Creating landscape images, like other forms of photography, is very subjective. What appeals to one photographer may leave another scratching their head. When I’m out creating landscape images I often find angles and the alignment of elements in a scene intriguing.
What follows are three landscape images and some of the composition thoughts that went into each image.
NOTE: Click on images to enlarge

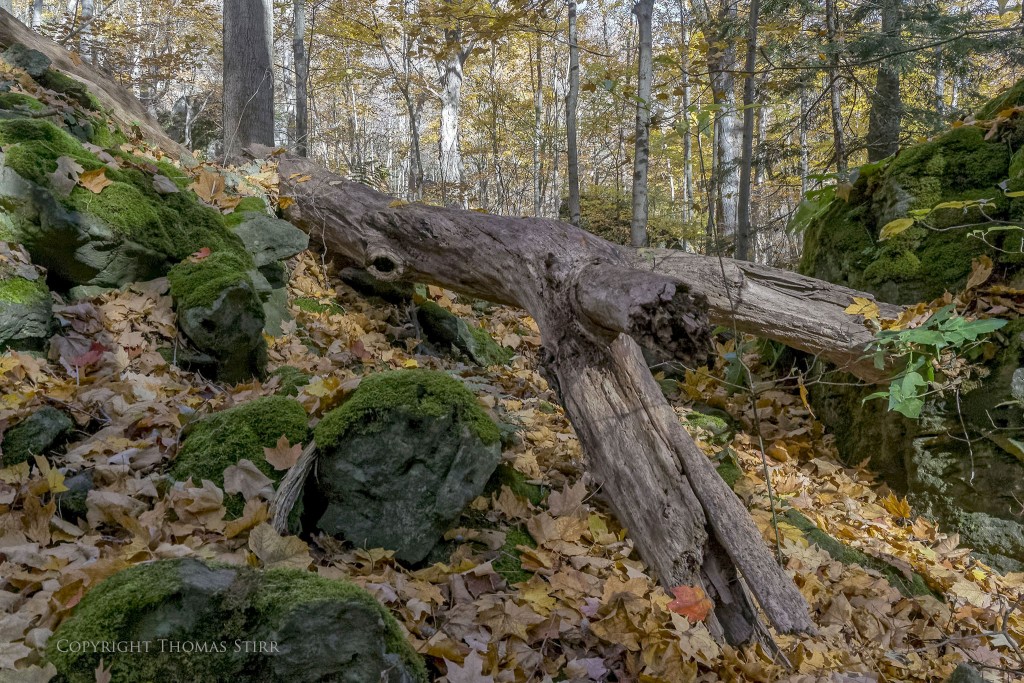
The image above is one that many readers will recognize from earlier articles. It contains a number of angles and alignments that took some time to compose.
What caught my eye initially was the ‘slingshot’ structure of the fallen tree. I really liked its strong v-shape. I moved around the scene physically until I could align various elements from the top left corner down to the bottom right corner to capture a strong angular and downward flow. Due to the angles spreading out from the fallen tree I couldn’t use those branches to guide the viewer’s eye to the bottom left right hand corner, so I tried utilizing a small, green sliver of moss that is visible in the right-hand corner of the frame for that purpose.
Next I focused on the largest tree trunk in the upper left corner and aligned it with the tip of the fallen tree as well as with the rock face which enters the scene from the top left corner. Those elements form a triangle directing the viewer’s eye down along the fallen tree’s trunk.
It was important to have the moss covered rocks on the left hand side of the scene compliment the overall flow of the image so I zoomed in on the scene slightly so I could crop a portion of the boulder in the bottom left corner. I also wanted to align the moss covered rocks on the left hand side so they formed a complimentary angle with one of the v-branches on the fallen tree.
The final consideration was the right hand side of the frame. To help the overall flow of the image I purposely left some room at the end of the upper v-branch so the reader’s eye could fall off the end of it and be led towards the bottom right hand corner by the green foliage and horizontal grey highlights on the rock.

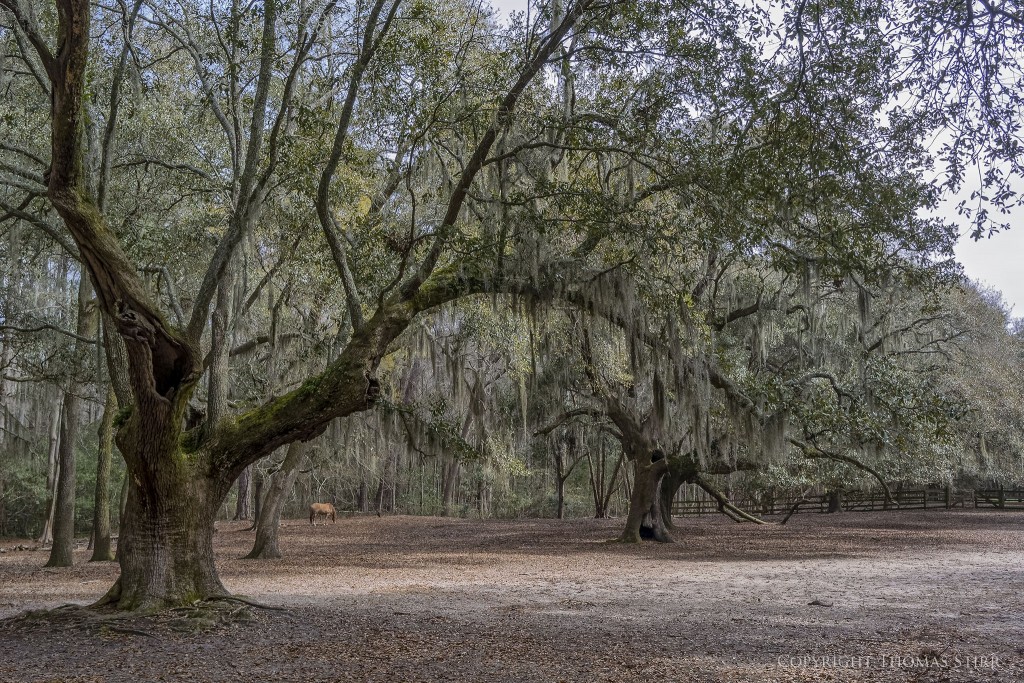
In the image above I really wanted to align the various trees so they would lead the viewer’s eye to the horse which is positioned in the bottom left section of the frame. I came in fairly tight to the large tree on the left side and allowed a bit of breathing room around the trunk.
To try to create a smooth framing over the horse it was also important to align the curve of the second tree trunk on the left hand side with the outstretched branch of the first tree. This creates a gentle sloping shape that integrates the two trees as opposed to having their trunks and branches fight with each other.
Finally, I wanted the right hand side to have an open foreground to help guide the viewer’s eye towards the left so I tried to align the right bottom corner of the frame with the trunk of the large tree on the right, then with with the pair of smaller trees behind it.

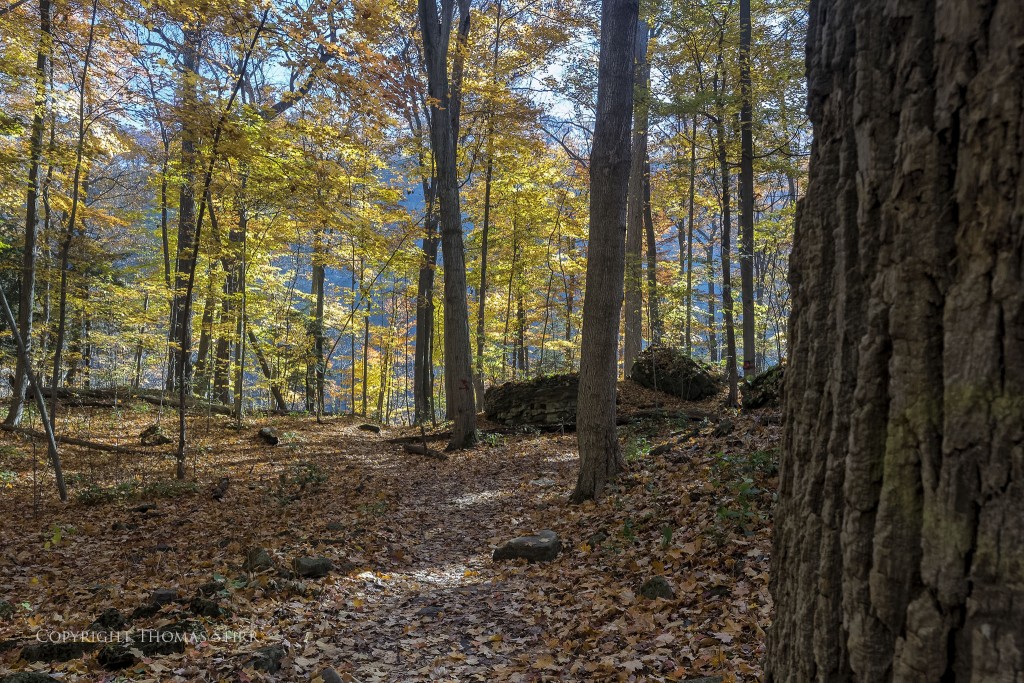
To create a strong leading line on the right hand side of the image I used the tree trunk as a corner anchor as well as serving as a partial reveal. I then aligned the three tree trunks on the right hand side with the corner anchor to bring the viewer’s eye into the scene.
To compliment this eye flow I positioned myself so the rocks along the path would enter from the bottom left corner and form a v-angle that would meet up with the third aligned tree on the right side of the image. This creates a v-angle about 1/3 from the bottom of the frame.
Angles and alignments are not always possible in a landscape composition but if you can find them they can often be used to create a sense of calm and order in a scene.
My intent is to keep this photography blog advertising free. If you enjoyed this article and/or my website and would like to make a modest $10 donation through PayPal to support my work it would be most appreciated. You can use the Donate button below. Larger donations can be made to tom@tomstirr.com through PayPal.
Article and all images Copyright Thomas Stirr. All rights reserved. No use, duplication of any kind, or adaptation is allowed without written consent.


thanks.
you have knack for explaining your process.
I tend to just shoot without a great deal of conscious thought and deal with the “mistakes” in post processing.
as a consequence I find myself a poor teacher because my first response when asked how or why I did what I did is “it was there. I shot it.”
another question…
do you perform a compositional analysis for each shot, or do you just know what you want when you see it?
Hi Craig,
For some reason my mind sees landscapes as angles and shapes. A photo just appears as an overall image in my mind. I don’t initially see how all of the details are working, or not working in the potential image. When I bring my camera’s viewfinder up to my eye my brain seems to click over into a different mode, and I begin to see if any of the details in the image are in conflict. At that point I begin to adjust my physical position and zoom in or out as needed. The process of examining all of the details tends to go really quickly so I don’t spend a ton of time fretting over an image.
Sometimes I can get everything the way I want…it just feels right because there is nothing that strikes me as being in visual conflict…and I take the shot. At other times I just can’t get it to work…and if I can’t I just move on to the next opportunity.
Tom
Question: In what program, or how, do you add the copyright with name to your pictures?
WEJ
Hi William,
I use Photoshop CS6 to add the watermarks.
Tom
Hi
Can also be done in lightroom in the print module or in the Library module when you export a file either for downsizing or not or convert it to another format (.dng, .jpg, .tif, etc.)
Thanks for adding to the thread Luc!
Tom