
Most of us go through peaks and valleys with our camera usage. There may be times of the year when our gear stays in our camera bags. One of the things that we can do to maintain our skill level is to spend a few minutes regularly doing camera settings practice. I’d like to thank one of our readers, Bob Owen, for posting a comment that provided the creative spark for this article.
NOTE: Click on images to enlarge.

Every camera will have its own design in terms of external body controls. Regardless of the camera we own, we can improve our photographic response time by doing some camera settings practice.
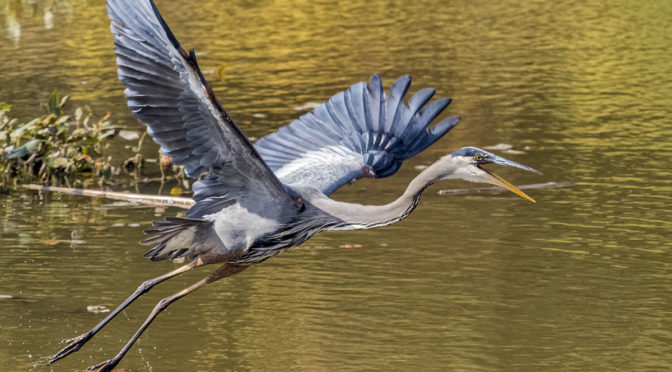
Over the past number of weeks I’ve been doing a lot of ‘blind practice’ with some of the key external controls on my E-M1X. I focus on the controls that I most often use when doing bird photography as these photographic opportunities can change rapidly.

I typically start my camera settings practice in Manual mode. This is the setting mode I always use when photographing static birds (I almost always shoot in Manual mode with my Olympus gear regardless of subject matter).
My practice begins with me closing my eyes and reaching over with my index finger to change ISO value or adjust exposure compensation. Usually some combination of 3 clicks up or down with either one. After each adjustment I open my eyes and check my camera to make sure that I did it correctly. After resetting my camera, I’ll do this a number of times. This part of my practice lasts for about 2-3 minutes.
I then move on to my Custom mode settings. I should explain that I have the four custom C settings on the mode dial of my E-M1X all set for my most common bird photography settings.

These include:
C1: AF-C with single point AF, 18 frames per second, silent shutter
C2: AF-C+TR with custom 3×5 auto-focus grid and Airplane Subject Tracking, 18 frames per second, silent shutter
C3: Pro Capture H with single point at 60 frames-per-second, 15 Pre-shutter Frames/15 Frame Limiter
C4: Pro Capture L with custom 3×5 auto-focus grid at 18 frames-per-second, 15 Pre-shutter frames/20 Frame Limiter
All of the above custom settings have the same aperture (f/5.6) and shutter speed (1/1600). These are my current custom settings and are subject to change.

A practice session with my custom C Modes usually lasts about 10 to 15 minutes. I sit with my E-M1X on my lap and begin with everything set to Manual. I then close my eyes and come up with a scenario in my mind.
For example, I might imagine that I see a small bird that I want to photograph using Pro Capture H. To do that I know I need to move the function dial 4 clicks counter clockwise and my shutter speed dial three clicks to the right. These simple movements would allow me to quickly have my E-M1X set to Pro Capture H at 60 fps with my standard 15/15 Pre-Shutter and Frame Count Limiter settings, f/5.6, 1/3200, with Auto ISO.

I practice finding the external controls by touch only, and making adjustments without looking at my camera. Then, I open my eyes to check if I got it right. I reset everything back to Manual on my mode dial, then try a new scenario. I do this repeatedly so I can build my muscle memory.
Part of practising these imagined scenarios also includes moving my focus point blindly using the joysticks on my E-M1X. I also check these adjustments to see if the AF point is where I wanted it to be.

Using the small bird/Pro Capture H mode scenario again, I might imagine that the bird will be taking flight from left to right. I would then practice clicking my joy stick four times to the left to have my focus point exactly where I need it for that kind of photographic opportunity. If I anticipate that the bird may be flying upward (e.g. robin taking flight from the ground) I would use three clicks to the left, then two clicks down, to set my focus point.
The key is to always reset the position of the AF point to centre frame during practice, and also when out in the field actively photographing subjects.
Imagining a particular photographic opportunity in my mind, then using touch only to change the settings on my camera builds muscle memory. Doing this, as well as blindly changing the position of my AF point, has helped me better remember what I need to do to respond to a particular bird in-flight opportunity.

From a practical standpoint, doing camera settings practice has resulted in far fewer missed photographs. Being able to change the settings on my camera without needing to look at what I’m doing means I can get ready for my images while I am approaching a subject bird. When I am in tight enough to my subject bird I can then bring my camera up to my eye and be immediately ready to capture some images, without wasting time fiddling with my camera settings.
Technical Note:
Photographs were captured hand-held using camera gear as noted in the EXIF data. Image were produced from RAW files using my standard process.

How you can help keep this site advertising free
My intent is to keep this photography blog advertising free. If you enjoyed this article and/or my website and would like to support my work, you can purchase an eBook, or make a modest $10 donation through PayPal. Both are most appreciated. You can use the Donate button below. Larger donations can be made to tom@tomstirr.com through PayPal.

Word of mouth is the best form of endorsement. If you like our website please let your friends and associates know about our work. Linking to this site or to specific articles is allowed with proper acknowledgement. Reproducing articles, or any of the images contained in them, on another website or in any social media posting is a Copyright infringement.
Article is Copyright 2020 Thomas Stirr. Images are Copyright 2019-2020 Thomas Stirr. All rights reserved. No use, duplication or adaptation of any kind is allowed without written consent. If you see this article reproduced anywhere else it is an unauthorized and illegal use. Posting comments on offending websites and calling out individuals who steal intellectual property is always appreciated!
Thanks, Tom – – That’s basically what I expected, given the excellent IBIS + IS of the {body+lens} I have ordered.
Interestingly, it was in the review of the OM-D EM-1 Mk iii by dpreview.com that criticism was made of the “limitations” (as they saw it) of the OM-D’s Auto ISO settings (with implied comparison with Sony a7 – which allows a bias to be selected for the shutter speed trigger-point, as Slower vs Faster, etc).
I say “interestingly” because, whilst the flexibility sounds good in theory, it had potential to cause (in my experience) a slower SS than actually suited the shooting conditions … It took me quite some time to realise I was much better off turning this bias off altogether, which then rather defeated the “flexibility” of having this feature in the first place.
Regards, John TKA
Hi John,
Sounds like you made the right decision with that feature based on your shooting style.
Tom
Hi Tom, Have sold enuff full-frame gear to afford an OM-D ; I have ordered an EM-1 mk iii plus M.Zuiko 12-100 IS PRO (at a good end-of-financial-year price).
A camera setting question, if I may;
I see there’s an option associated with setting of Auto ISO range to also specify a lowest shutter speed (used as the point at which the camera will increase ISO in order maintain at least that SS). Apparently, this setting is “buried in the menu” and not easily modified on-the-fly.
So, is there a worthwhile practical minimum SS to apply ?
John TKA
Hi John,
I think a ‘minimum shutter speed’ depends on a number of factors:
1) amount of subject movement
2) handheld skill of an individual photographer
3) effectiveness of IBIS/VR of the equipment used
4) focal length of lens used
These factors can vary significantly so I personally don’t see the point in setting a minumum shutter speed on any of my cameras.
It is important for a photographer to get to know their gear as well as their personal limitations when using specific equipment. For example, when I shoot with a Nikon 1 J5 with the 1 Nikkor 6.7-13 mm zoom, I know that I can consistently create good useable images at 1/10th of a second without needing to think about it much. I may push this to 1/2 second under specific situations. If I was photographing the exact same scene with an E-M1X and the M.Zuiko PRO 7-13 mm I wouldn’t hesitate shooting at a shutter speed of 1 or 2 seconds… and would push this to 4 seconds or so when needed. In this case my skill set hasn’t changed, but the IBIS/VR is much different between various cameras and lenses.
Subject matter can impact minimum shutter speed significantly. For exmaple, a photographer may use a minumum shutter speed of 1/1600 with large birds-in-flight, but may set a minimum of 1/3200 or 1/4000 when photographing hummingbirds. A minimum shutter speed for a large perched bird may be 1/30, while a smaller perched bird may require a minimum of 1/250 or 1/320.
Tom