

Before we get into this article I’d like to thank one of our readers, Motografia, for providing the creative spark for this article. During a recent visit to Bird Kingdom I decided to try a high ISO ETTR test. The term ETTR stands for ‘expose to the right’. This is a somewhat controversial technique in which a photographer purposely exposes an image ‘to the right’ in order to maximize highlight details.
The basic theory is that by exposing to the right, i.e. towards the highlight end of a camera’s histogram, more of the highlight details can be preserved in an image. The trick is not to push an exposure too far to the right or clipping (i.e. blown out highlights) will result.
Then, when working with an image in post, a photographer can darken the image to correct for the purposeful ‘to the right’ exposure that was done during the creation of the photograph.
Another benefit that is associated with exposing to the right (ETTR) is a reduction in image noise. As we all know, noise is most prevalent in the shadow and dark areas of a photograph. Noise is very noticeable at high ISO values, and can be difficult to address.
In preparation for my high ISO ETTR experiment I had a look at the sensor scores for an Olympus OM-D E-M1 Mark II. Since my E-M1X does not yet have test scores on DxO Mark I decided to use the next best thing.
There is one particular area on the bottom floor at Bird Kingdom that is very dark. I typically need to capture images at ISO-6400 in this part of the facility, and it is often difficult to get any ‘keepers’.
I knew that I would need to use a faster aperture and also probably have to increase my ISO in order to expose to the right in this area. It sounds counter intuitive to purposely use an even higher ISO to reduce noise. I decided that there was no noticeable penalty to be paid if I went to ISO-10000. Let me explain…
At ISO-6400 an E-M1 Mark II has 9.34 EV of dynamic range and 16.6 bits of colour depth. When pushed to ISO-12800 these values fall to 8.81 EV and 15.2 bits respectively.
Differences of 0.5 EV of dynamic range and 1.0 bits of colour depth begin to be noticeable for most people. I decided that I didn’t want to push my ISO up to 12800, but I was willing to go to ISO-10000. At this ISO value I estimated that the E-M1X’s dynamic range would be about 9.08 EV and the colour depth would be 15.9 bits. In both cases the differences would not be noticeable when compared to ISO-6400.
What follows are three sets of photographs. The first image in each set is the original out-of-camera jpeg of the ETTR photograph. The second image is a jpeg created from an uncorrected RAW file. The third was created from the RAW file after it was adjusted in post. The fourth is a 100% crop of the processed image showing the amount of detail and noise in a particular portion of the photograph.
Let’s have a look at our first ETTR example.
NOTE: Click on images to enlarge.

As we look at this out-of-camera jpeg we can see quite a bit of smoothing/smearing of details, caused by in-camera noise reduction. This is very apparent on the flank and belly of the duck.

The above image is a jpeg made from the uncorrected RAW file. We can see quite a bit more detail has been retained compared to the out-of-camera jpeg.
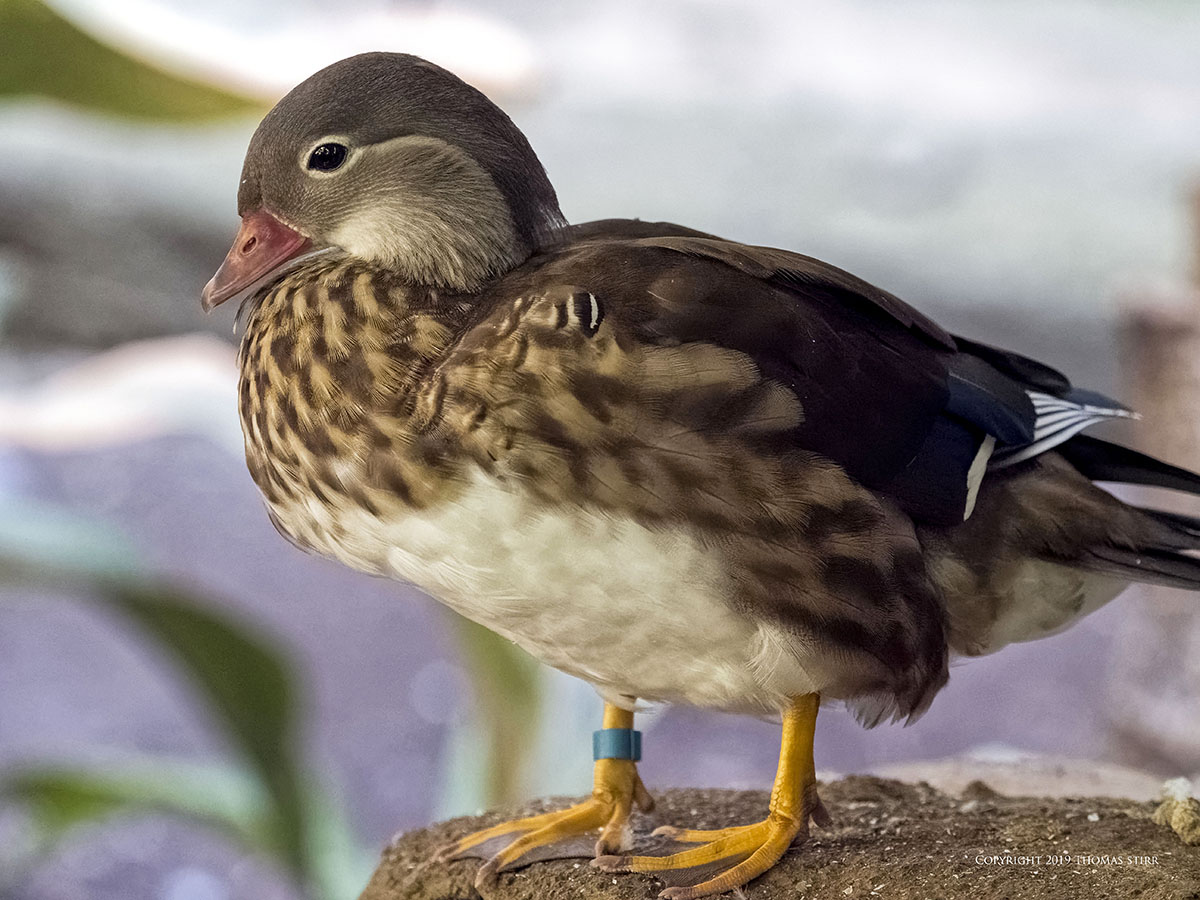
The above image has been processed from the RAW file. We can see that using ETTR technique has dramatically increased the amount of visible detail on the flank and belly of the duck. Here is a 100% crop so you can see the amount of detail and noise in the duck’s bill.

The 100% crop does show some noise, but it is fairly muted. For many people it would likely be acceptable for social media posting and perhaps even prints as large as 9″ x 12″ (22.86 cm x 30.48 cm).
Let’s have a look at our second example.


And, here is our third sample set of images.


The results of my first ever high ISO ETTR test were very instructive for me. I think this technique has some very interesting potential, especially when using small sensor cameras.
One of the critical factors is to carefully expose to the right and avoid clipping highlights. I was able to use my E-M1X’s histogram in real time when composing and exposing these images. If I was using a camera that did not have this feature, trying to use ETTR technique would be mainly trial and error.
Doing your own high ISO ETTR test is something many photographers will find interesting. It is one thing to read about this technique, and quite another to actually put it into practice.
To capture the images in this article I had my camera set to Manual mode and also set my ISO manually.
Technical Note:
All photographs were captured hand-held using camera equipment as noted in the EXIF data. Images include out-of-camera jpegs as well as some created from RAW files using my standard process.
Word of mouth is the best form of endorsement. If you like our website please let your friends and associates know about our work. Linking to this site or to specific articles is allowed with proper acknowledgement. Reproducing articles, or any of the images contained in them, on another website or in any social media posting is a Copyright infringement.
How you can help keep this site advertising free
My intent is to keep this photography blog advertising free. If you enjoyed this article and/or my website and would like to support my work, you can purchase an eBook, or make a modest $10 donation through PayPal. Both are most appreciated. You can use the Donate button below. Larger donations can be made to tom@tomstirr.com through PayPal.
Article and all images are Copyright 2019 Thomas Stirr. All rights reserved. No use, duplication or adaptation of any kind is allowed without written consent. If you see this article reproduced anywhere else it is an unauthorized and illegal use. Posting comments on offending websites and calling out individuals who steal intellectual property is always appreciated!
Tom,
I am impressed at the quality of your images with ISO 10,000 and ETTR. Did you use additional noise reduction during post-processing?
Jack
Hi Jack,
Yes, I used my standard process with the ETTR files… DxO PhotoLab2 during which I applied PRIME noise reduction… then a DNG into CS6… then I finished the files off in the Nik Collection.
Tom
Thank you for referring to this topic, Mr. Thomas. Undoubtedly an experiment with quite clear results and that demonstrate that this technique has its space and usefulness at the right time. Above all, when we face the dynamic range limitations of our cameras.
A technique once understood, can help us not only with the highlights but also with the shadows.
Again a pleasure to read and images,
Regards!
Thanks for providing the creative spark for this article Motografia!
I plan on doing more experimentation with ETTR. It will need to wait until I can process E-M1X files again. The update this morning from DxO killed my copy of PhotoLab 2 and it won’t even load at the moment.
Tom