I would like to preface this article by saying it is not intended as a “do this, don’t do that” sermon from the mount. To me, using a camera is akin to playing a guitar. It is simply an instrument that a person uses to achieve a particular outcome. And, like a guitar, there are many styles and approaches in how to “play it”. What works for me may not work or feel comfortable for you. So, if this article provides a few useful tidbits for some readers, it will have served its purpose.
There’s quite a bit of text in this article so I will be showing a range of images shot with my Nikon 1 V2 to provide some visual breaks, and also to help illustrate the capability of the Nikon 1 system.
(NOTE: click on images to enlarge them)

I must confess that I really like using the Nikon 1 system. I know, I know. You’ve read a lot of negative comments on the internet. And perhaps even read some reviews that were mixed at best. Unfortunately, a lot of what is out there posted in photography forums is written by folks who have never even held a Nikon 1 camera, let alone shot with one. They simply regurgitate the assumptions of others, or parrot reviewers.

When I first bought my Nikon 1 V2 I had two very simple objectives in mind. The first was to use it as a second camera for my client video shoots. I chose the V2 because it is small and light and can be positioned in hard-to-reach places where my D800 can’t go. It also allows me to make aperture changes “on the fly” when shooting video, which is something that I couldn’t do with most Nikon DSLRs. Another big advantage was the increased depth-of-field of CX lens and sensor combination when compared to 35 mm equipment at equivalent-fields-of-view. For industrial productions I do, more depth-of-field is almost always preferred over the artistic use of bokeh.

My second intended use was basically to use it as an image-capturing teleconverter, an inexpensive way to get more reach out of my existing FX glass. Initially, that was all the potential that I saw with the Nikon 1 system.

Now, I typically reach for my Nikon 1 V2 first, and my D800 is usually only used for on-site client shoots. For example, all of the images taken for my recent Ruggard Legion 45 Messenger Bag review were taken with the V2. All of the images were shot hand-held at ISO 3200.

Let’s look at a few ways you can get the most out of your Nikon 1 camera. The first 6 simple camera settings to consider are:
Shoot in RAW
I appreciate that many Nikon 1 users currently shoot in JPEG only and that shooting in RAW may be intimidating. The dynamic range of the CX sensor in the Nikon 1 series of cameras is limited. If you make the move to RAW you will have more digital information with which to work and you’ll be able to get more highlight and shadow detail using RAW files. This will make for higher-quality finished images.

Adjust JPEG Settings
If shooting in RAW is too big of a leap for you right now, at least adjust your Picture Control settings to suit the type of subject you are shooting. The Standard setting is good for general photography. Other settings like Landscape or Portrait are self-explanatory. I often use Vivid when shooting flowers and colourful birds to punch up the colours in JPEG images. When shooting video that I intend to colour grade in post-production, I will shoot in Neutral.

Set Image Quality
To give myself maximum flexibility I always shoot in ‘NEF (RAW) + JPEG fine’. For some web uses a straight-out-of-camera jpeg will often suffice, but I always want to have the RAW file just in case.
Adjust White Balance
There are times when shooting in “Auto” makes sense. For example, when indoors and shooting in mixed lighting. When outdoors, changing your white balance to suit lighting conditions can help improve your image quality. Direct Sunlight, Cloudy and Shade are the typical choices.
Use Auto Distortion Control
Make sure it is turned on as this helps correct lens distortions automatically.
Use Active D-Lighting
Make sure this is turned on. This will help bring out shadow details in your images.

Now, let’s look at a few other simple things you can do to get the most performance out of your Nikon 1 system.
Avoid Shooting in Auto
One of the best things you can do to learn about your camera’s capabilities is to stop shooting in Auto mode and choose one of the other modes. M (manual) lets you choose both shutter speed and aperture. A (aperture priority) lets you choose aperture whilst the camera selects shutter speed for correct exposure. S (shutter priority) lets you choose shutter speed with the camera selecting correct aperture. P (program) lets you adjust both shutter speed and aperture selected by the camera for correct exposure – whichever setting you change, the other will also change correspondingly. The mode you choose is a personal choice and one setting is not necessarily better than the another. It really depends on how much and what sort of control you want. On a personal basis I always shoot in aperture priority regardless of the camera I’m using and the subject I’m shooting.

Keep the Aperture at f/5.6 or Lower When Possible
One of the inherent image quality issues when shooting with any camera that has a small sensor is image softening due to diffraction. I always try to keep my aperture at f/5.6 or below with my Nikon 1 V2 to keep diffraction at bay. On rare occasions I may shoot a tad higher, but unless I’ve made a mistake it is never more than f/8 as even at this setting diffraction does become visible. At f/11 is it very apparent.

Use All of the Nikon 1 Shutter Capability
Many people do not realize that a camera like the Nikon 1 V2 can actually operate at faster shutter speeds for still photography than high end DSLR cameras like the Nikon D4s or D800 (which are limited to an already impressive 1/8000 of a second). It is true that the stated specifications of the Nikon 1 show a maximum shutter speed of 1/4000 when the mechanical shutter is used. But if you switch to the electronic shutter, the maximum shutter speed increases to 1/16000. That’s two more stops of exposure control.
Please excuse the quality of the image below. It is an image I staged to force an overexposure situation by aiming my V2 camera into the sun while shooting behind some leaves.

Look at the shooting specs for the image above. You’ll see that the image was shot with my V2 with a shutter speed of 1/16000. I accomplished this by switching to the 15 fps electronic shutter shooting mode and lightly tapping the shutter to only get one frame rather than a burst. When shooting in very bright sunlight Nikon 1 cameras will warn of a possible overexposure with a camera setting flashing in your viewfinder or on the rear screen. Under this scenario I would normally have to stop the camera down from my desired aperture of f/5.6 to f/11 (2 stops) and thus have diffraction impact the sharpness of my image. By using the electronic shutter in a bit of a creative way I can often maintain my desired aperture and still get a good exposure in very bright conditions.

Play With Metering
Given the limited dynamic range of the Nikon 1 cameras, it is quite easy to get blown-out highlights in landscape images, especially if you only shoot in JPEG. The metering on my Nikon 1 V2 is quite good and I usually use matrix metering for landscape images as it does a good job delivering nicely balanced exposures. In cases where I am facing very bright or high contrast conditions I will often switch to center-weighted or spot metering to see if that will help me get a better overall exposure. I will also often switch to single point auto focus so that I can really set the exposure according to an important area of the scene. It may seem counter-intuitive to use single point auto focus when shooting landscapes, but I find this very helpful at times. It is important to remember that once highlights are gone, you can’t get them back. It is better to underexpose the image with a Nikon 1 and then work with the RAW file in post to bring out more shadow details.

Learn to Shoot and Compose Using Single Point Auto Focus
One of the advantages of the Nikon 1 cameras is the number of focus points on the sensor. On my V2 I have 135 focus points that cover virtually the entire height and width of the sensor. This gives me a tremendous amount of creative freedom to select a specific part of an image that I want in focus. Obviously, someone using a DSLR can do the same thing by using “focus and recompose” technique. With a Nikon 1 camera I find there is no need to “focus and recompose”, all that needs to be done is move the single point focus to exactly where you want it and shoot.

Develop a Good Hand-Holding Technique
One of the criticisms that people throw at 1 Nikon lenses, specifically the zoom lenses, is their slow apertures. What most people fail to realize is that it is far easier to get good hand-held shots at slow shutter speeds with a Nikon 1 set-up than it is with a full frame DSLR camera. This also holds true when using your regular Nikkor glass with the FT-1 adapter. Look at some of the shutter speeds in the following images. I’ve added equivalent field of view information:


Developing a good hand-holding technique will enable you to shoot at slower shutter speeds and allow you to keep your ISO at lower levels, which helps improve image quality.

Use a Polarizing Filter
This is something we all know can help improve image quality. I have polarizing filters permanently mounted on one of my 1 Nikon 10-30 mm non-PD zooms and my 6.7-13 mm zoom.

Integrate Software Into your Nikon 1 System Consideration
Using software, especially when shooting in RAW, can dramatically improve the overall impact of your Nikon 1 images. Try different ‘trial versions’ of software until you find one that you really like, and one that does a good job with your Nikon 1 files. Pay special attention to the noise reduction and lens softness functions in the software you choose.
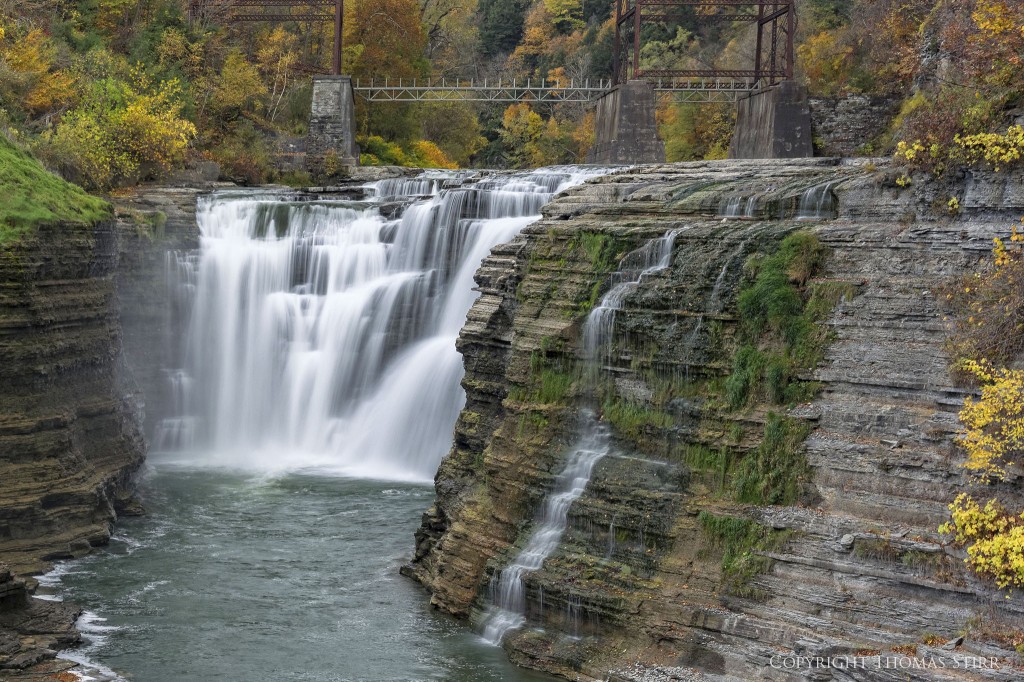
I use DxO OpticsPro 10 for all of my RAW file processing and I find that the PRIME noise reduction and lens softness functions are terrific and do a great job with my Nikon 1 V2 files. Have a look at the images below. All were shot at high ISO’s. According to the hoard of internet posters this is not supposed to be possible.


Set Your ISO
As you become more familiar with your entire Nikon 1 system, you will have a better idea on where the limits are in terms of the ISO settings you should use. Since noise can be an issue with Nikon 1 cameras, selecting a specific ISO rather than choosing an ISO range (Auto ISO) can be helpful. It is also important to remember than dynamic range decreases as ISO is increased (this goes for all cameras), so shooting at the lowest possible ISO under any given situation is always a good thing to do.
Ignore the Naysayers
The internet is full of people who like to trash small sensor cameras in general just because they have small sensors. The Nikon 1 system has received a lot of hate in particular. Pay them no heed. Instead just have fun with your Nikon 1 if that is what you need and want.

Experiment, Then Experiment Some More!
One of the best ways to get the most out of your camera gear, regardless of what you own, is to experiment with it and try and push it as far as you can to see what you can create with it. After all, isn’t creating images where the joy of photography resides?
My intent is to keep this photography blog advertising free. If you enjoyed this article and/or my website and would like to make a modest $10 donation through PayPal to support my work it would be most appreciated. You can use the Donate button below. Larger donations can be made to tom@tomstirr.com through PayPal.
Article and all images Copyright 2014, Thomas Stirr. All rights reserved. No use, reproduction or duplication including electronic is allowed without written consent.


Hi Tom,
Thank you!
I am anxious to tryout your DxO processing methods on some images from a recent trip to southern Africa, but first I need to figure out how to move beyond Aperture. Little did I know what problems a single image file managed by a photo tool would create!
I have many thousands of images that started as Nikon Raw files, were processed and cataloged, indexed, tagged, etc. within Aperture – and now no ‘easy’ way to move them to something else. Yes, there are tools available that help moving to Lightroom, but that is just another captive environment.
I am looking at moving to something like you do with the Windows environment, but using the OSX equilivent.
I like the Aperture tools, and need to find how I can divide their concepts between OSX tools and DxO. Things like key words, ‘folders’ that that contain links to images not content, etc.
All of this is probably better in the long run, but I should have though it through better from the start!
Thanks again.
Bob
Hi Bob,
I’m glad you liked the article, and thanks for the positive comment! Your posting really highlights the potential risk of storing files inside photographic programs rather than in a general filing database. I think there is also significant risk storing files in the cloud. I hope you find a solution that does a great job for you!
In terms of using OpticsPro, since it currently only does global corrections, you may find that using in conjunction with other programs that allow spot corrections may be the best solution. I use a somewhat unusual combination of OpticsPro 10, CS6 and Nik, using portions of each program that I like rather than trying to rely on one program. Software choice is, of course, a personal decision and what works for one may not be the best solution for another.
Tom
Thank you for your excellent overview on using the Nikon 1 system. I am a V1/V2 user and they meet my needs as an amateur photogapher very well. I have used Apple Aperture for my workflow and have now purchased DxO Pro 10. Now that Apple has discontinued Aperture, I need a new solution that integrates image manipulation and organization. Lightroom is an option, but you seem to have chosen otherwise. Can you discuss your solution to the problem?
Bob
Hi Bob,
Thank you for your positive comment – much appreciated! As far as my Nikon 1 files go I use OpticsPro 10 for all of my basic RAW processing. I typically let the software ‘do its thing’ with automatic corrections. Depending on the image I’ll often taken highlights down -20, add some micro contrast – perhaps 10, and often take black down to -5 or a bit lower. If the lens I’m using is covered by an OpticsPro 10 profile I’ll often set the lens softness at 1.20 for global and 70 for detail. Regardless of the ISO at which an image was taken I always run my Nikon 1 files through PRIME noise reduction. For many typical files I don’t need to do much else. If they need a bit more tweaking I’ll export a DNG file into CS6 (you could export into Lightroom) and play around a bit there…and perhaps a tweak or two in Nik Suite depending on the image.
Since my business includes HR consulting, normative assessments, executive coaching and some strategic planning I never use any photo software to store or catalogue files. I use Windows Explorer for all of my file storage needs.
Hope this has helped…
Tom