

This Olympus OM kit review article summarizes our experiences shooting with this M4/3 gear over the past 5 years. As has been stated numerous times on this website, the choice of camera equipment is intensely personal. What works well for one photographer, may not be the best choice for another.
This article is not intended to encourage any readers to buy the gear that we have purchased. It is simply to provide some hands-on feedback on the equipment that we own and regularly use.
It is also important to remind readers that I have no formal relationship with OMDS, nor do I have any Affiliate Marketing relationships that pay commissions when readers make purchases using click-through links. So… there is no financial benefit for me if you choose to buy new camera gear or not.
NOTE: Click on images to enlarge.

As regular readers know, before switching to the M4/3 format back in May 2019 with Olympus, I used a number of other digital camera formats. These included full frame, cropped sensor APS-C, Nikon 1, as well as a few 1/2.3 ” sensor point and shoot cameras. Every system has its advantages and challenges. The key is for each of us to use whatever equipment best meets our needs.

Camera Bodies
My wife and I both use Olympus camera bodies. I shoot with a pair of E-M1X bodies, while she uses an E-M1 Mark III. When originally deciding to make the switch to Olympus, the size of the sensor in the cameras was of no concern to us at all… and it did not enter into our decision making matrix.

My primary purchase criteria were comfort/handling/ergonomics, build/reliability, weatherproofing, and overall photographic and video functionality. My wife focused on the size/weight, and ease-of-use of the camera body. She had enjoyed using the Nikon 1 V3 with EVF, grip, and flip out rear screen… so that was her baseline in terms of her expectations.

Back in 2019 Olympus had a Pro Loaner program in which I was qualified to participate. So, I had the opportunity to try out some gear for a couple of months free of charge and without any obligation. Within the first hour of using the E-M1X I was sold. The comfort, handling and ergonomics were simply outstanding. I was amazed with how good this double gripped camera felt in my hands. I became spoiled on that first day… and remain so today.

Added to that was incredible IBIS performance. It was so good I didn’t have to bring any camera supports when shooting video. IPX-1 weathersealing… which has proven itself incredibly reliable time and time again over the years. And, an assortment of industry leading computational photography technologies like Pro Capture L/H, Handheld Hi Res, Live ND, in-camera focus stacking, in-camera HDR, and AI Subject Tracking.

I had never used any camera that expanded my photographic potential to this degree. Over the years, I’ve come to rely on these technologies more and more. In recent years those technologies have been used in over 75% of all my photographs.

We considered the E-M5 and the E-M1 Mark III for my wife’s needs. After some deliberation we decided on the E-M1 Mark III because of its broader overall functionality, and it using a common battery with the E-M1X. We did not want to repeat the inconvenience that we had experienced with our Nikon 1 kit, where every camera had a different battery.

Both my wife and I are completely happy with the Olympus camera bodies we are currently using. From time to time I still get readers asking me if I will be “upgrading” to a newer generation OM body.

While the OM-1 and OM-1 Mark II have some performance improvements when compared to my E-M1X, neither one of them comes close to providing the level of comfort, handling and ergonomics that I want. So, I intend to continue to shoot with my E-M1X bodies for many years to come.

Lenses and Teleconverters
My wife and I own a good assortment of M.Zuiko lenses, along with the MC-14 and MC-20 teleconverters. This section of the article will comment briefly on each item individually.

M.Zuiko 45 mm f/1.2 PRO
This prime lens was purchased to handle very low light conditions encountered with my industrial client video business, as well as indoor situations usually associated with family gatherings. As such I view it as a ‘special purpose’ lens that has an extremely narrow focus of use for me. As regular readers know, I much prefer using zoom lenses, so it won’t come as any surprise when I state that the M.Zuiko 45 mm f/1.2 PRO prime lens is the least used one in our kit. I doubt that I use it even a couple of times per month.
Suffice to say that the lens has performed exceptionally well in those stated low light situations, and I’m certainly glad that we decided to buy it. I’ve never used this lens out in the field when working on articles for my website, so I have don’t have many images captured with the M.Zuiko 45 mm f/1.2 PRO that I can share in this article.

M.Zuiko 12-40 mm f/2.8 PRO
This zoom lens is one of the first three zoom lenses that we bought when we made the switch to Olympus M4/3 gear. Like the 45 mm f/1.2 PRO prime lens, this zoom lens is often used in darker, indoor situations… often family gatherings. It certainly has the potential to be a workhorse for indoor video work. It is also quite a capable general subject and landscape lens.

Over time I came to understand that this lens can be effectively shot at quite slow handheld shutter speeds of 1 second or longer. The photograph above was captured handheld using a shutter speed of 4 seconds. The lens is relatively small and light, making it easy to handle.

The M.Zuiko 12-40 mm f/2.8 PRO provides excellent optical performance, flexibility, and colour rendition. When used with handheld in-camera focus stacking it can be effectively shot wide open for landscape images at the wide end of the focal length range.

Since I don’t do very much client work any more, the M.Zuiko 12-40 mm f/2.8 PRO is now often used for indoor, family gatherings where it does a stellar job. It certainly still has a place in my bag for general photography and landscape work.

M.Zuiko 7-14 mm f/2.8 PRO
When doing landscape photography the M.Zuiko 7-14 mm f/2.8 PRO is one of my favourite lenses. As is the case with other M.Zuiko PRO lenses, the optical quality, colour rendition and build quality are all top notch.

Some photographers who like to use external filters may find the bulbous front lens element inconvenient as the lens does not accept screw-on filters.
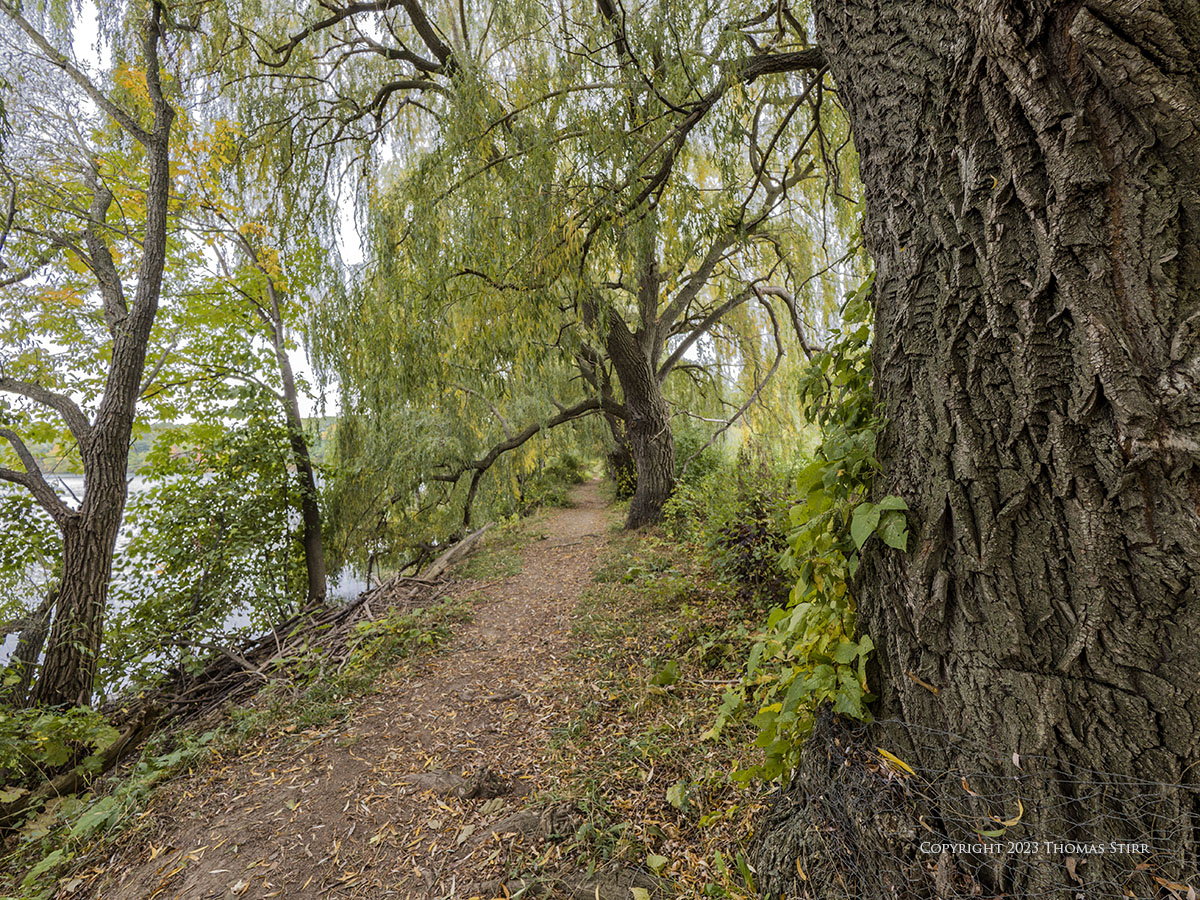
When shot at the 7 mm end of the focal length range, the M.Zuiko 7-14 mm f/2.8 PRO can provide deep depth-of-field at more wide open apertures. This creates some additional handheld flexibility for landscape photography, especially when lower light conditions need to be considered.

When using the M.Zuiko 7-14 mm f/2.8 PRO it is important to not interpret how to use it in full frame equivalency terms. If a photographer does this they run the risk of stopping the lens down far more than is needed to achieve deep depth-of-field for landscape images. For example, the test photograph above was shot at 7 mm using an aperture of f/2.8.

The M.Zuiko 7-14 mm f/2.8 PRO can be shot handheld at very slow shutter speeds. For example, the image above was captured handheld using a shutter speed of 5 seconds.

M.Zuiko 40-150 mm f/2.8 PRO
This is my favourite lens in our Olympus/OM kit. It is wonderfully sharp optically and can be used effectively with the MC-20 teleconverter. In fact, this combination was my primary birding kit until the M.Zuiko 100-400 mm f/5-6.3 IS was introduced.

While this zoom lens is a great choice for birding and nature, especially when used with M.Zuiko teleconverters, it is also a very effective lens to use for flower photography. Some quite good close up photography can be achieved when extension tubes are utilized.

The M.Zuiko 40-150 mm f/2.8 PRO zoom has a comparatively short minimum focusing distance which gives the lens a lot of in-field flexibility. The lens can be effectively used with handheld in-camera focus stacking and extension tubes.

The fast aperture coupled combined with a longer focal length and a short minimum focusing distance, can be utilized to achieve shallow depth-of-field.

This can be further enhanced in compositions when extension tubes and appropriate distances to background are used.

The M.Zuiko 40-150 mm f/2.8 can also be used with extension tubes, and the M.Zuiko MC-20 teleconverter, to photograph insects and other small critters.

The M.Zuiko 40-150 mm f/2.8 PRO is a superb piece of kit with excellent optical performance and a wealth of in-field flexibility.

M.Zuiko 12-100 mm f/4 IS PRO
Over the past couple of years my appreciation for the M.Zuiko 12-100 mm f/4 IS PRO has grown substantially. It has become my ‘go-to’ lens for travel and outdoor photography when I want a one lens solution.

The Sync-IS gives the M.Zuiko 12-100 some added in-field capability in terms of utilizing Live ND where shutter speeds of 1/2 second or slower are often needed.

With good handheld technique this lens can be shot at slow shutter speeds well beyond 1 second. For example, the photograph above was captured handheld at 24 mm (efov 48 mm) using a shutter speed of 4 seconds.

The M.Zuiko 12-100 mm f/4 IS PRO can be used with extension tubes and handheld in-camera focus stacking to create some pleasing flower images.

It shines as a travel lens, especially when paired with the M.Zuiko 100-400 mm f/5-6.3 IS zoom. This combination allows a photographer to shoot throughout an extensive focal length range of 12 mm to 400 mm (efov 24 mm to 800 mm) with only 2 lenses. Adding an MC-14 to the 100-400 mm expands this even further.

M.Zuiko 14-150 mm f/4-5.6 II
This is another great all-in-one lens that provides a lot of in-field flexibility. While not being a constant aperture zoom, for many situations the variable aperture of f/4-5.6 will not be an issue. This is my wife’s everyday lens. She finds that it performs better optically than did the Nikon 1 10-100 mm f/4-5.6, while providing a slightly broader focal length range.

The 14-150 mm f/4-5.6 II is weather sealed and performs quite well optically for not being a PRO lens. Some minor adjustments to RAW files in post can help produce images that would be acceptable to most photographers.

The focal length range of this lens makes it ideal for a wide range of subject matter. During a recent outing to photograph a horse jumping competition I chose this lens over the 12-100 f/4 PRO IS because its focal length range was better suited to the task at hand.

As an affordable, weather-sealed, all-in-one flexible solution… the M.Zuiko 14-150 mm f/4-5.6 II is hard to beat.

M.Zuiko 75-300 mm f/4.8-6.7 II
The M.Zuiko 75-300 mm f/4.8-6.7 II is likely under-rated by many folks. It isn’t weather sealed and not up to “PRO” standards in terms of build quality, or optical performance. But it still is a solid performer capable of producing some very pleasing images.

As noted in my earlier hands-on assessment, it isn’t realistic to expect a lower cost lens like the M.Zuiko 75-300 to perform at the same level as lenses that cost two or three times more money.

It is small, lightweight, cost efficient and provides a good focal length range to do bird and nature photography in decent lighting.
With a little bit of work on the RAW files in post, this lens can produce quite good results that will meet the needs of many photographers.

My wife doesn’t use her lens that often… so I take it out from time to time as it’s a lot of fun to use.

Photographers who are just starting out with bird and nature photography may be well served by giving the M.Zuiko 75-300 mm f/4.8-6.7 II some consideration. It is a cost-affordable way to try one’s hand at bird photography.
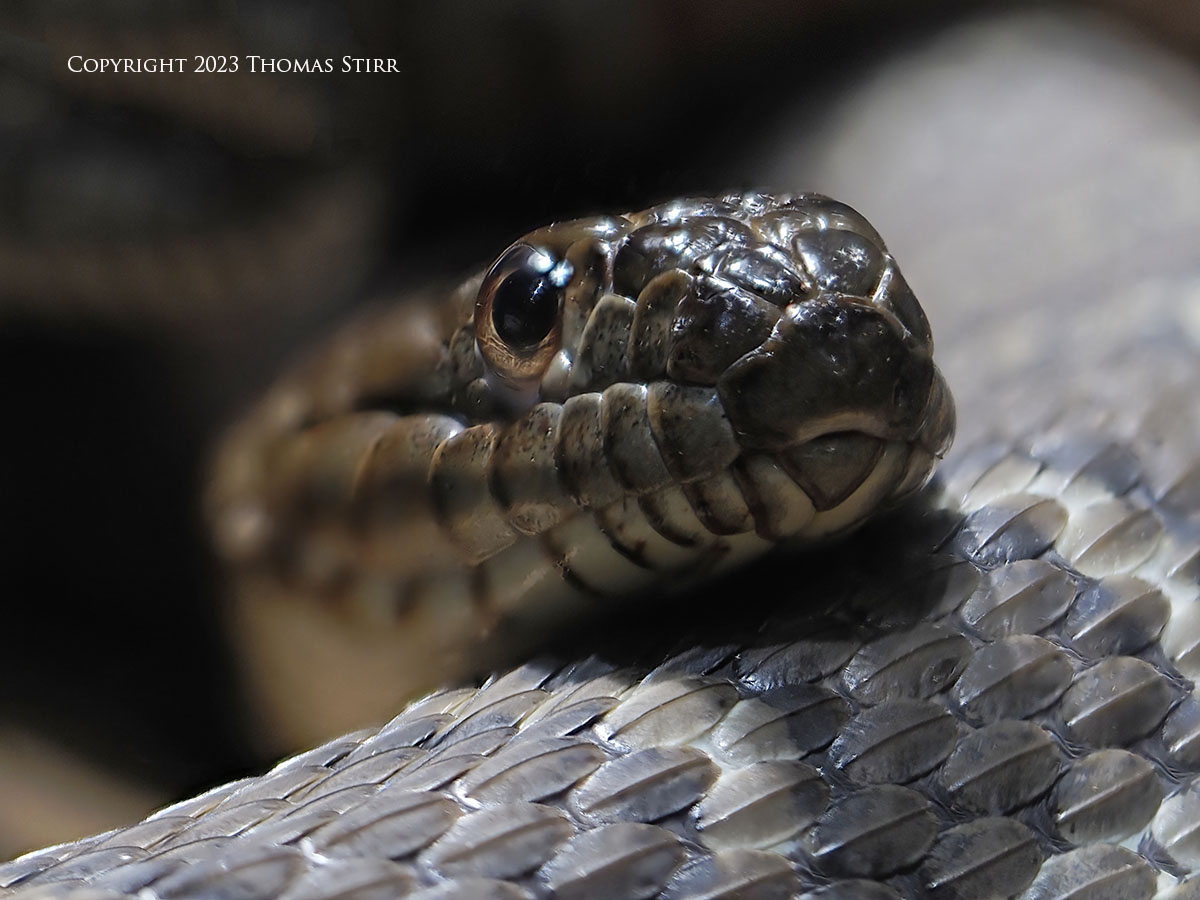
M.Zuiko 60 mm f/2.8 Macro
The M.Zuiko 60 mm f/2.8 macro lens is the Mighty Mouse of macro photography. It is incredibly small, light and easy to handle… and delivers great image quality.

When mounted on the OM-D E-M1X this macro lens does look like a toy. But… don’t let looks deceive you. The M.Zuiko 60 mm macro is a very capable lens that punches well above its weight class.

It can be shot at fairly slow shutter speeds like 1/40th of a second when using handheld in-camera focus stacking. The sharpness and colour rendition of this lens are quite good.

The M.Zuiko 60 mm f/2.8 macro has a focus limiter switch which helps the lens achieve auto-focus without a lot of hunting. I used my copy of the 60 mm macro handheld for a number of years and never had any issues with inaccurate auto-focusing.

The M.Zuiko 60 mm f/2.8 macro does not directly accept the MC-14 or MC-20 teleconverters, but can be used with extension tubes. Some folks promote ways to make things ‘fit’… but I’ve never tried these approaches.

As detailed in my 2023 review, the M.Zuiko 60 mm f/2.8 macro is a terrific piece of kit that really brings a lot of fun to handheld macro photography… and at an affordable price.

mm, efov 252 mm, f/13, -0.3 EV, 1/250, ISO-200, M.Zuiko STF-8 Twin Macro Flash, cropped to 2193 pixels on the width, subject distance 250 mm
M.Zuiko 90 mm f/3.5 PRO IS Macro
Photographers who are looking to take their handheld macro photography to a higher level may want to consider the M.Zuiko 90 mm f/3.5 PRO IS macro lens.

Being able to photograph at 2X magnification using the Super Macro setting, as well as accepting teleconverters, the M.Zuiko 90 mm f/3.5 PRO IS lens explodes handheld macro photography potential.

If a photographer wants to get totally crazy, they can combine teleconverter use, with the in-camera Digital Teleconverter and Handheld In-Camera Focus Stacking.

My standard handheld macro photography set up now includes the MC-20 teleconverter and STF-8 Twin Macro Flash. This set-up allows me to quickly adjust to almost any macro opportunity that I discover and capture it handheld.

The M.Zuiko 90 mm f/3.5 PRO IS macro lens does take some time to hone one’s skills to be able to utilize the potential that this lens offers. I originally took a pass on this lens, but once my wife started to enjoy macro photography with our M.Zuiko 60 mm f/2.8 lens, I reconsidered the 90 mm macro. And… I’m glad I did!

Using teleconverters with the M.Zuiko 90 mm f/3.5 PRO IS macro lens opens up all kinds of additional photographic opportunities. Like photographing flies in flight using Pro Capture H… as you can see in the image above.

In my mind, investing in any new camera equipment needs to expand my photographic potential to be justified. The 90 mm macro has done that in spades for me. I’ve been able to capture handheld macro images with this lens in ways that simply were not possible with the 60 mm macro.

The M.Zuiko 90 mm f/3.5 PRO IS macro does come with a significant price differential when compared to the M.Zuiko 60 mm f/2.8 macro. Before making the investment leap, photographers would be well advised to clearly define their needs.

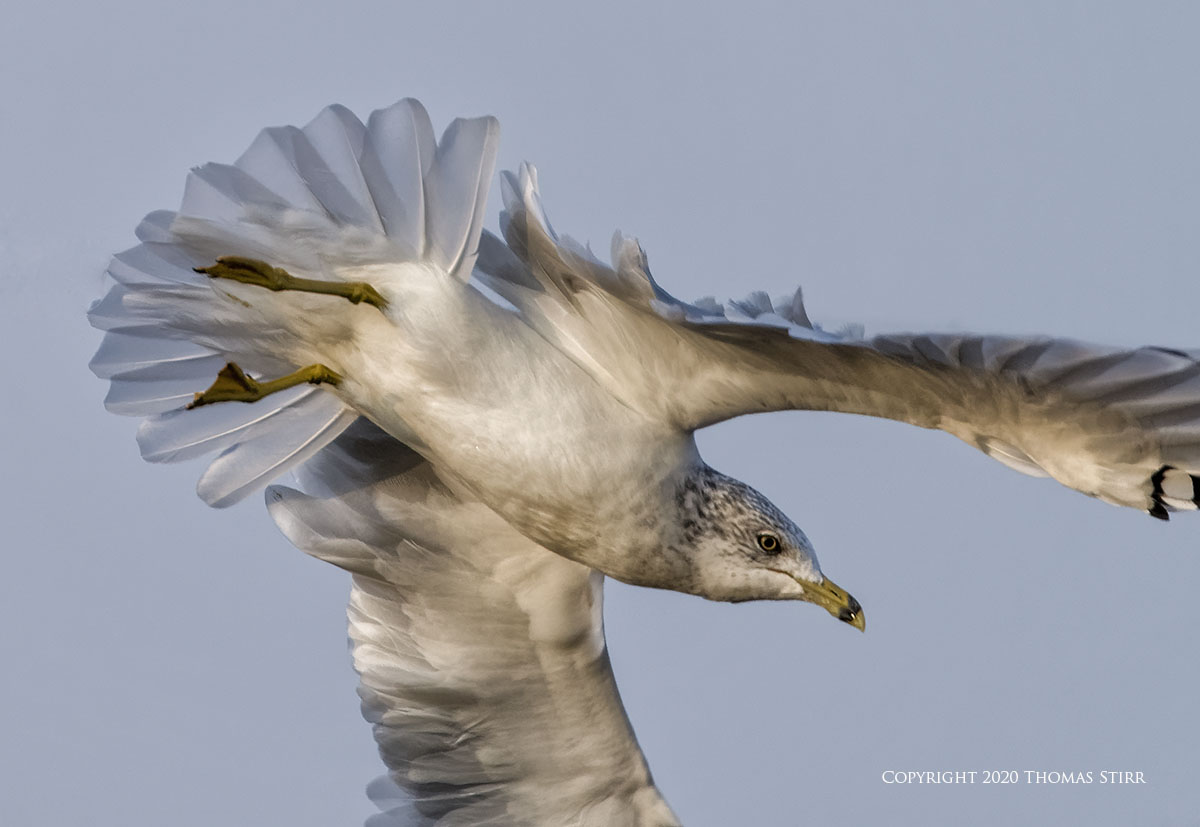
M.Zuiko 100-400 mm f/5-6.3 IS
The M.Zuiko 100-400 zoom lens broke some new ground for Olympus when it was introduced, by offering increased reach, and making the lens compatible with teleconverters. This caught the attention of a lot of bird photographers who were using M4/3 equipment.

The additional reach of the M.Zuiko 100-400 expanded my bird photography significantly over using the M.Zuiko 40-150 f/2.8 PRO with MC-20 teleconverter.

I found that I regularly used this zoom lens with the MC-14 for even more reach. Giving up one stop of light was a trade-off I was prepared to make.

Using handheld in-camera focus stacking is also possible with this lens, which further expands its in-field potential.

The lens mount with the M.Zuiko 100-400 mm f/5.6-3 does have a bit of play which initially concerned me to a degree. I have used this lens extensively in inclement weather without any issues so my concerns about the lens mount not being as tight as I would like, have disappeared.

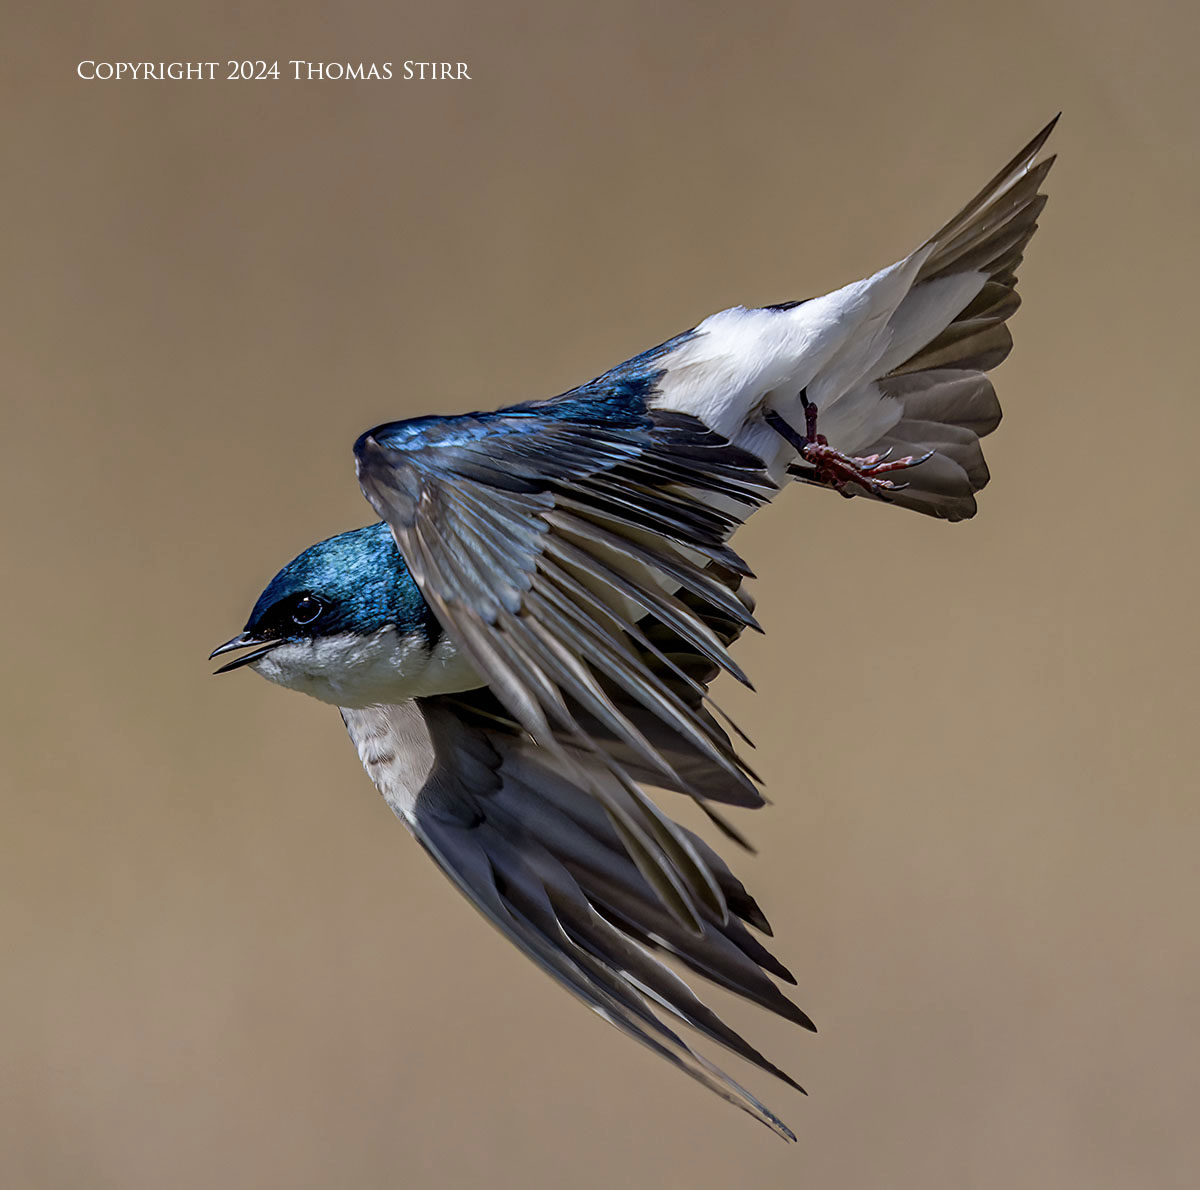
One of my favourite subjects to photograph with the M.Zuiko 100-400 is capturing images of dragonflies in flight. I’ve even used the MC-20 teleconverter with the 100-400 fully extended to 400 mm (efov 1600 mm) and been able to capture very useable images.


I’ve also had some success photographing Clearwing Hummingbird Moths in flight, as well as butterflies and bees.

Whenever I’m photographing birds-in-flight I always use a combination of Pro Capture L with Bird AI Subject Detection, and a single small AF point. This enables me to capture unique in-flight moments as they happen.
M.Zuiko 150-600 mm f/5-6.3 IS
The launch of the M.Zuiko 150-600 mm f/5-6.3 IS zoom lens took me by surprise… as it did with many other photographers. It certainly gave us pause to consider whether making a sizeable investment in this lens would make sense for us. After reviewing our needs we decided to buy this lens… and I’ve been enjoying it immensely.

As detailed in our M.Zuiko 150-600 vs 100-400 Comparison article, these lenses are very different beasts indeed, with advantages cutting either way depending on our individual photographic priorities.

Ultimately the Sync-IS, improved image quality, additional reach, and responsive handling led us to make the necessary investment in the 150-600. And, I can say without any hesitation, that the lens has been worth every penny that we paid for it.

The M.Zuiko 150-600 mm f/5-6.3 IS has expanded our photographic potential significantly. I won’t rehash all of those details in this article… but if you read our hands-on review… you’ll find a plethora of information to digest… as well as links to a number of other articles about the M.Zuiko 150-600 mm f/5-6.3 IS.

At this point, my wife and I are confident that we’ll be using our Olympus/OM equipment for many years to come. It has proven to be extremely reliable and delivers the quality, and performance features that we need.

Weather Sealing and Durability
After the first few months of use with my initial E-M1X, I discovered that weather sealing actually meant something to Olympus. My gear and I were drenched by a huge splash from waves hitting a retaining wall… the image above was captured just as that splash was going to hit me. It’s a heck of a thing to see that coming at you in your viewfinder!

My wife and I spent a couple of weeks in Newfoundland in the spring of 2023 and faced inclement weather for 75% of our trip. Our gear kept working flawlessly in the snow, rain and fog. In over 5 years of use, none of our cameras have ever needed the sensors to be cleaned, and nothing has needed repair.
Plus… no matter how hard I pushed my E-M1X bodies, they have never overheated… even when used for prolonged periods of time under very hot atmospheric conditions, or shooting video for extended durations.

M.Zuiko MC-14 and MC-20 Teleconverters
I regularly use both of these teleconverters. The MC-14 is typically used with either the 100-400 or 150-600 zoom lenses. I find that the MC-20’s two stop light penalty is a bit too much for these two long telephoto length zoom lenses. Plus the added reach is a bit too challenging for me to handle with birds in flight. The MC-20 does work well with these two lenses when photographing more static subjects.

I have no hesitation using the MC-20 teleconverter with the M.Zuiko 90 mm f/3.5 PRO IS macro lens, or the PRO 40-150 mm f/2.8 zoom.

In fact, the MC-20 is part of my standard macro photography set-up with the 90 mm macro lens.
Summary
Based on my specific photographic needs, switching to the Olympus (now OM) M4/3 system over 5 years ago was the best decision I have made buying digital camera gear in almost 2 decades. Of course, this may not be the best decision for other photographers as their needs could be very different from mine.

I hope this article has provided you with a decent Olympus OM kit review, as well as giving you a chance to view an extensive, representative sample of the work that we’ve been able to do with the system over the past 5 years.
Technical Note
Photographs were captured handheld with the camera equipment noted in the EXIF data. All images were created from RAW files or out-of-camera jpegs using my standard process in post. This is the 1,408 article published on this website since its original inception in 2015.

How you can keep this website advertising free
My intent is to keep this photography blog advertising free. If you enjoyed this article and/or my website and would like to support my work, you can purchase an eBook, or make a donation through PayPal (see link below). Both are most appreciated. Sometimes all we need as photographers is a bit of inspiration. We hope you can find some of that inside Finding Visual Expression II.

Finding Visual Expression II is available for download for an investment of $11.99 CDN. The best viewing experience of this eBook will be at 100% using Adobe Acrobat Reader.
You may be interested in all of the 30 concepts covered in both of these related eBooks. If so, you may want to also consider Finding Visual Expression.

Finding Visual Expression is available for download for an investment of $11.99 Cdn. The best viewing experience of this eBook will be at 100% using Adobe Acrobat Reader.
Our other eBooks include Images of Ireland, New Zealand Tip-to-Tip, Nikon 1: The Little Camera That Could, Desert & Mountain Memories, Images of Greece, Nova Scotia Photography Tour, and a business leadership parable… Balancing Eggs.
If you click on the Donate button below you will find that there are three donation options: $7.50, $10.00 and $20.00. All are in Canadian funds. Plus, you can choose a different amount if you want. You can also increase your donation amount to help offset our costs associated with accepting your donation through PayPal. An ongoing, monthly contribution to support our work can also be done through the PayPal Donate button below.
You can make your donation through your PayPal account, or by using a number of credit card options.
Word of mouth is the best form of endorsement. If you like our website please let your friends and associates know about our work. Linking to this site or to specific articles is allowed with proper acknowledgement. Reproducing articles, or any of the images contained in them, on another website or in any social media posting is a Copyright infringement.
Article is Copyright 2024 Thomas Stirr. Images are Copyright 2019-2024 Thomas Stirr or Rosemary Stirr. All rights reserved. No use, duplication or adaptation of any kind is allowed without written consent. If you see this article reproduced anywhere else it is an unauthorized and illegal use. Posting comments on offending websites and calling out individuals who steal intellectual property is always appreciated!
Nice Thomas I also love my OM-1 Mark II and I also have the Canon R5II.
Question in Lightroom is there a way to get the subject distance to show because my R5 it does show but the OM-1 doesn’t, Maybe there is a setting in camera to enable it?
Thanks
Hi Chris,
Unfortunately I’m not the right person to ask about Lightroom as I have never used that particular program.
I do use a very old copy of PhotoShop CS6 as the second stage of my post processing… but only on a very modest level to tweak my files and have access to Topaz DeNoise AI, Topaz Sharpen AI, and a very old copy of the Nik Collection.
Tom
Thanks much Thomas. As an Olympus user it’s always good to hear someone praise Olympus gear, all too many folks seem to think that only FF gear can produce good images.
Hi Woody,
At the end of the day everyone needs to find the gear that best suits their individual needs. For some folks that could be medium format or full frame… and other folks could find that smaller sensor cameras are better aligned with their photographic approach. One format isn’t necessarily ‘better’ than another… just different. I’ve shot with a number of different formats over the years including full frame, APS-C, M4/3, Nikon 1 and some 1/2.3″ bridge cameras. Every camera has its advantages and challenges.
A number of years ago I fell for the hype surrounding full frame cameras and I invested a lot of money into that format, thinking it would help make me a better photographer. It didn’t. On a professional basis buying full frame equipment was a bad decision that turned out to be very inefficient for my client video business. And… on a personal basis… full frame was a camera format that I never enjoyed using at all. So, I sold all of my full frame gear back in July 2015 and luckily didn’t suffer too much of an economic penalty doing so. I began using smaller sensor cameras exclusively back then and never missed my full frame gear for even a second.
Assessing what makes a “good image” is a subjective assessment. Composition, lighting/exposure, the emotions/story that an image can convey, as well as ‘special moment attributes’ are what make a “good image” from my perspective. The size of sensor in a camera as well as the make/model of the equipment used are basically irrelevant to everyone except to the photographer who created the image. As long as they find gear that enables their creativity and helps to fuel their inspiration, they have the right camera equipment in their hands.
On a personal basis I don’t think that my photography improved at all when I used full frame gear. It always seemed to get in the way of my creativity. I don’t know why it did… but it just did. It was a struggle to find inspiration and motivation when my gear felt so confining. Moving to Nikon 1… and then on to Olympus/OM M4/3 equipment… were very liberating experiences for me. And… liberating myself has definitely improved my photography significantly over time.
Tom
Tom, thank you.
Olaf
Hi Tom, and thank you for sharing your experience with the different lenses. For macro, I am playing with old OM lenses on a bellows with adapter to my EM1X, in addition to the 60mm 2.8 macro. I have a 40-150 f/4-5.6 kit lens, which turned out to be a lens often fixed to the EM1X. I have the 2.8 PRO +1.4 TC, which is a tad to big for a daily lens, so I decided to buy the 40-150 f/4 PRO. Same minimum 0.7m focusing distance as the 2.8 PRO, but smaller, lighter and pin sharp; my new favorite walk around lens. It has a 62mm filter thread, so it can be used with the extra ring that came with STF-8 flash.
What is your preferred exposure setting for macro; A, S or M? Spot? I often miss shots because I cannot decide which one to use…
Yours, Olaf
Hi Olaf,
I virtually always shoot in Manual mode, regardless of the subject matter. For moving subjects like BIF, or when I’m changing subjects quickly in variable lighting conditions, I use AUTO-ISO. For static subjects like landscapes I often set my ISO manually, then adjust my other settings as needed to get the exposure I want. I utilize exposure compensation quite a bit.
Depending on how quickly lighting conditions change with macro, I often use AUTO-ISO as well. If I’m doing macro flower photography in stable light then I will manually set my ISO.
It depends on the lighting conditions whether I use matrix, centre weighted or spot. Since I usually try to get in as tight as possible I most often use matrix metering. I don’t typically shift from matrix to centre weighted to spot… since the action is often happening too quickly… and I don’t want to miss any shots. I can very quickly adjust exposure compensation without having to take my eye away from my EVF so this is the most common adjustment I make with exposure.
I find one of the things that really helps to adjust exposures in post is using DxO Smart Lighting. I use this function on every one of my RAW files.
Tom
Excellent article. Have you ever used the M. Zuiko 150-400 mm f/4 PRO?
Thanks, Alan
I’m glad you enjoyed the article Alan!
I’ve not had the opportunity to use the M.Zuiko 150-400 f/4.5 TC1.25 PRO IS. Wildlife pros like Petr Bambousek and Andy Rouse are very positive about the lens so I imagine it performs at a very high level.
Tom
A very comprehensive and informative review Mr Stirr, thank you.
I’ve had my EM1/3 since 2021 + 12-40 f2.8 Pro, 40-150 f2.8 Pro and 100-400 and thinking of upgrading to a S/H EM1X rather than to the more expensive OM1/ OM1 Mkii. Just really after the bird tracking feature tbh. Would then be able to put other spare money not spent on the OM’s to the 90mm Macro or the 150-600!
Hi Mal,
Thank you for your supportive comment on the article… much appreciated.
It sounds like you have an interesting decision ahead of you regarding the 150-600 vs. the 90 mm Macro PRO. I own and use both of these lenses and can attest to the fact that they are both excellent.
Tom
Thanks so much for a superb summary of your experiences.
It helps with my future thoughts.
Having just acquired a grip for my OM 1, questions arise regarding how you carry the EM1x plus long lens.
Thanks again.
Regards Ianm
Hi Ian,
In terms of carrying the E-M1X with a long lens like the 100-400 or 150-600 it really depends on how long I’m planning to be out using my gear. If I’m going to be out for a couple of hours or more, I clip my camera/lens onto my Cotton Carrier G3 Harness. This works very well as it removes all the weight from my arms when I’m not actually shooting with the gear. The clip mechanism gives me very quick access to my gear when a photographic opportunity appears. For shorter duration sessions I often take an old mid-size Tenba shoulder bag with all of the inserts removed. My camera gear can then be placed inside the bag, or rested in it when not in active use.
More often than not I use my Cotton Carrier G3 Harness.
Tom
Very well done!! Thanks, Tom.
Hi Bill,
I’m glad you enjoyed the article.
Tom