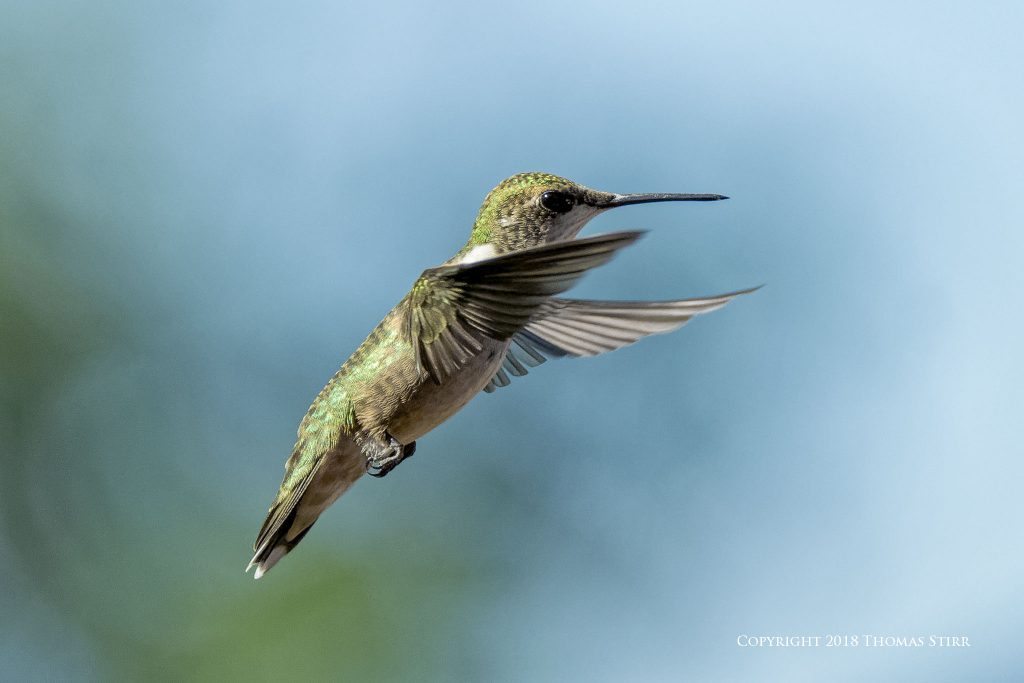
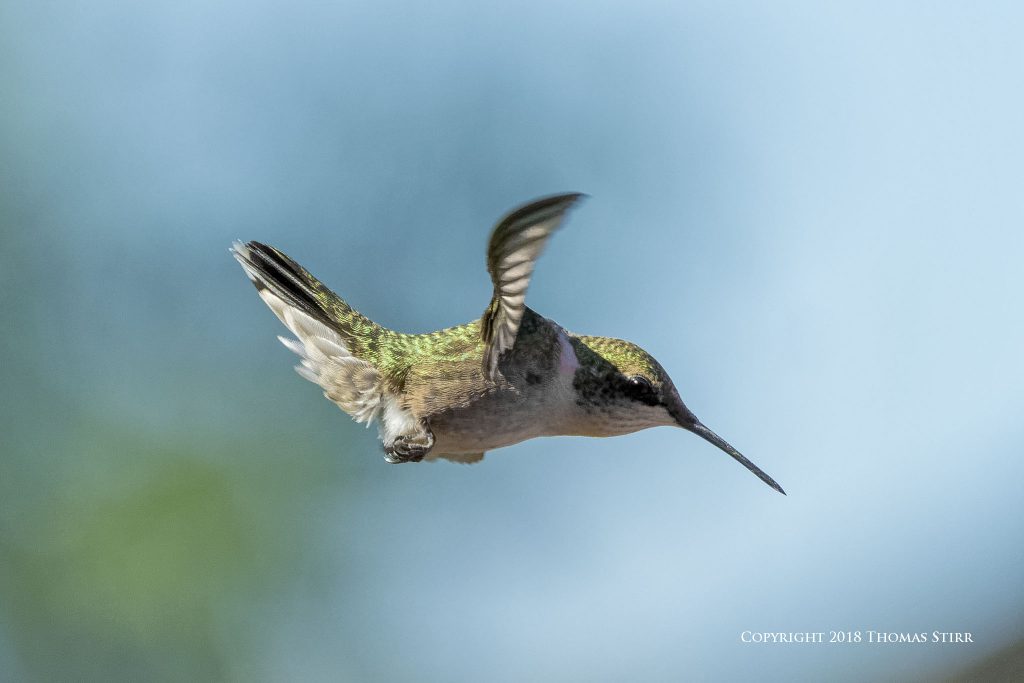
Hummingbirds are one of my favourite birds to photograph. In Southern Ontario we are only treated to visits from these ‘pocket rockets’ for a few months of the year. While it is ideal to find and photograph hummingbirds around flowers, opportunities tend to be fairly rare – especially in my backyard. As the season is quickly drawing to a close, I thought it would be fun to post an article about photographing hummingbirds near feeders, as this is where the majority of images are captured by many photographers.
NOTE: Click on images to enlarge.

I much prefer the challenge of trying to capture images of hummingbirds in flight, rather than when they are perched. The image above is very typical of the type of angle and composition that can result when photographing hummingbirds around feeders. If you look on the bird’s chest you will see a reddish hue, caused by a reflection from the feeder. This is a telltale sign that the bird was photographed near a feeder as this colour shading doesn’t look natural on the hummingbird.

The hummingbird in the above photograph was briefly hovering about 5 centimetres (~2 inches) above one of my feeders. Its chest and belly had a very strong reddish cast. I cropped the hummingbird tightly to remove the feeder. I then did a hue adjustment on the red pallet, pretty much removing this colour from the image which makes the hummingbird’s colour look more natural. For comparison purposes let’s have a look at the entire frame as originally captured.

You can clearly see the reddish colour cast on the underside of the hummingbird. To my eye, the feeder doesn’t add any visual value to the photograph, other than giving it some context, so I had no hesitation to crop it out.

The image above was also captured with the hummingbird in very close proximity to a bright red feeder. A very aggressive crop was done on the image in order to focus on just the hummingbird and to remove the feeder. An adjustment to the red hue was also done.
It is a matter of personal taste whether a photographer wants to show feeders in their images or not. At times hummingbirds can be so close to feeders that it is basically impossible to crop a feeder out of an image.
When photographing hummingbirds around feeders it is always a good idea to watch how the birds behave. I’ve found that they will often fly in from the same basic direction. Almost all of the hummingbirds that I’ve observed will very briefly hover about 15 to 20 centimetres (~ 6 to 8 inches) away from a feeder before they approach it to feed, or land on one of the perches. The exact position of this hovering around a feeder can vary.
I always try to photograph a hummingbird at this precise moment, i.e. when it is doing this very brief hover before it comes in closer to the feeder.
What follows is a series of six consecutive images of a hummingbird that was briefly hovering at this 15 to 20 centimetre ( ~ 6 to 8 inch) distance away from a feeder. These photographs were captured hand-held in my suburban backyard.


It takes some planning and discipline to capture this type of image, including the following simple tips.
1) Position your feeder in good light and at a height that will give you a good, unobstructed view so you can see the hummingbirds approaching.
2) Whenever possible, position your feeders so they will be on the same focal plane as your camera. Avoid having to shoot up or down at feeders.
3) Choose a shooting angle that will place anything in the background a good distance away from the feeder. This will help create a smooth, out-of-focus background. Anticipate where the ‘shooting zone’ will be when hummingbirds do their pre-approach hovering.
4) Sit in a comfortable chair, positioned in the same spot, so the hummingbirds will get used to your presence. Have your camera ready and avoid any sudden movements when the hummingbirds arrive.
5) Pre-focus your lens on the feeder. This will increase the likelihood of your camera quickly acquiring focus on the hummingbird during the split second when it is hovering 15 to 20 centimetres away from the feeder.
6) Do some tests to determine the best camera settings to use. This will vary depending on the gear you are using and the amount of wing blur you prefer in your images. My preferred settings with my Nikon 1 V2 or V3 are to shoot in Manual mode, f/5.6, using continuous auto focus with subject tracking, and Auto-ISO 160-6400. I most often shoot at 15 or 20 frames per second depending on the camera used and utilize matrix metering. VR is typically turned off. My preferred shutter speed (assuming enough light) is 1/5000.
7) Set realistic expectations for yourself and be patient. It is very common for all of us to miss these fleeting photographic opportunities.
Technical Note:
All photographs were captured hand-held in available light using Nikon 1 gear as per the EXIF data. All images were produced from RAW files using my standard process of DxO PhotoLab, CS6 and the Nik Collection.
Word of mouth is the best form of advertising. If you like our website please let your friends and associates know about our work. Linking to this site or to specific articles is allowed with proper acknowledgement. Reproducing articles or any of the images contained in them on another website is a Copyright infringement.
My intent is to keep this photography blog advertising free. If you enjoyed this article and/or my website and would like to support my work you can purchase an eBook, or make a modest $10 donation through PayPal, both are most appreciated. You can use the Donate button below. Larger donations can be made to tom@tomstirr.com through PayPal.
Article and all images are Copyright 2018 Thomas Stirr. All rights reserved. No use, duplication or adaptation of any kind is allowed without written consent. If you see this article reproduced anywhere else it is an unauthorized and illegal use. Posting comments on offending web sites and calling out individuals who steal intellectual property is always appreciated!


Great shots! I have never been successful trying for pics of these little guys. Like fishing, I just don’t have the patience.
Hi William,
Patience does seem to be a mandatory component for this subject matter. Brewing a pot of coffee or steeping a pot of tea, and a comfortable chair are helpful.
Tom
Magnificent photos.
Thanks Anders!
Tom
Hi Tom,
Bless you for feeding ’em hummingbirds as well as other birds dropping by. Specially liked tip #4 – Sit in a comfortable chair 😀 Seriously though, your hummingbird shots embodies the expression “poetry in motion”. They’re exquisite shots, freezing the motions and details that are too quick and fleeting to the human eye to note.
Oggie
Thanks Oggie – I’m glad you enjoyed the photographs!
My wife keeps four bird feeders continually stocked with various types of seeds all year long to give our feathered friends some ongoing support. A few years ago I built a pond in our backyard. We typically keep the pump running all year long so the birds can have an easily accessible water supply, especially in the winter. In terms of hummingbirds, my wife makes a new batch of sugar water for them every few days during the season, then empties, cleans and refreshes three different hummingbird feeders with it. We’ve learned that if the food supply goes stale, the hummingbirds will move on.
Since hummingbirds primarily eat flower nectar, tree sap, insects and pollen, my wife also has a range of plants in our garden that are known to attract hummingbirds. Every spring we wait in anticipation of the arrival of these little ‘pocket rockets’ and enjoy them immensely during the season.
Tom
Hi Tom,
Any particular recipe for the sugar water? I’m familiar with planting indigenous flowering/fruiting plants/shrubs/trees to attract pollinators.
Oggie
Hi Oggie,
I checked with my wife and here are her instructions: “Put one cup of white granulated sugar for every four cups of water into a saucepan. Bring to a boil for two minutes then let cool.” As long as the mixture does not go stale she told me that the hummingbird feeders only need to be cleaned about once a month. A quick rinse under the tap can remove the odd ant and other debris etc. between formal cleanings.
If the mixture goes stale, and for regular monthly maintenance, the feeder needs to be cleaned. To clean the hummingbird feeders she adds two drops of dish detergent and two drops of bleach in a pail of water. She then submerges and swishes the hummingbird feeders around in the mixture. To rinse she empties the pail and refills with clean water, submerges the feeders, then does a final rinse with a hose.
While the usual visitors to our hummingbird feeders are their namesake birds, we also get quite a few Baltimore Orioles at the feeders in the spring.
Tom
Tom,
Thanks to you and your wife for the tips. I envy your location — I have to go out of town to spot birds other than sparrows.
Oggie
Always a pleasure to help a reader Oggie!
Tom
Hi Tom,
I am always impressed by your photographs of birds or insects in flight. You must be blessed with a very fast reaction to succeed to catch them in their often unpredictable movements. That the Nikon-1 is helping to achieve this, is obvious. I wonder, if there was a particular reason why you chose the V2 for this series. Would the V3 have been less effective?
Happy photographing and good light!
Rudolf
Hi Rudolf,
It is possible to capture handheld images of hummingbirds like the ones in the article with either the Nikon 1 V2 or V3. I’ve found that the Nikon 1 V2 acquires auto focus very slightly faster than does the V3 and I will choose the use the V2 on occasion, usually in lower light conditions. For this particular subject matter the V2 is slightly more responsive in terms of auto-focus so it can make getting these kinds of images a tiny bit easier to achieve.
When photographing hummingbirds in my backyard I concentrate my efforts using specific shooting angles and a designated ‘shooting zone’. This can help in terms of my reaction time. If hummingbirds are outside of this ‘shooting zone’ I often do not even try to capture photographs of them.
Tom