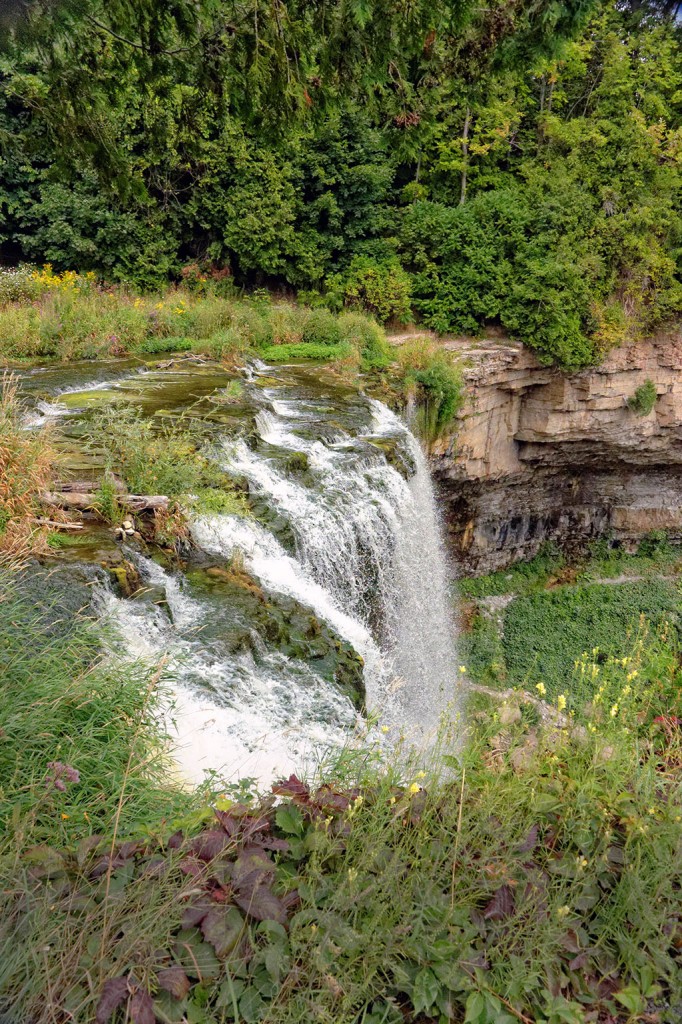
As an owner of a Nikon 1 V2 and a selection of Nikon 1 lenses I’m always looking for ways to extend the use of this compact-sized camera system. I thought it would be an interesting challenge to try and photograph a waterfall with the Nikon 1 system.
(NOTE: click on images to enlarge them)
When many of us first start out photographing waterfalls we are often disappointed with the images we capture as they have a ‘frozen’ appearance and lack the ‘smooth water’ effect that can add beauty and drama to our photographs. To achieve the ‘smooth water’ effect we need to slow our shutter speed down. This can be accomplished by using the lowest possible ISO setting, stopping our lens down, and by using a neutral density filter.
Photographing waterfalls with a Nikon 1 camera presents three interesting challenges:
1. Given the small sensor size in Nikon 1 system cameras stopping down beyond f/5.6 can start to create softening due to diffraction. This becomes quite evident at f/11 and as a result limits the use of this technique for waterfall photography.
2. The lowest ISO setting on many Nikon 1 cameras is ISO-160 which is also a bit of limiting factor.
3. Since most of the lenses in the Nikon 1 system are quite small and use 40.5mm filters there is a somewhat limited selection of filters available, especially when it comes to variable neutral density filters.
Undaunted, I did a bit of research and ended up purchasing a Vello IR infrared remote control and a Vivitar 40.5mm NDX variable neutral density filter. I headed off to Webster’s Falls (Hamilton Ontario Canada) to see what kind of images I could create.
It has been quite dry in my local area this summer and fortunately there was a reasonable volume of water flowing at Webster’s Falls, and I was able to capture this image at f/5, 0.8 seconds, ISO-160.
I found that the Vivitar NDX variable neutral density filter was just adequate for the job. It is advertised as providing 1-10 stops of light reduction. My experience is that you’ll get about half of that light reduction since the filter is very prone to ‘x pattern’ darkening. Never-the-less the filter did do its job and is very modestly priced making it ideal for hobbyists on a budget.
The Vello infrared remote control worked very well with my Nikon 1 V2 and I’d recommend it for anyone doing tripod work with a Nikon 1 camera. Be sure to check to make sure that it will operate with your specific camera model before purchasing it.
Most Nikon 1 lenses do not have focusing rings and manual focusing must be done on the rear screen using body controls. This is a bit cumbersome so after adjusting the Vivitar NDX filter to get my desired exposure, I used auto focus without any issues with my Nikon 1 V2.
Here is another image of Webster’s Falls, taken from a different vantage point at f/5.6, 1 second, ISO-160. It was quite breezy during the day I was shooting, and I had to take a number of exposures before I captured one where the foliage was not blurred to a distracting level.
Summary
By adding a neutral density filter to their kit, owners of Nikon 1 system cameras can create very pleasing ‘smooth water’ effects in their waterfall images. Given some of the limitations of the Nikon 1 system, for best results you should choose waterfalls with a good level of water volume.
My intent is to keep this photography blog advertising free. If you enjoyed this article and/or my website and would like to make a modest $10 donation through PayPal to support my work it would be most appreciated. You can use the Donate button below. Larger donations can be made to tom@tomstirr.com through PayPal.
Article and all images Copyright 2014, Thomas Stirr. All rights reserved. No use, reproduction or duplication including electronic is allowed without written consent.


