As photographers many of us face the challenge of shooting through glass as it may be the only option we have to create a particular image. While this is not an ideal condition there’s a few simple things we can do to minimize the effects of shooting though glass.
NOTE: Click on images to enlarge.

When visiting displays of captive specimen we are usually faced with shooting through glass enclosures. Depending on the venue these are often soiled with fingerprints and substances left behind by toddlers. The exact nature of those substances remains for science to determine.
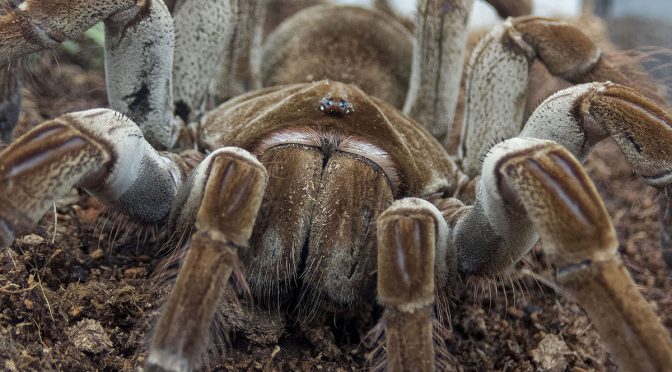
In these situations one of the best things we can do is place the lens of our camera as close as we can to the glass surface in order to eliminate the potential for glare. This also helps to ‘shoot past’ fingerprints when were are in close enough so that the glass surface is inside the minimum focusing distance of our lens.

Before buying lenses it is always a good idea to check its specifications to discover the minimum focusing distance of a particular lens. Using lenses with comparatively short minimum focusing distances gives us a lot more flexibility when shooting through glass at various exhibits.

Using extension tubes to shorten the minimum focusing distance of a lens is a practical solution in a range of situations. I find this approach very useful when using a longer focal length zoom lens.

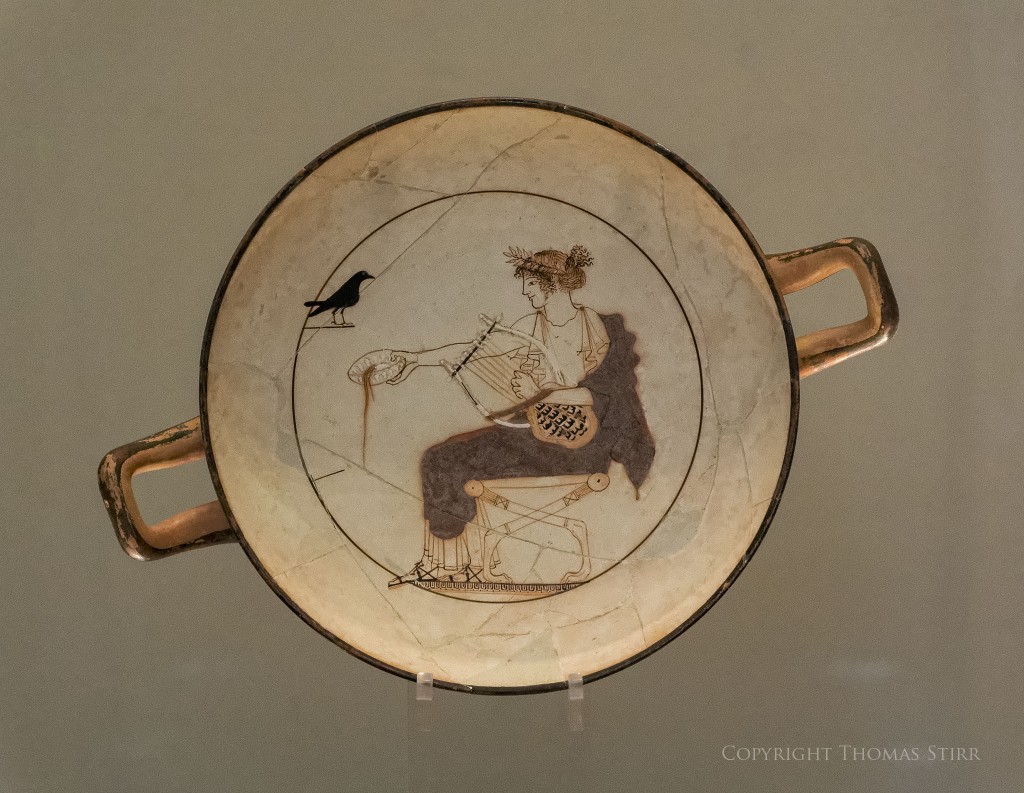
Sometimes we forget that glass enclosures are not reserved for exhibits of living things, but may also be there to protect antiquities and other items on display. Regardless of the subject matter, getting in close to the glass so it is inside the minimum focusing distance of our lens will help us be successful.
At times we will be unable to capture our subject from a straight on perspective. In these situations it is important to minimize the angle of our lens in relation to the glass surface. Keeping our lens surface as close to parallel as possible to the glass will help minimize potential distortion.

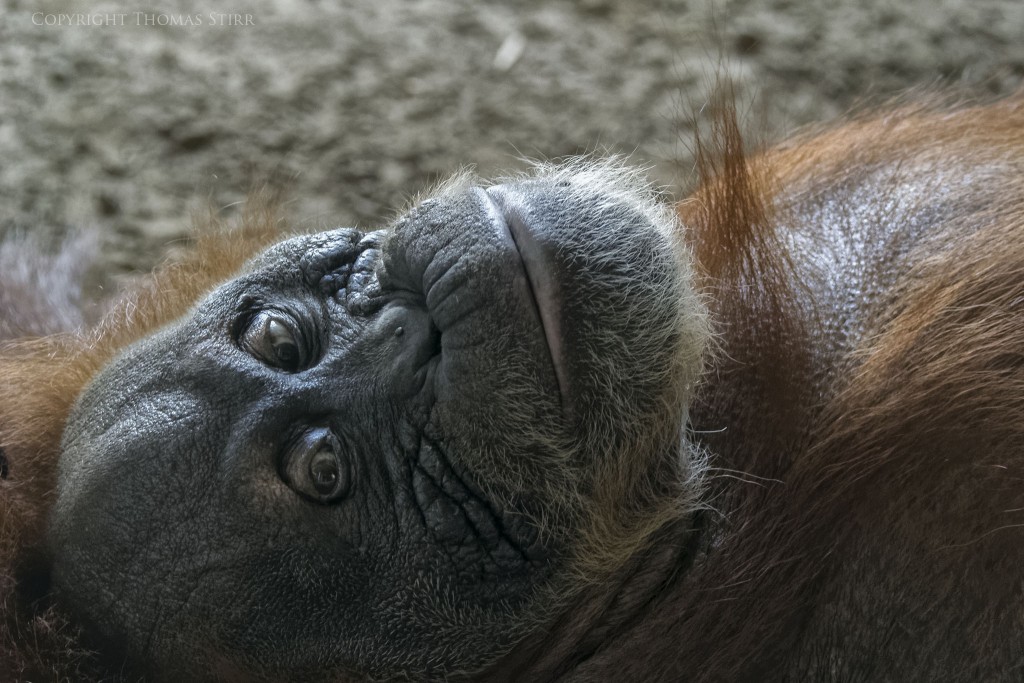
This technique is not just for macro-type opportunities. The orangutan in the image above was photographed through a soiled pane of thick safety glass. In these situations our shooting angle is a critical success factor.

This tiger was a fair distance away, but still photographed through a very thick, soiled pane of safety glass.

For many of us a kitchen window is an ideal hide for our bird photography. The sparrow above was photographed through my double-pane kitchen window under poor lighting conditions. This necessitated the use of ISO-16000.

Obviously shooting through my kitchen window under poor light is not my first choice… but one has to take advantage of whatever photographic opportunities Mother Nature sends our way. An image of a hawk taking flight at ISO-16000 captured through my kitchen window… is better than not capturing any image of it at all. I like to remind myself that life is a relative experience.

We may own a camera that has special features like the Microscopic Mode in the Olympus Tough series. This technology can allow us to achieve auto-focus when subjects are extremely close to a glass panel. By using this technology we can shoot with our camera right up against a glass surface which can help minimize distortion.

The photograph above of a Baltimore Oriole taking flight from one of our hummingbird feeders was captured by shooting through the double-pane patio door in my kitchen. If I would have been outside on my deck the oriole would not have visited the feeder. Shooting through glass isn’t ideal, but it can enable us to capture some images that may not be possible otherwise.

Shooting through the glass in my kitchen window has yielded many hours of enjoyment photographing birds bathing in the pond I built in our backyard. And… taking flight from it… as captured with the following Pro Capture H image run.


In summary, don’t be afraid to shoot through glass windows, patio doors or panels at exhibits. Just use a few simple techniques to help minimize potential distortion.
- Shoot close up to the glass so its surface is inside the minimum focusing distance of your lens.
- Keep your lens as parallel to the surface of the glass panel as possible, and change your physical shooting position as needed.
- Be aware of potential flare from exhibit lights and reflections from other people walking by at the exhibit. Shift your physical position accordingly, or adjust your shutter release timing.
- Have a set of extension tubes with you in case you need to shorten the minimum focusing distance of your lens

If you wear a wide brimmed hat when out with your camera, it can used to help block out reflections in glass panels. You’ll need to be adept at shooting one-handed, or have a tripod with you.

There will still be occasions when we’ll be unable to get the correct shooting angle and physical proximity to our intended subject to be able to successfully shoot through glass. All we can do is adjust our shooting technique as best we can given the conditions we face. Sometimes it works. Sometimes it doesn’t. C’est la vie!
Technical Note
Photographs were captured handheld using camera gear as noted in the EXIF data. Images were produced from RAW files or out-of-camera jpegs using my standard process.
For those readers who are interested in calculating equivalent field-of-view, multiply focal lengths for Olympus M4/3 cameras by a factor of 2, Nikon 1 by 2.7, and Olympus TG-5 by 5.6. This is the 1,267 article published on this website since its original inception in 2015.

How you can help keep this site advertising free
My intent is to keep this photography blog advertising free. If you enjoyed this article and/or my website and would like to support my work, you can purchase an eBook, or make a donation through PayPal. Both are most appreciated.
Our eBooks include Images of Ireland, New Zealand Tip-to-Tip, Nikon 1: The Little Camera That Could, Desert & Mountain Memories, Images of Greece, Nova Scotia Photography Tour, and a business leadership parable… Balancing Eggs.
If you click on the Donate button below you will find that there are three donation options: $7.50, $10.00 and $20.00. All are in Canadian funds. Plus, you can choose a different amount if you want. You can also increase your donation amount to help offset our costs associated with accepting your donation through PayPal. An ongoing, monthly contribution to support our work can also be done through the PayPal Donate button below.
You can make your donation through your PayPal account, or by using a number of credit card options.
Word of mouth is the best form of endorsement. If you like our website please let your friends and associates know about our work. Linking to this site or to specific articles is allowed with proper acknowledgement. Reproducing articles, or any of the images contained in them, on another website or in any social media posting is a Copyright infringement.
Article is Copyright 2023 Thomas Stirr. Photographs are Copyright 2014-2023 Thomas Stirr or Terry McDonald as noted on images. All rights reserved. No use, duplication or adaptation of any kind is allowed without written consent. If you see this article reproduced anywhere else it is an unauthorized and illegal use. Posting comments on offending websites and calling out individuals who steal intellectual property is always appreciated!


I find that a high quality CPL significantly reduces reflections when shooting through residential window glass. The associated loss of an f-stop is inconsequential for most of my stills and actually beneficial – serving an ND filter to lower shutter speed – when filming through-window videos on sunny days. The two downsides of capturing images through modern, multi-paned (sometimes gas-filled) windows are decreased dynamic range and window-specific colour casts. To minimize the latter effect, I’ve created custom WB presets, shooting a gray card held outside each window from inside.
Hi Stan,
Thanks for adding to the discussion by sharing your experience and technique shooting through windows.
Tom
After my last visit to the local zoo, I vowed to take a container with glass wipes with me next time.
Hi Arthur,
I know a couple of photographers that take wipes with them. It can help, but it also can reduce available shooting time. I often bring a short stool with me so I can comfortably shoot handheld from a lower level.
Tom
Thanks for sharing. Wonderful information. I must give it a try.
I am amazed at your images taken at 16000 iso. I get poor results at much lower iso. I have to resort to using DeNoise and the results are not as good as yours.
Carol
Hi Carol,
ISO-16000 is my upper limit. I use 2 rounds of noise reduction… DxO DeepPRIME at the start of my process, then I finish my files with Topaz DeNoise.
I’m glad the article was helpful.
Tom