This lengthy article provides a summary of some of the actions that a photographer can take to practice handheld shot discipline. Many of the actions would also apply to folks who use tripods or monopods. Shot discipline is all about making sure that our camera gear is ready. That we know how to use it to best effect. That we use good camera technique. And, that we remain calm and focused.
NOTE: Click on images to enlarge. Photographs have been added to serve as visual breaks.

Battery preparation
Check your batteries the night before and charge them if necessary. Be sure to bring some back up batteries with you. If you are shooting in cold weather it’s best to have your back up batteries stored underneath your outer garment. In very cold environments a camera battery can lose up to half of its power.

Memory cards
Start your photography session with empty cards in your camera, or at the very least check how much memory space is left on your card(s). Be sure to bring additional cards and a proper storage container for your cards with you. Once you have filled a memory card use the locking tab to help protect your images from accidental erasure.
Avoid deleting images from your memory card while it is still in your camera. Deleting images runs the risk of causing card corruption. Avoid touching the electrical connections on your memory cards as grease from your fingers can transfer to the contacts on your card and potentially affect performance.

Clean your camera gear.
Periodic cleaning of camera gear helps ensure its good operation. At a minimum before going out with your camera, be sure to clean the front of your lenses/filters with an appropriate solution and cloth.
If your camera does not have an effective automatic sensor cleaning mechanism, check your sensor and clean it as necessary. Dust can be removed with a dry tool such as the Eyelead Sensor Gel Stick, or by using a blower.
There are various versions of the Eyelead stick based on the coatings that are on the sensor in your camera. Only use the stick that is designed for your specific camera. Never use a gel stick that is designed for a particular camera on a different brand without first checking whether it is compatible. You will be liable if you improperly use a sensor gel stick on a camera for which it was not designed.

WARNING: There are fake sensor gel sticks on the market that can cause serious damage to your camera’s sensor. These are typically made in China and sold over the internet. Only buy the Eyelead Sensor Gel Stick from an approved vendor such as Photography Life. The Eyelead Sensor Gel Stick is made in Germany.
Depending on your camera, its sensor may need a wet cleaning from time to time. This occurs most often with a DSLR when debris or lubricant is cast off by a mechanical shutter mechanism. If you plan on doing your own sensor wet cleaning be sure to buy a good quality kit and follow the instructions thoroughly. If you are not comfortable doing a wet cleaning, take you camera in to a reputable camera store.

Anticipate the lenses you may need.
While many of our photography outings are intended for specific purposes such as bird photography, we often cannot control whether our desired subject matter will cooperate. It can be helpful to pop another lens or two in your camera bag just in case you need to shift your photographic objectives when you are in the field.

Check your settings before you get out of the car.
It is easy to forget how we last left our camera settings. Sometimes they may not be appropriate for our intended subject matter or for the lighting conditions. Double checking our camera settings can help reduce the risk of missing an initial photographic opportunity.

Understand your personal handheld limitations.
While practising slow shutter speed handheld photography is important to develop and improve your technique, this shouldn’t be done with important subject matter.
Our ability to effectively capture handheld images at slow shutter speeds will vary by camera body, lens, and focal length. It is important to know our physical limitations with the gear we own.

Plan your shot in advance.
When we see a subject of interest, we have a vision in our minds of how we want that photograph to look. Consider shutter speed, aperture, ISO value, depth-of-field, exposure, and composition in advance whenever possible. This will help ensure that you create a well conceived photograph.

Choose shutter speed over ISO value.
Using too slow of a shutter speed can result in blurry photographs. While some advancements with post processing software have occurred that can help image sharpness, it is far easier to deal with potential image noise in post than it is to try and fix an out-of-focus image. More often than not an out-of-focus image cannot be saved.

Compose to fill the frame and limit cropping.
From an image quality standpoint there is little point in capturing a photograph that will require significant cropping. When we do that we are needlessly filling our memory card, and later our computer hard drive, with wasted pixels. Putting the maximum number of pixels on a subject will produce better results than aggressive cropping.
Professional photographers know their cropping limits in terms of producing proper sized image files that can be sold to their clients. Most would not waste their time capturing an image that requires dramatic cropping as it would not be marketable photograph for them.

Wait for your moment.
Photographing a subject when it is not in the right pose or position, is too far away, or not in the right light, just wastes space on our memory card. And, needlessly burns up camera shutter count that we can never get back. It is always best to wait for your moment… and if it doesn’t come… wait for the next opportunity.
Waiting for your moment is a critical factor in practising shot discipline, and is one of the hardest things to do.
It is so easy for any of us to get caught up in the excitement of a photographic opportunity. When we do, we can end up creating images of little value. Remaining calm and focused on the image we have in our minds gives us the shot discipline needed for us to craft our best photographs.

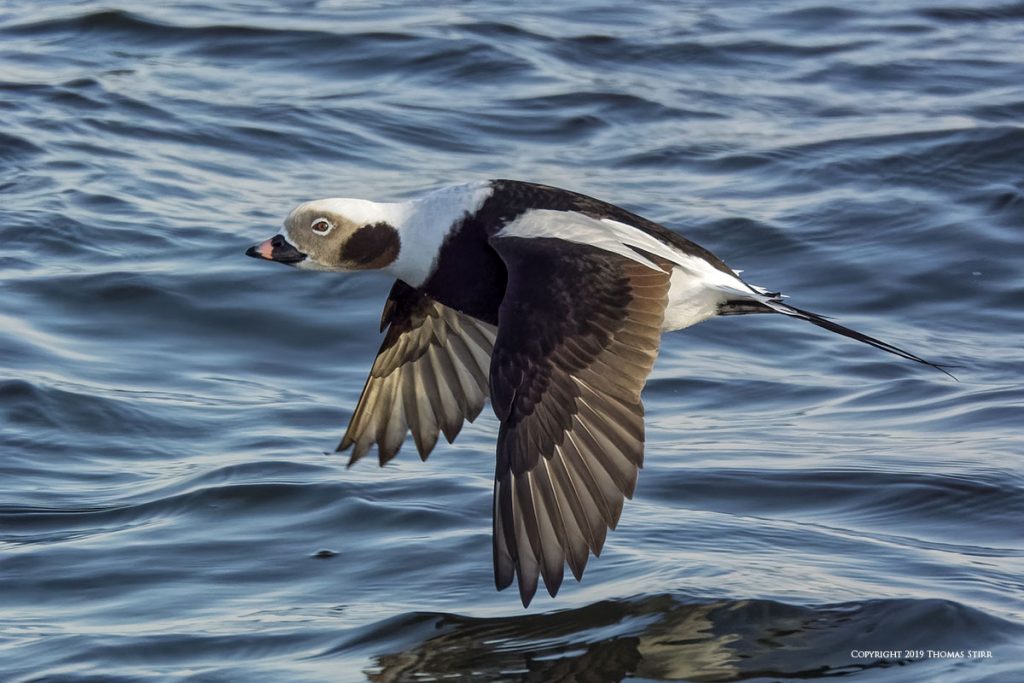
Yesterday I was culling through some older files of long tail ducks. It quickly became apparent to me that I must have been caught up in the excitement of photographing flocks of ducks that day. As a result I captured far too many photographs that required aggressive cropping. I ended up deleting over 75% of my photographs from that outing.
All of my best images were taken later on during the session when I found some composure, and waited for the ducks to fly by much closer to my vantage point.

Let your subject come to you.
When photographing moving subjects we need to watch them carefully to discover if they are exhibiting any habitual behaviours. Often we can identify a visual zone where a subject momentarily pauses. By pre-focusing on this visual zone we can then capture our image by waiting for the subject to come to us.

Do a 360-degree edge check with still subjects and landscape images.
Before fully depressing your shutter release do a quick 360-degree edge check of your composition. Look for distracting elements that reduce eye flow or otherwise cause visual disruption in your composition. Then, try to adjust the framing of your photograph to eliminate these issues.

Get it right in camera.
Some exposures can be tricky. Do your best to get it right in camera. This helps us better understand the nuances of our equipment and how to effectively use it to adjust in-camera exposure. Relying on an attitude of “I’ll fix it in post” restricts our growth as photographers and holds us back from getting the most out of our camera gear.

Experiment with exposures.
Purposely under exposing or over exposing an image can create some interesting creative effects, and dramatically change the nature of a photograph. Not all of these experiments will work, but they do help broaden our creative options.

Plan ahead for inclement weather.
It is a simple matter to look outside or check the weather forecast on a particular day, then decide if we are going to go out with our camera gear. When going on trips or for multiple day photographic excursions it is wise to plan ahead for inclement weather. Bringing a small, waterproof camera or rain sleeves can help ensure that we do not miss photographic opportunities. If your camera gear is weatherproofed, make sure you understand its potential limitations.

Take advantage of technology.
Many cameras have unique features and technology that can allow us to capture photographs in new and interesting ways. Spend time with your camera equipment learning about how to use the technology packed inside.

Use a light, smooth finger motion with your shutter release.
When shooting handheld we need to aware of what kind of motion we are using with our index finger when depressing our shutter release. A hard, jerky movement can cause image blur. This is especially true when attempting to use slower shutter speeds. Practice using a light, smooth finger motion with your shutter release.

Choose auto-focusing points carefully.
In order to give our camera gear the best chance for success it is important to choose auto-focusing points carefully. Placing an auto-focus point on a specific spot of high contrast can help our cameras stay locked on. This can be a key success factor when shooting at slower, handheld shutter speeds.

Brace your camera.
When shooting handheld we need to appreciate that our body is acting as the source of stability for our camera. We need to make sure that we are still and stable, with our elbows typically tucked into our sides, If we can find an additional external support to use like a tree, large rock, or railing… we can further brace our cameras.

Use your knees as natural shock absorbers.
When shooting handheld in a standing position we often lock our knees. This can have the effect of increasing upper body swaying movement, and cause image blur when using slow shutter speeds. Having our knees slightly flexed allows them to act as natural shock absorbers, and can reduce upper body sway.

Monitor your breathing.
For best results when shooting handheld at slower shutter speeds it is important that we monitor our breathing. Practising slow steady breathing will help reduce body tension and the camera shake that it can produce. Depress your shutter release as you are slowing exhaling, this will help avoid upward camera movements that can occur when we inhale. Holding our breath as we depress our shutter release can cause unintended body movements.

Remain calm and focused.
Handheld shot discipline is all about making sure that our camera gear is ready. That we know how to use it to best effect. That we use good camera technique. And, that we remain calm and focused.
Technical Note
Photographs were captured hand-held using camera gear as noted in the EXIF data. Images were produced from RAW files using my standard process.

How you can help keep this site advertising free
My intent is to keep this photography blog advertising free. If you enjoyed this article and/or my website and would like to support my work, you can purchase an eBook, or make a modest $10 donation through PayPal. Both are most appreciated. You can use the Donate button below. Larger donations can be made to tom@tomstirr.com through PayPal.
Word of mouth is the best form of endorsement. If you like our website please let your friends and associates know about our work. Linking to this site or to specific articles is allowed with proper acknowledgement. Reproducing articles, or any of the images contained in them, on another website or in any social media posting is a Copyright infringement.
Article is Copyright 2020 Thomas Stirr. Images are Copyright 2013-2020 Thomas Stirr. All rights reserved. No use, duplication or adaptation of any kind is allowed without written consent. If you see this article reproduced anywhere else it is an unauthorized and illegal use. Posting comments on offending websites and calling out individuals who steal intellectual property is always appreciated!


Excellent review of basic camera craft – something we all need to review at the very least on an annual basis to stay on top of our game.
Glad you enjoyed the article Martin!
Tom