
Readers who enjoy bird photography can attest to the fact that many people go out early in the morning to capture their images. This can be a challenge, especially when using a camera with a smaller sensor, as higher ISO values are often used during this time of day. This article shares a few images and discusses using slow shutter speeds to photograph wild birds handheld.
One of the first things that I should clarify is what I consider a ‘slow shutter speed’ when photographing birds. Since we are typically using a longer focal length lens, a slow handheld shutter speed to me is anything at 1/30th of a second or slower.
The images used in this article are meant to be representative of the results that can be achieved using slow shutter speeds. You will find that some of the backgrounds in the images are less-than-ideal. I had limited time to capture these images as the morning light improved. All of the photographs in this article were captured before 7 AM at the Hendrie Valley Sanctuary.
The Reciprocal Rule.
The ‘reciprocal rule’ in photography advises the shutter speed used should be reciprocal to the effective focal length of the lens. For example, when shooting with a 400 mm lens using a full frame camera a shutter speed of 1/400th would be recommended. That same lens on an APS-C cropped sensor camera would have an effective focal length of 600 mm (i.e. 1.5 X crop factor) so a shutter speed of 1/600th would be suggested. This is a guideline and not a hard and fast rule as a number of factors come into play.
NOTE: Click on images to enlarge.

Distance from subject and its size.
If we check out the EXIF data in the above image we’ll see that it was captured at 1/20th of a second using an effective focal length of 810 mm. This is over 5 stops slower than would be recommended by the reciprocal rule. Using a shutter speed of 1/800 would have resulted in the image being shot at ISO-6400 with a significant loss of dynamic range and colour depth, as well as creating a lot of noise in the photograph. One of the reasons that a slower shutter speed could be used in this photograph was my distance to the subject and its relative size. Simply put, I was fairly close to a large bird.

Camera gear attributes and performance.
Our second sample image was captured at an even slower shutter speed, 1/10th of a second. A few factors contributed to that slow shutter speed. The overall quality and sharpness of the lens used plays a part in being able to shoot at slow shutter speeds, as does the image stabilization/vibration reduction effectiveness of your camera gear. You’ll note in the EXIF data that I used an effective focal length of 481 mm. Using a shorter focal length also makes it possible to shoot at slower shutter speeds. The 1 Nikkor CX 70-300 mm f/4.5-5.6 is an excellent lens in terms of sharpness. It also has excellent vibration reduction capability. All of these factors combined, allowed for a slow shutter speed to be used.

Hand-holding skill level.
The hand-holding skill of a photographer will also directly impact the potential use of slow shutter speeds. It is very important to regularly practise shooting at slow shutter speeds, especially with long focal length lenses. This allows us to not only improve our technique, but also understand the physical limits that each of us has when it comes to the shutter speeds that we can use at various focal lengths.

Shutter release timing.
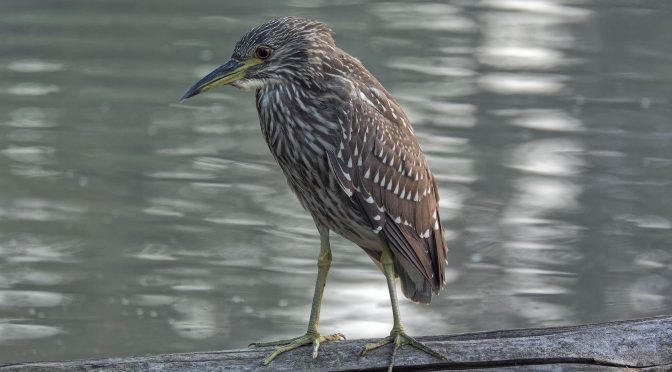
The juvenile night heron in the image above was making periodic movements while perched on the log in the photograph. I had to time my shutter release with periods when the bird became stationary. This will obviously vary by bird species. Smaller birds tend to be more active and jittery than large birds, making them more difficult to photograph at slow shutter speeds. The image above was shot using a shutter speed of 1/30 with an effective focal length of 810 mm, about 5 stops slower than the reciprocal rule would suggest.
Benefits of using slow shutter speeds.
There are two primary benefits to using slow shutter speeds. The first is being able to capture our images at lower ISOs. This allows us to use more of the dynamic range and colour depth available based on the sensor in our camera. It also helps to reduce noise in our images. This effectively extends the shooting range of our camera gear. The second benefit is related to that reduction in image noise – we can spend less time in post processing with our images.
Technical Note:
All photographs were captured hand-held in available light using Nikon 1 gear as per the EXIF data. All images were produced from RAW files using my standard process of DxO PhotoLab, CS6 and the Nik Collection.
Word of mouth is the best form of advertising. If you like our website please let your friends and associates know about our work. Linking to this site or to specific articles is allowed with proper acknowledgement. Reproducing articles or any of the images contained in them on another website is a Copyright infringement.
My intent is to keep this photography blog advertising free. If you enjoyed this article and/or my website and would like to support my work you can purchase an eBook, or make a modest $10 donation through PayPal, both are most appreciated. You can use the Donate button below. Larger donations can be made to tom@tomstirr.com through PayPal.
Article and all images are Copyright 2018 Thomas Stirr. All rights reserved. No use, duplication or adaptation of any kind is allowed without written consent. If you see this article reproduced anywhere else it is an unauthorized and illegal use. Posting comments on offending web sites and calling out individuals who steal intellectual property is always appreciated!
As usual great shots Tom. I too use the same setup and am working very hard on my handheld shots. Love the cx 70-300.
Have you given up on using the J5 for birds?
Hi Jack,
Whenever I’m photographing birds-in-flight I use a V3 and recently paired up with a V2. The images in this article were taken early morning on a “bird-in-flight” day. I still regularly shoot static birds, butterflies etc. with a J5.
Tom