
A number of days ago I decided to take a break from some client video work and a couple of eBook projects on which I’ve been working. I ended up on the shores of Lake Ontario on a cold morning, composing some photographs. After spending a bit of time processing a few of those images I thought I’d share some quick thoughts about working with dull winter scenes in post.
A couple of readers have contacted me over the past number of months, commenting that it would be helpful if I could show a comparison of jpegs made from unprocessed RAW files (rather than out-of-camera jpegs) with some finished images produced from the same original RAW files. So, that’s what follows in this short article.
NOTE: Click on images to enlarge.

The image above was one of the first ones that I captured during my morning outing. It appeared to have a bit of promise with the hints of colour in the sky and on the surface of the water.

I made some simple adjustments with highlights and shadows to help to bring out more details in the image. A quick adjustment in the curves function in CS6 brought out more of the colour contrast in the scene, and bumping brightness a bit livened up the image.

The unprocessed image above definitely needed some work in terms of perspective control as the shaping of the gazebo was distracting.

I used the perspective control adjustment in OpticsPro 11, tweaked highlights and shadows (double bumping both), increased colour contrast with the curves adjustment in CS6, used some micro-contrast and structure to give the details better definition, and finished the image off by increasing the brightness.

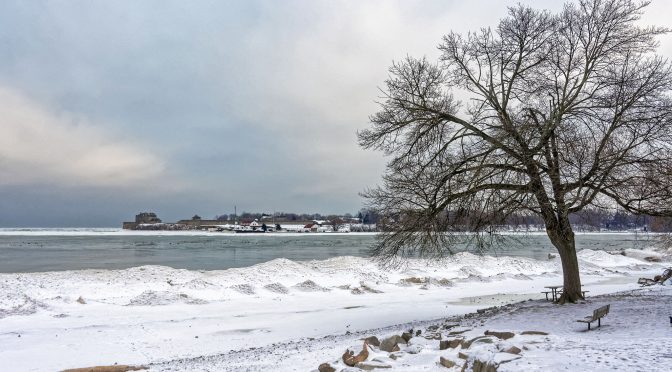
The large tree and adjacent picnic table caught my eye. I also noticed some increasing colour in the sky.

I did similar adjustments to this image in terms of adjusting highlights and shadows, increasing colour contrast with a curve adjustment, and adjusting brightness. One additional thing that I did with this image was to increase blue saturation.
While none of the photographs were ‘keepers’ in terms of images to enlarge, they did end up being good reminders of some of the simple things that can be done when working with dull winter scenes in post.
Technical Note:
All photographs were captured hand-held using Nikon 1 gear as noted in the EXIF data. All images were produced from RAW files using my standard process of DxO OpticsPro 11, CS6 and the Nik Collection.
My intent is to keep this photography blog advertising free. If you enjoyed this article and/or my website and would like to support my work you can purchase an eBook, or make a modest $10 donation through PayPal, both are most appreciated. You can use the Donate button below. Larger donations can be made to tom@tomstirr.com through PayPal.
Article and images Copyright 2018 Thomas Stirr. All rights reserved. No use, duplication or adaptation of any kind is allowed without written consent. If you see this article reproduced anywhere else it is an unauthorized and illegal use. Posting comments on offending web sites and calling out individuals who steal intellectual property is always appreciated!
Hi Tom
I’m semi retired now but still do some real estate work using my 1 Nikon 6.7-13mm lens. I usually correct perspective in CS6 at raw level. I notice in your post you used Optics pro 11 on the gazebo for this purpose. I have not tried this software. Is there a big advantage over CS6?
Until recently, I have not been tempted to upgrade my V1 to a later model body but after seeing your superb files, I ordered a J5 body. It arrived yesterday. My only reservation was the lack of a EVF but I think the flip screen will more than make up for that, as I do a lot of tripod work. The most impressive thing is the user interface. If only the V1 had been designed with a UI like that, I’m sure the Nikon 1 future would be very different as it was the UI that was criticized most by reviewers.
I have only recently become a subscriber but have enjoyed your work and tutorials for years.
Thank you.
Richard
Hi Richard,
I like how my Nikon 1 files respond to OpticsPro, especially the PRIME noise reduction function. I use OpticsPro as my main RAW processor but don’t do all of my adjustments in that program as I like some of the tools in CS6 and also the Nik Collection. In terms of the perspective control in OpticsPro I find it very fast and easy to use. I also like the automatic corrections that OpticsPro does, and I use the Spot Weighted Smart Lighting with all of my files.
I export a DNG file from OpticsPro into CS6 and do some additional corrections in that program (basic sliders and well as Curves, Levels, Brightness). I typically finish off my files with the Nik Collection. I use these three programs in combination as each of them has some specific tools that I quite like. At the end of the day this approach allows me to get the look I want with my files quite quickly.
Tom