

Sometimes those of us with small sensor cameras capture images at high ISO values out of necessity. As soon as we press our shutter release we wonder if there will be much we can do in post to overcome the impact of using a high ISO. This article shares three examples of working with small sensor ISO-10000 images in post. It is good to remember that any time we do work with RAW files it is ‘to taste’. You may, or may not, like the results that are illustrated in this article. At the end of the article, I will be sharing some basic guidelines of the approach I used with these photographs.
All of the images in this article were captured today at Bird Kingdom in Niagara Falls, Canada. One of my objectives was to purposely capture some high ISO images with the Olympus OM-D E-M1X to see what would happen. Let’s look at the first set of images.
NOTE: Click on images to enlarge.

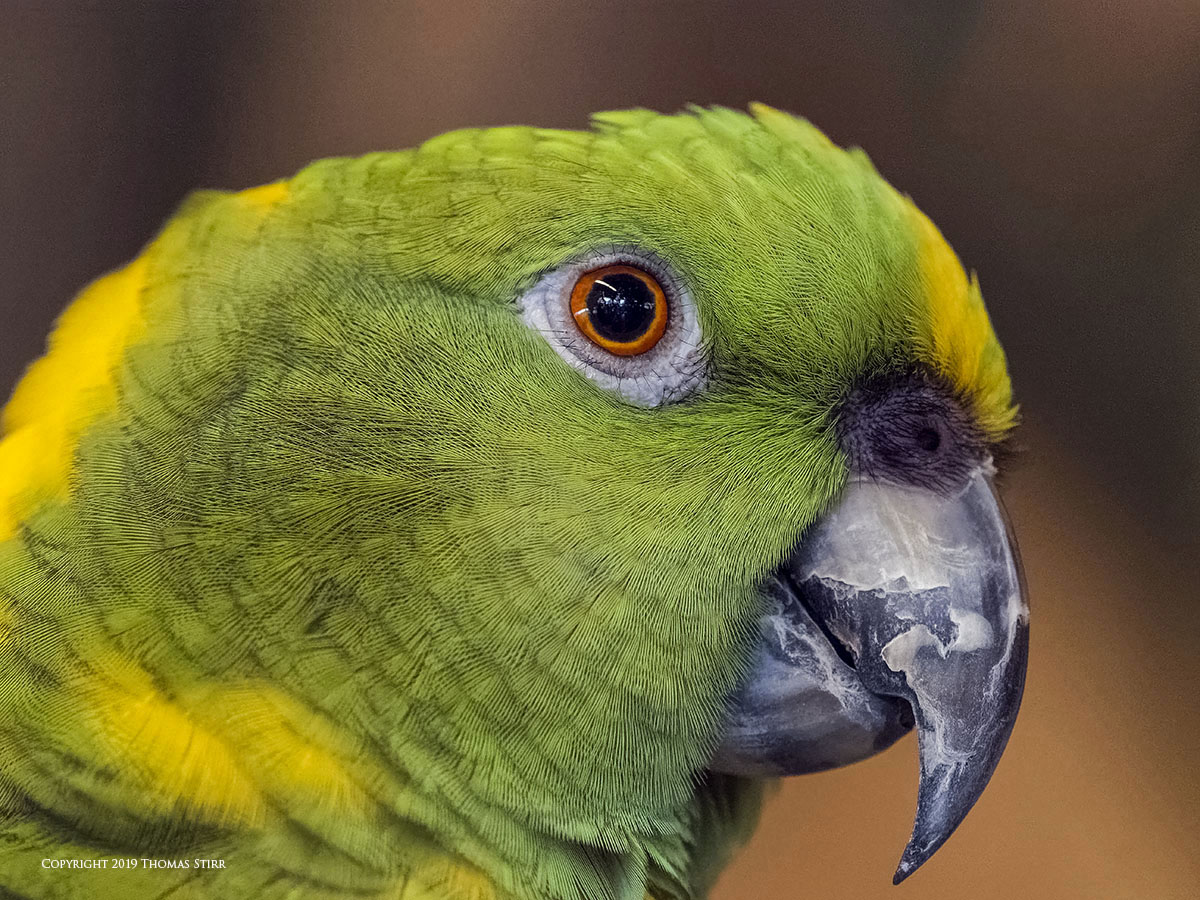
In the straight out-of-camera (SOOC) jpeg above we can see that the E-M1X did a reasonable job at such a high ISO. While the visible noise has been controlled there was a price to pay. The noise suppression has smoothed out a lot of the feather details and lost quite a bit of definition around the bird’s eye. In addition a light blue colour on the bird’s forehead is quite noticeable and looks out of place. Now let’s have a look at the same image, but this time processed from the corresponding RAW file.

One of the first things that we can see in the image produced from the RAW file is a lot more details around the bird’s eye and on its beak. While still not great, we can also see more feather definition on the lower portion of the bird’s neck. The former blue shading on the bird’s forehead is now under control, with a better overall colour match throughout the bird’s plumage.
All of these changes were accomplished with reasonably simple adjustments in post done with the three programs that I use: DxO PhotoLab 2, CS6 and the Nik Collection.
Over the years many readers have asked me why I use a combination of programs. I prefer using this combination as it allows me to make a series of very modest corrections in three different platforms to get the results I desire… rather than having to be more aggressive in just one program. Its not right or wrong… just a different journey to my destination.
Let’s have a look at our second image set.

We can see a lot of smearing of the feather details on the bird’s cheek and an overall lack of definition around the eye and beak areas.
With the image processed from the RAW file we can see more feather details on the cheek and sharper definition around the eye and beak of the bird. We can also see more tonal variance with the plumage colours.
Let’s have a look at our third set of images.

In our final straight out-of-camera jpeg we can see a significant loss of details on the side of the bird’s face and no definition of the black feathers on its neck. As with the first two SOOC jpegs there is a flat, dull look to the black areas of the image, such as the bird’s beak and claws.

In this final example we can see some obvious differences in terms of significantly more details on the bird’s cheek, around its eye and on its beak. We can now see some details in the black feathers on its neck. Another significant change is the colour of the background. It has gone from brown hues to grey. So… let’s discuss, in general terms, how the RAW files were adjusted in post to create the images you see in this article.
Step 1:
Run the RAW file through a custom preset in DxO PhotoLab 2. This makes some basic adjustments to Highlights, Midtones and Shadows, and applies PRIME noise reduction. The basic intent here is to ‘thicken up’ the image to provide more with which to work.
Step 2:
Identify the most critical area of the image and use the DxO Smart Lighting Spot Weighted tool to adjust the dynamic range in that critical area. This is an important step to bring out as much detail in the critical area of the image as possible.
Step 3:
Begin the process to increase perceived sharpness and definition by applying Microcontrast, and Lens Sharpness adjustments with Global and Details, in DxO PhotoLab 2. Export a DNG file into CS6. Steps 4 and 5 also aid in the creation of sharpness and definition in an image.
Step 4:
Make minor adjustments as necessary to Highlights, Shadows, Whites, Blacks and Clarity in CS6. Open up Viveza 2 in the Nik Collection.
Step 5:
Apply minor adjustments to Contrast and Structure as needed.
Step 6:
Adjust hues in CS6 to help bring out specific details, or to better colour balance the image. For example, in the third set of images I significantly reduced the red hue to help bring out more of the black area details. This is why the background changed colour. In the first image I reduced blue and cyan hues.
Step 7:
Use Levels and Brightness in CS6 as needed to complete the image.
These 7 steps took 4-5 minutes per RAW file, including computer processing time.
Working with small sensor ISO-10000 images (or higher) in post can be a challenge. These 7 steps will not ‘save’ every image… but they may help to increase the usability of some of your photographs. You very likely do not use the same software programs that I do. Consider the general intent of each step noted, then try to replicate them with the software that you use. You may do a number of spot adjustments with your images such as dodging and burning. I very seldom use these types of adjustments.
Technical Note:
All photographs in this article were captured using camera gear as noted in the EXIF data. All of the photographs displayed in this article were either straight out-of-camera jpegs, or produced from RAW files using my standard process. All photographs are displayed as 100% captures.
Use of Olympus Loaner Equipment
All of the photographs in this article were captured using Olympus Loaner Gear which was supplied by Olympus Americas Inc. on a no-charge basis. We are under no obligation what-so-ever to Olympus Americas Inc. in terms of our use of this loaner Olympus camera equipment. There is no expectation or agreement of any kind with Olympus Americas Inc. that we will create and share with readers any images, articles or videos, or on what that content may be.
Word of mouth is the best form of advertising. If you like our website please let your friends and associates know about our work. Linking to this site or to specific articles is allowed with proper acknowledgement. Reproducing articles, or any of the images contained in them, on another website or in any social media posting is a Copyright infringement.
My intent is to keep this photography blog advertising free. If you enjoyed this article and/or my website and would like to support my work, you can purchase an eBook, or make a modest $10 donation through PayPal. Both are most appreciated. You can use the Donate button below. Larger donations can be made to tom@tomstirr.com through PayPal.
Article and all images are Copyright 2019 Thomas Stirr. All rights reserved. No use, duplication or adaptation of any kind is allowed without written consent. If you see this article reproduced anywhere else it is an unauthorized and illegal use. Posting comments on offending websites and calling out individuals who steal intellectual property is always appreciated!
Hi Tom,
My best buddy who’s a micro 4/3 user and I were discussing the high-ISO capabilities of Olympus vs Panasonic/Lumix and I have to agree, in terms of high ISO IQ, Oly is hands on the winner over Lumix. Your images speak for themselves. Also, thanks for selflessly sharing your post-processing workflow!
Oggie
http://www.lagalog.com
Hi Oggie,
I only had a very brief experience with Panasonic about 4 years ago that only lasted about 10 days before I returned gear for a small restocking charge. I just didn’t like using it at all… c’est la vie!
The ISO-10000 images in the article look ‘ok’. They ended up being much more time consuming in post than I would have liked so I wouldn’t say ISO-10000 is a practical setting at all for the E-M1X.
I am working on another article that specifically will talk about high ISO performance of the E-M1X… I’m still going through some photos I captured yesterday so it is still far too early to tell what my assessment will be.
Tom