The second article in our Photography Fundamentals series will briefly discuss aperture.
What is aperture?
Just like the pupil in our eye operates, think of aperture as an adjustment that changes the size of the hole in a lens. This allows different levels of light to hit the sensor in your digital camera.
What does ‘opening up’ a lens mean?
In a very dark room the pupil in your eye will expand to let in more light. It is the same thing when you have an adjustable lens on your camera and you are trying to take a photograph in a dark room. You can ‘open up’ the lens, i.e. use a lower f-stop number (f/1.8 for example), to let in more light.
What does ‘stopping down’ a lens mean?
When you are outside in extremely bright conditions the pupil in your eye will get smaller to cut down on the amount of light coming into your eye, otherwise you could be blinded by the bright light. You can do the exact same thing with the lens on your camera by ‘stopping down’ the lens, i.e. using a higher f-stop number (f11 for example), to reduce the amount of light that is getting through to the sensor in your camera.
What is a neutral density filter?
Sometimes you may find yourself outside in conditions that are so bright and sunny that you may choose to wear sunglasses. Or, you may need special protection for your eyes to protect against extremely bright light in a work environment – welding for example.
From time to time your camera may also need sunglasses, and when it does this takes the form of a neutral density filter. These come in various types of configurations but regardless of the form that the filter takes the intent is exactly the same – to cut down on the amount of light that is getting through to the sensor of your camera.
The aperture you select affects depth-of-field
When you change the aperture setting on the lens of your digital camera it impacts how much of your photograph will be in focus – or the depth-of-field. If you ‘open up’ the lens, less of your photograph will be in focus, and if you ‘stop down’ your lens it will cause more of your image to be in focus. Let’s look at some simple test samples.
NOTE: Click on images to enlarge.

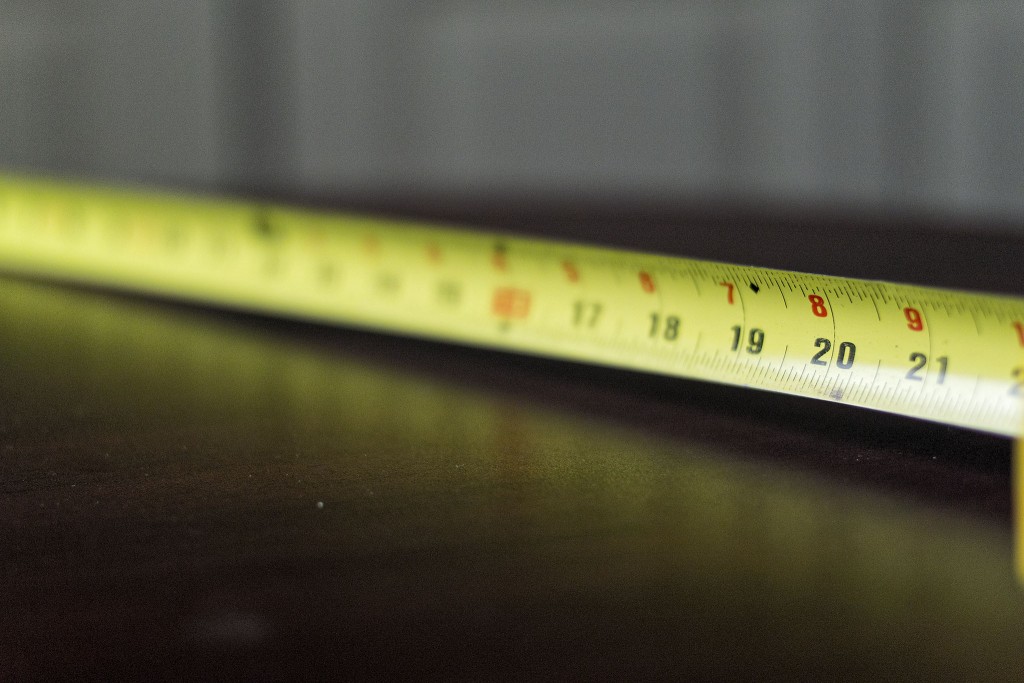
You’ll see in this first test image that very little of it is in focus. That’s because the lens with which it was taken was ‘opened up’ to its widest aperture which in this case was f/1.2. I used single point auto-focus to take this image and had it positioned at about the ’20-inch’ mark on the tape measure. Let’s see what happens when the lens is stopped down to f/2.8.

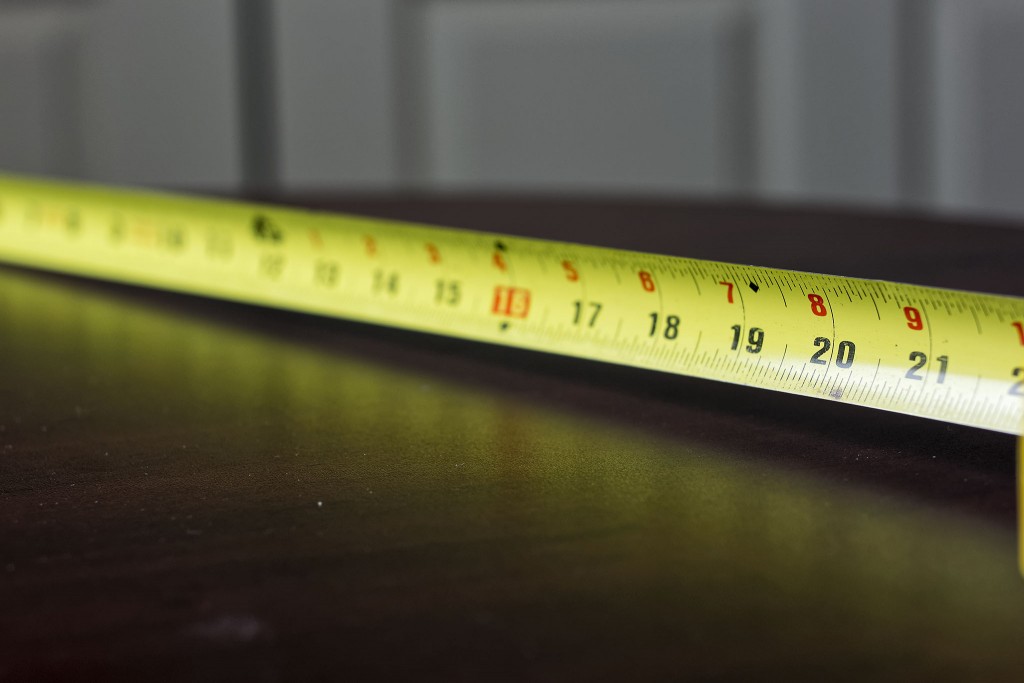
You can see that more of the numbers along the tape measure are beginning to be in focus as is the background in the image. Now, let’s stop the lens down further to see what happens at f/5.6.

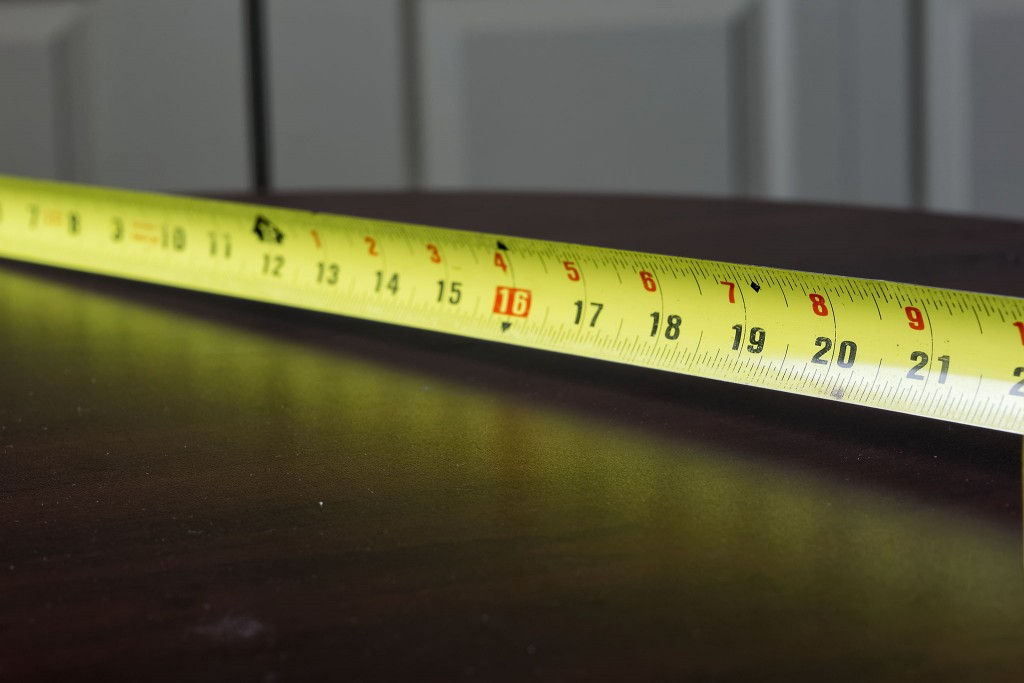
Once again you can see that an increasing amount of the subject is now in focus and more of the background as well. Let’s look at one final test image. This one was taken at f/11.

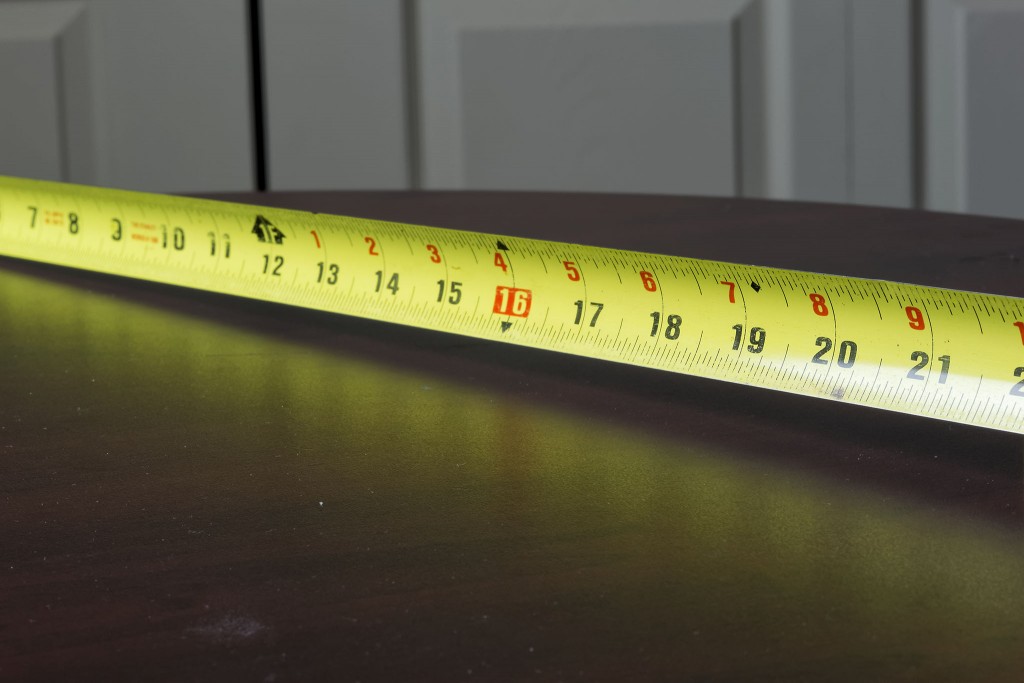
Not only are almost all of the numbers on the tape measure easily readable but you can also see much more of the background in the image is also in focus.
Aperture is a key creative decision
As you can see from the simple test images your choice of aperture plays a big role in how your final image is going to look in terms of how much of it is in focus.
If were shooting a landscape scene, you may want to ‘stop down’ your lens to get more in focus – or increase the depth-of-field. On the other hand if you were creating an image of a solitary flower you may want to have the background out of focus so the flower would stand out more. In this case you would ‘open up’ the lens to achieve that effect.
Your choice of lens and distance between your camera and the main subject of your photograph, as well as the distance between the subject and the background in the image will also have an effect on how much of the main subject is in focus.
How aperture affects exposure
Aperture is one third of the exposure triangle. The other two are shutter speed and ISO sensitivity. In an earlier article ISO sensitivity was discussed and you can review that subject if needed.
There are specific apertures that constitute one ‘stop of light’ difference between each other. You will need to either write these down or commit them to memory so you will always be aware of how you are potentially affecting overall image exposure when you choose to change the aperture setting on your lens.
Each of these aperture settings have 1 ‘stop of light’ between them:
f/1.0
f/1.4
f/2.0
f/2.8
f/4.0
f/5.6
f/8.0
f/11
f/16
f/22
f/32
Not all lenses will have this range of aperture settings available. Some may start at f/1.8 or higher and end at f/16. This depends on the type of lens and its design.
Let’s assume that you were planning to take a landscape image and a properly exposed image could be obtained with the following camera settings: f/2.8, ISO-160, 1/640 of a second.
If you have read the earlier article on ISO Sensitivity you would likely choose to keep the ISO sensitivity setting at ISO-160 to retain as much dynamic range and colour depth as possible. Additionally, you would likely want a lot more in focus than would be possible with an aperture setting of f/2.8. As a result you may choose to stop down your lens to f/11 to achieve more depth-of-field.
Since going from f/2.8 to f/11 is four ‘stops of light’ your shutter speed would need to be 4 stops of light slower for your landscape scene to be properly exposed. That means you would need to go from 1/640 to 1/40 of a second (1/640 divided by 2 = 1/320 divided by 2 = 1/160 divided by 2 = 1/80 divided by 2 = 1/40). So, your final camera settings would be f/11, ISO-160, 1/40 of a second. This would allow the equivalent amount of light as the original settings, therefore producing an identical exposure, while dramatically increasing the depth-of-field.
My intent is to keep this photography blog advertising free. If you enjoyed this article and/or my website and would like to make a modest $10 donation through PayPal to support my work it would be most appreciated. You can use the Donate button below. Larger donations can be made to tom@tomstirr.com through PayPal.
Article Copyright Thomas Stirr. All rights reserved. No use, duplication of any kind, or adaptation is allowed without written consent.


You’ve shown the effect on depth of field by varying the aperture. Could you, in a simple to explain set of pictures, the effect of diffraction as one goes from f11 to f32? Many say you need to watch out and not go beyond f11 (or f16). Other go right ahead and place their setting on f22 or smaller aperture and not think twice about the effects of diffraction. Is it worth worrying about, and how can one “see” the effect of stopping down too much?
Hi wei,
Thanks very much for your suggestion…it certainly is a good one. The effects of diffraction will vary based on the pixel density of the sensor in the camera being used. As a result I kept my aperture to a maximum of f/11 and I normally never shot beyond f/8 when I was shooting with a D800. I now shoot with Nikon 1 gear exclusively and diffraction starts to become noticeable by f/8 so I normally shoot at a maximum of f/5.6. Depending on what a photographer has with them at any given time it still may be a good decision to stop their lens down and get diffraction setting in rather than missing the shot entirely. This is sometimes the case when trying to create a ‘smooth water’ waterfall image without the use of a neutral density filter. Your suggestion is something I will need to ponder to figure out an appropriate way to address it. Thanks again!
Tom
Hi wei,
I just published an article on diffraction.
Tom