

Often when we are creating images, especially landscapes, we can get so focused on the main subject that we forget to think about incorporating a foreground element to help add depth and drama to our scene. There are a number of different approaches we can use. In this short article I’ll be illustrating three simple and effective ways you can incorporate foreground elements into your images. The first is something that I like to call a ‘bottom band’ during my landscape seminars.
(NOTE: click on images to enlarge them)

A ‘bottom band’ can be any kind of homogeneous grouping of plants, rocks, or man-made structure that sweeps across the bottom of our image. A ‘bottom band’ creates a base for the main subject in our image and forces the viewer’s eye to rise over it, and in doing so creates more depth to the image. Here are a couple of additional examples of ‘bottom bands’.


Another approach is the ‘reveal’. This is commonly done by using foreground elements on either side of the frame to create the feeling of a door or window through which the viewer must pass in order to see the main subject.


A ‘reveal’ can also be created by using only one foreground element, provided it is sufficiently large. These can be very effective if also supported by a strong leading line which takes the viewer’s eye deeper into the composition. In the following image the reveal is created by the green foliage on the right hand side of the image and the bridge entering the photo on the left serves as a leading line to draw the viewer further into the composition.

The large rock that fills the left-hand side of the frame creates the reveal in the next image. The weathered, dead tree forms a leading line to connect the viewer to the other elements in the image.

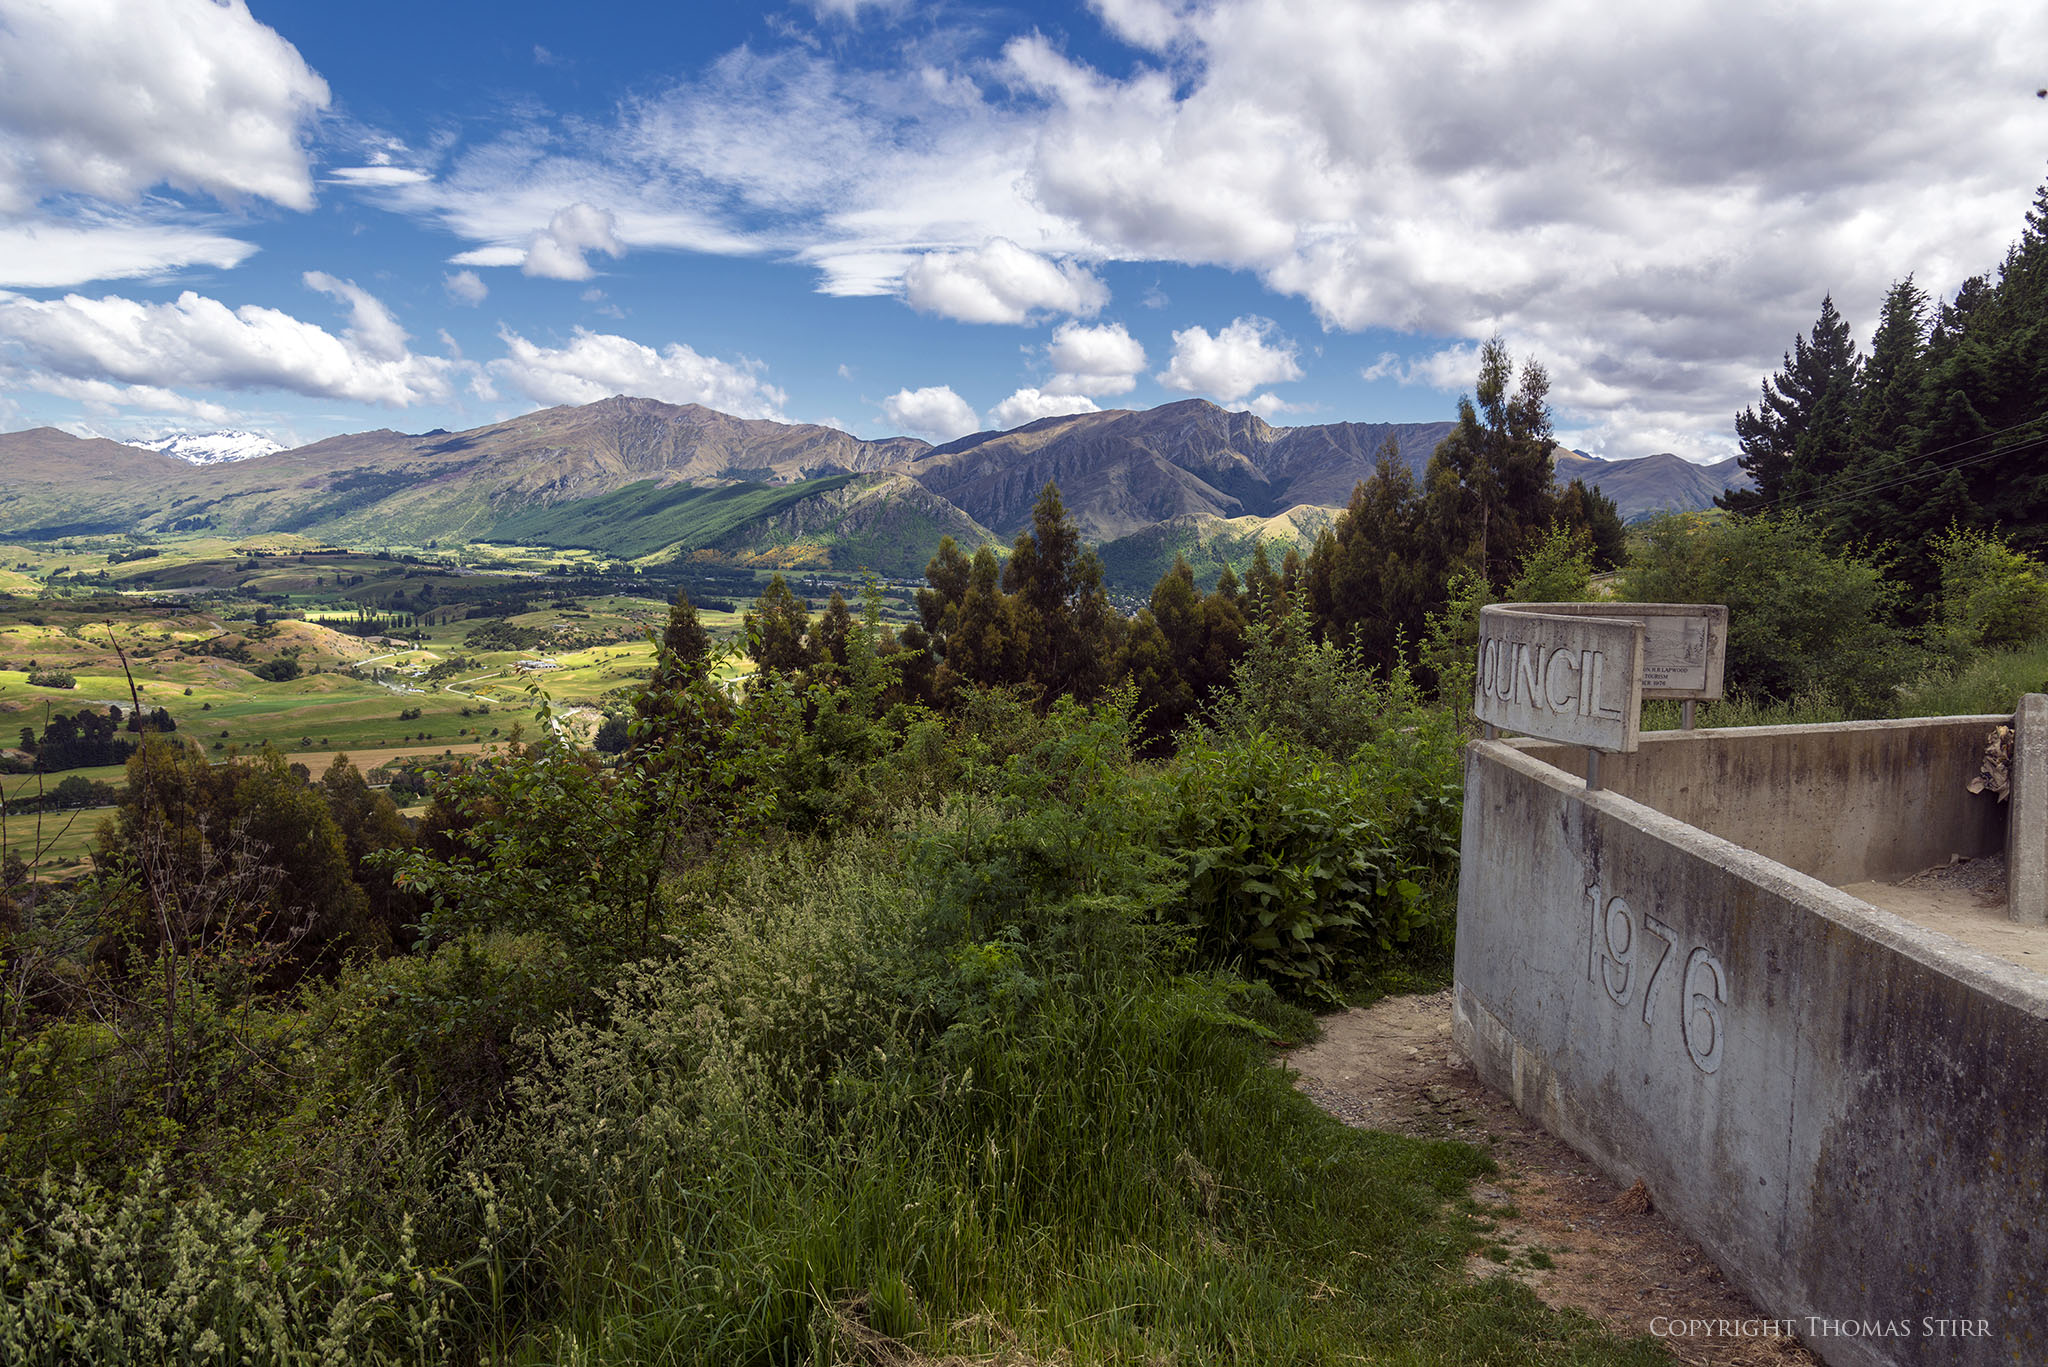
The final approach is one I refer to as the ‘corner anchor’. This can be any large element that resides in a corner of your image. Again, it can be made-made or natural. A ‘corner anchor’ can serve to create size perspective, and at times may even represent the main subject of your photograph as in the image below. You will also notice a strong leading line that serves to draw the viewer further into the image, and the splashes of bright blue on either side of the stature help to balance it visually.

Some corner anchors can be dramatic and dominate an image. In this next example the corner anchor forces the viewer’s eye off into the distance where the blue sky offers visual relief.

Some corner anchors can do dual service and also act as a strong leading line for an image as in this final example.
If you are looking to add more depth to some of your images try experimenting with some foreground elements and using them as a ‘bottom band’, a ‘reveal’, or as a ‘corner anchor’.
My intent is to keep this photography blog advertising free. If you enjoyed this article and/or my website and would like to make a modest $10 donation through PayPal to support my work it would be most appreciated. You can use the Donate button below. Larger donations can be made to tom@tomstirr.com through PayPal.
Article and all images Copyright 2014, Thomas Stirr. All rights reserved. No use, reproduction or duplication including electronic is allowed without written consent.