

As a handheld photographer, shooting macro with a 2X teleconverter was something that I had never attempted, or even considered, in the past. That all changed when we purchased the M.Zuiko 90 mm f/3.5 PRO IS macro lens.
NOTE: Click on images to enlarge. If you would like to view this article in a range of other languages click on the Canadian flag in the upper right corner.
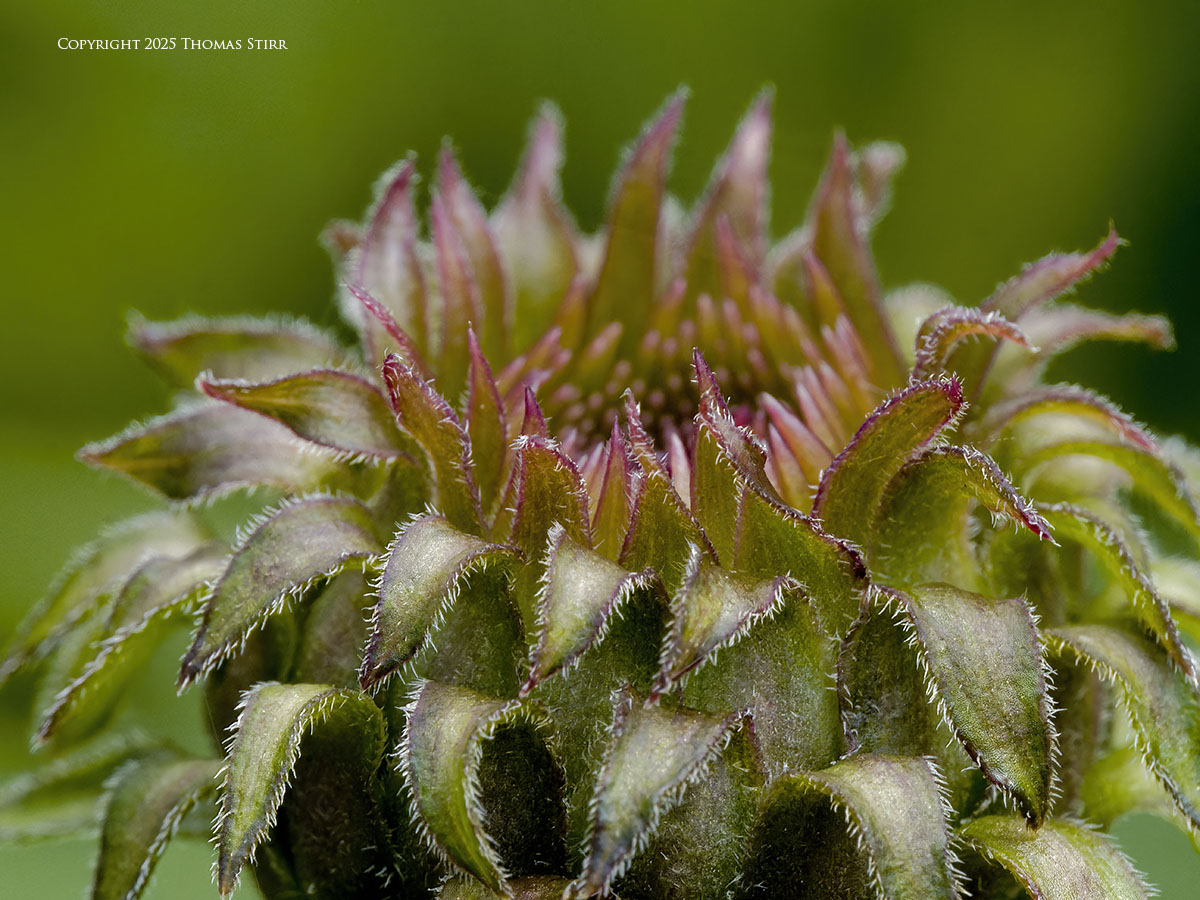
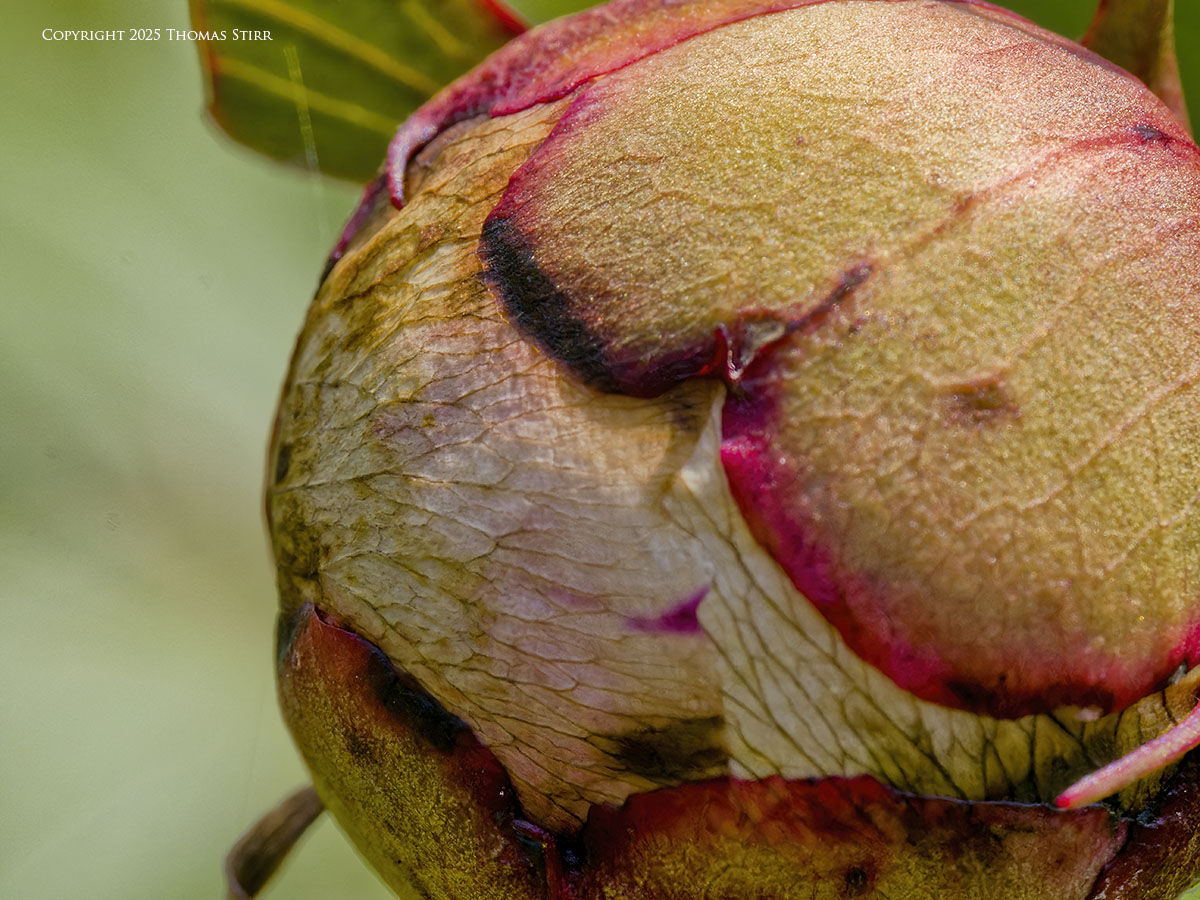
Being able to do handheld macro photography with an equivalent field-of-view of 360 mm is a unique experience… but one that may not be fully appreciated when photographing blossoms.
Doing macro photography of insects is another matter, as getting in too close to a subject may cause it to flee. Having the option of putting a bit more distance between one’s camera and a skittish subject has an obvious benefit.
As we know, the closer we get to a subject, the shallower our depth of field becomes. With macro photography our depth-of-field can be extremely shallow. This is one of the main reasons why many macro photographers use tripod and rail systems to capture multiple images using varying focusing points. They then combine their set of images in post using focus stacking software.
If you examine the EXIF data on the images in this article you’ll see that the vast majority of them were captured with my M.Zuiko 90 mm f/3.5 PRO IS lens fully stopped down to f/22.
Like many photographers I was told never to fully stop a lens down to f/22, fearing softness in images due to diffraction. This was of particular concern when using smaller sensor cameras.
Well… with over a year of experience under my belt using my M.Zuiko 90 mm macro, I now have no hesitation stopping this lens down to f/22 whenever needed. I also have no hesitation shooting my E-M1X up to ISO-6400 when doing macro photography with this lens.
Every photographer has their own approach to their work so I’m not suggesting that anyone follow what I do. The objective of this article is simply to feature a wide assortment of handheld macro images that were all captured using the M.Zuiko MC-20 2X teleconverter.
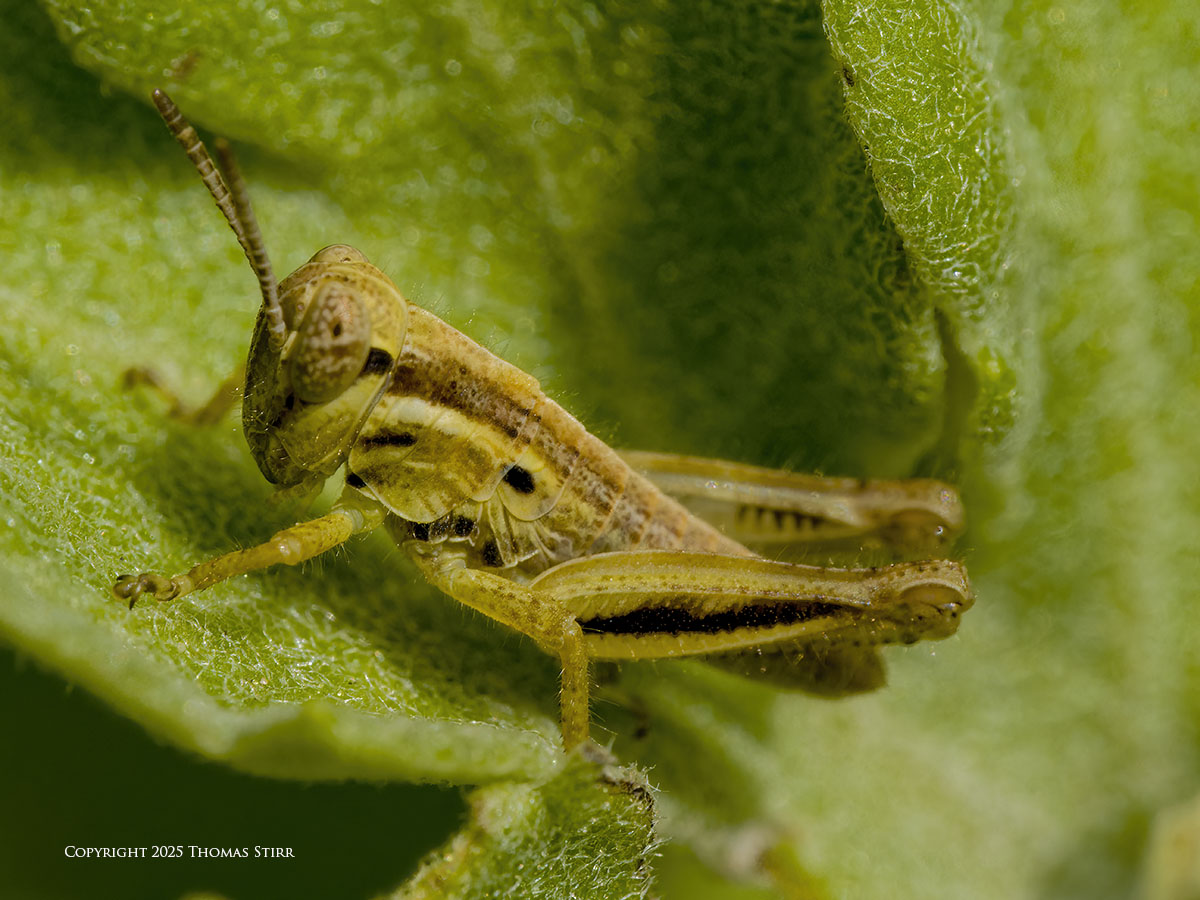
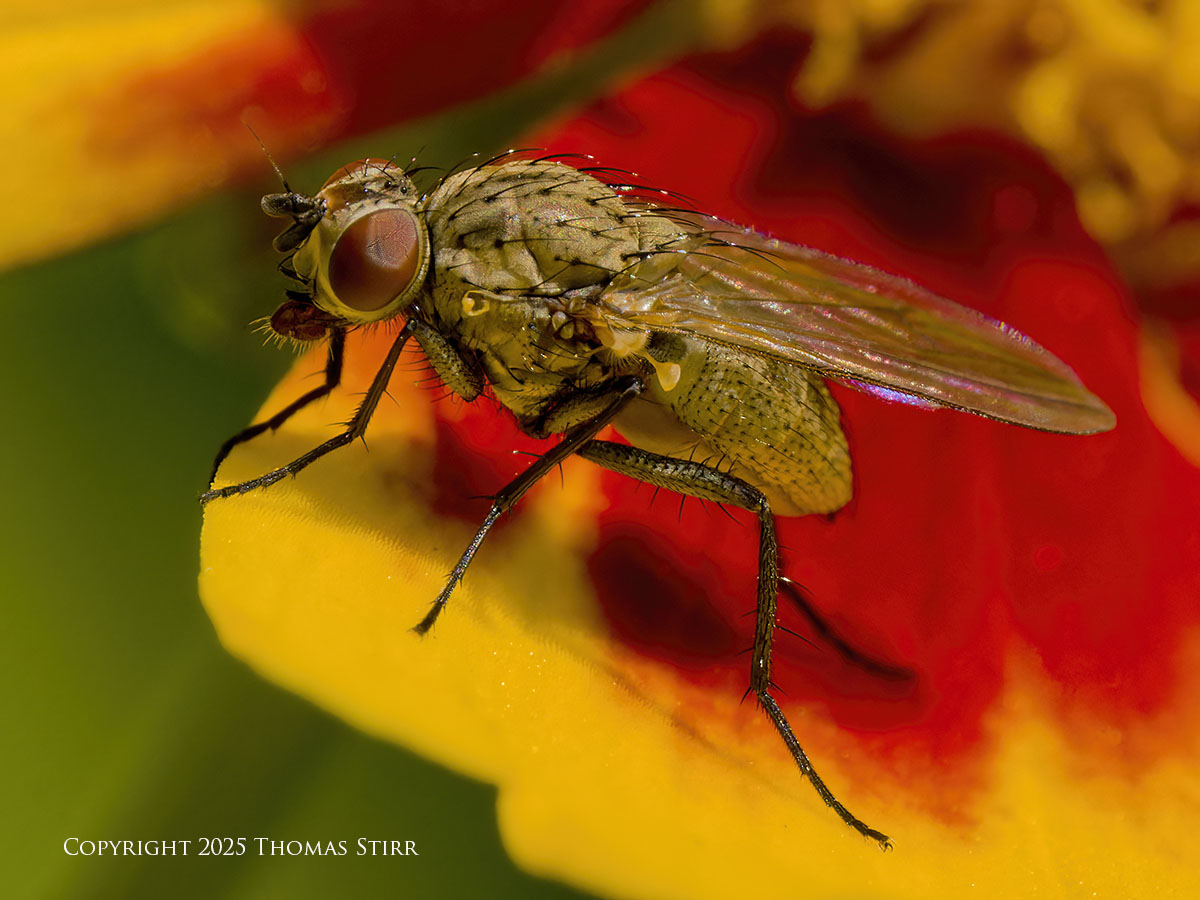
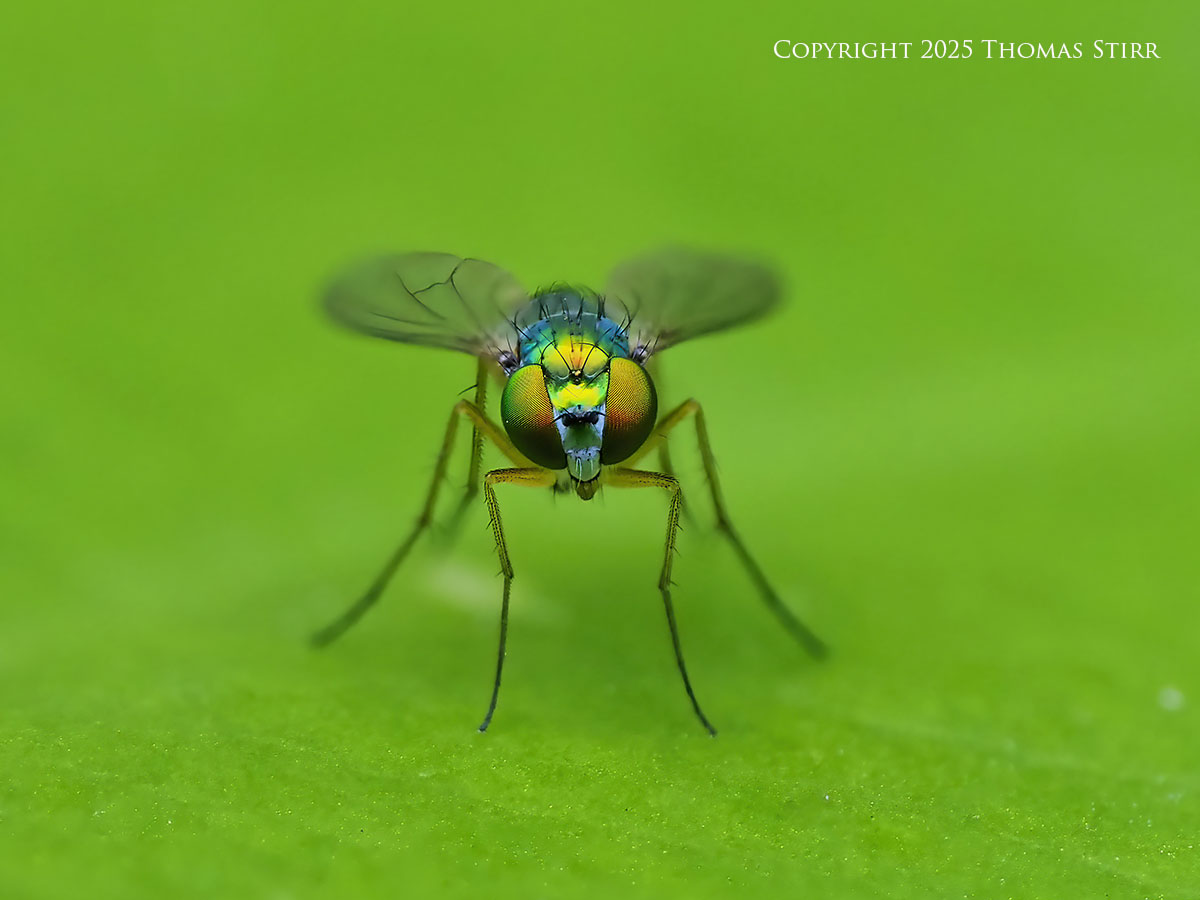
From a creative standpoint some folks like to have a small portion of their macro subject in focus, while other photographers want more depth-of-field. One approach isn’t better than another… they’re just different. As we can see in the image above, using f/22 when shooting directly downward on a subject can help reveal details along the length of the subject’s body.
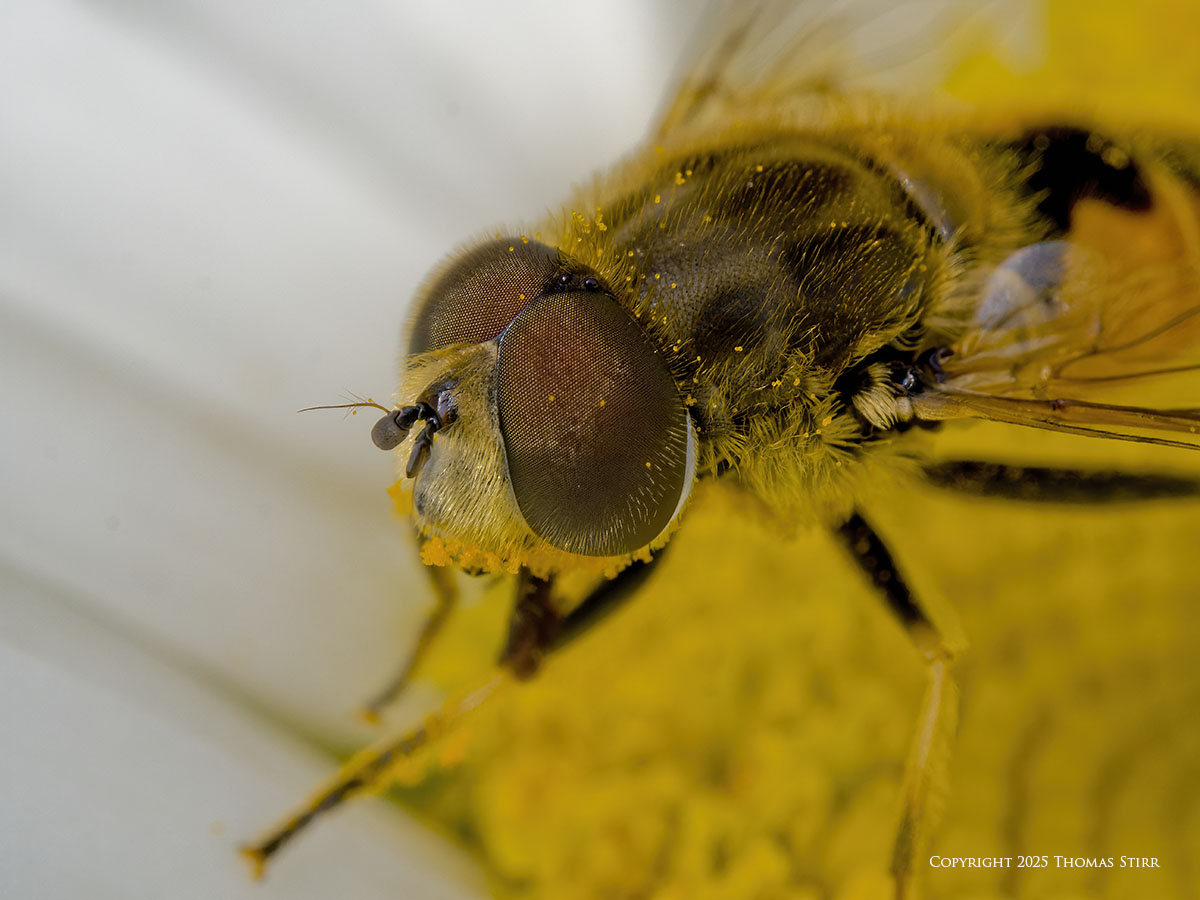
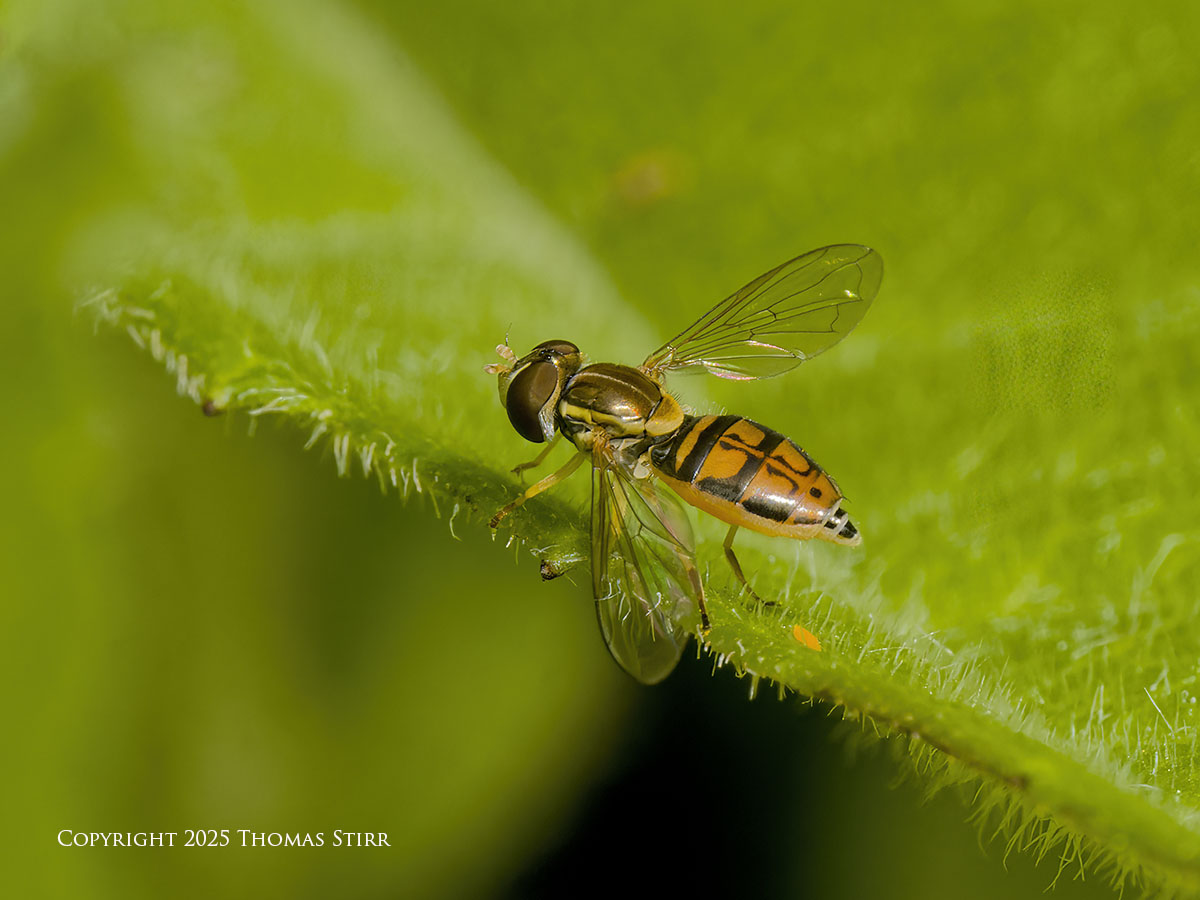
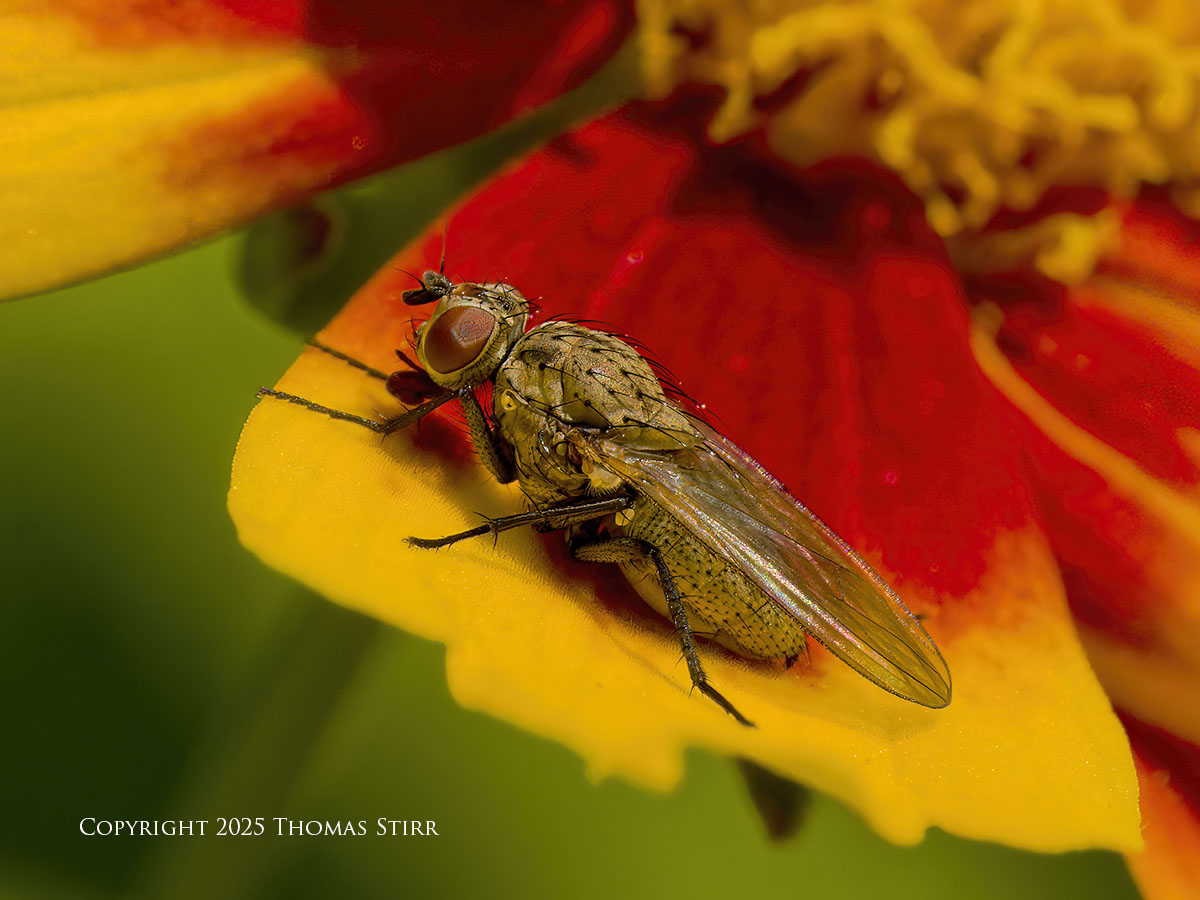
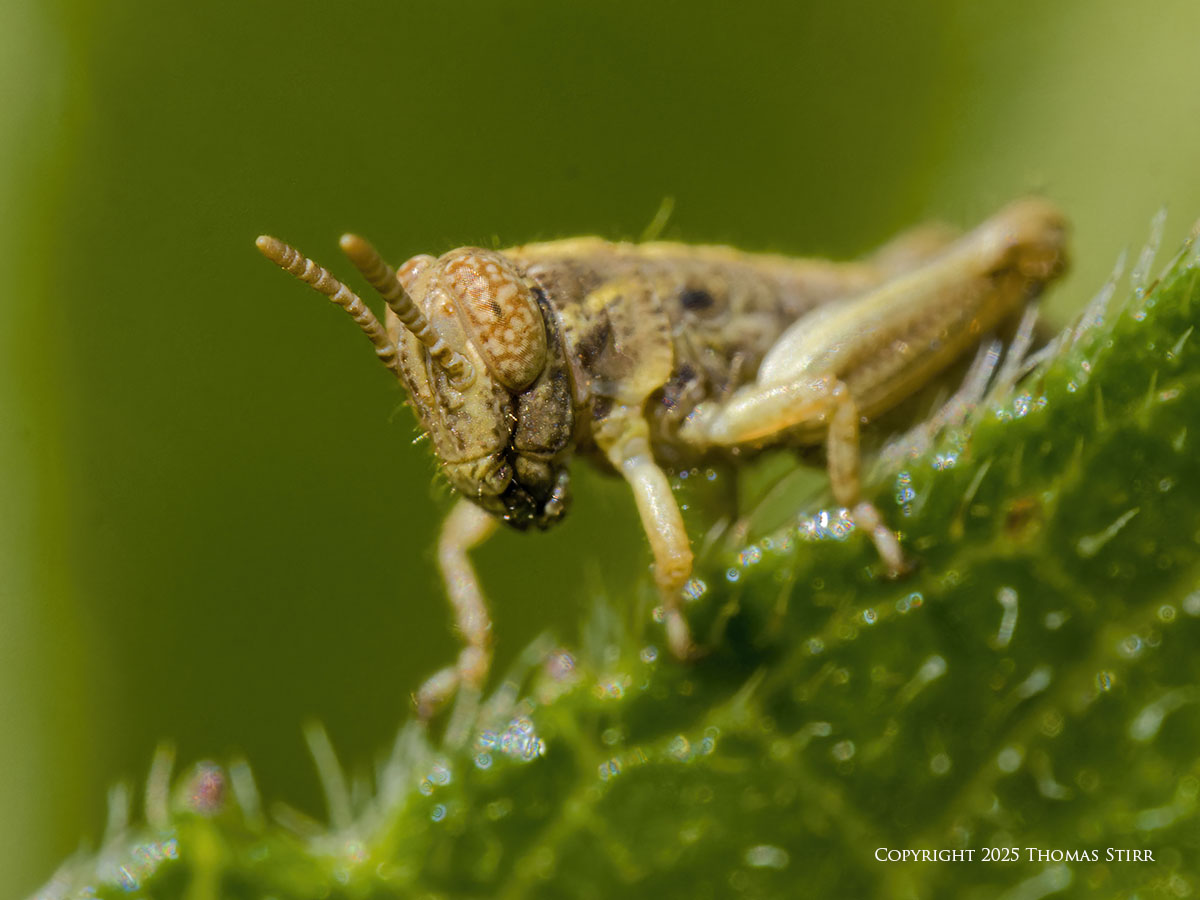
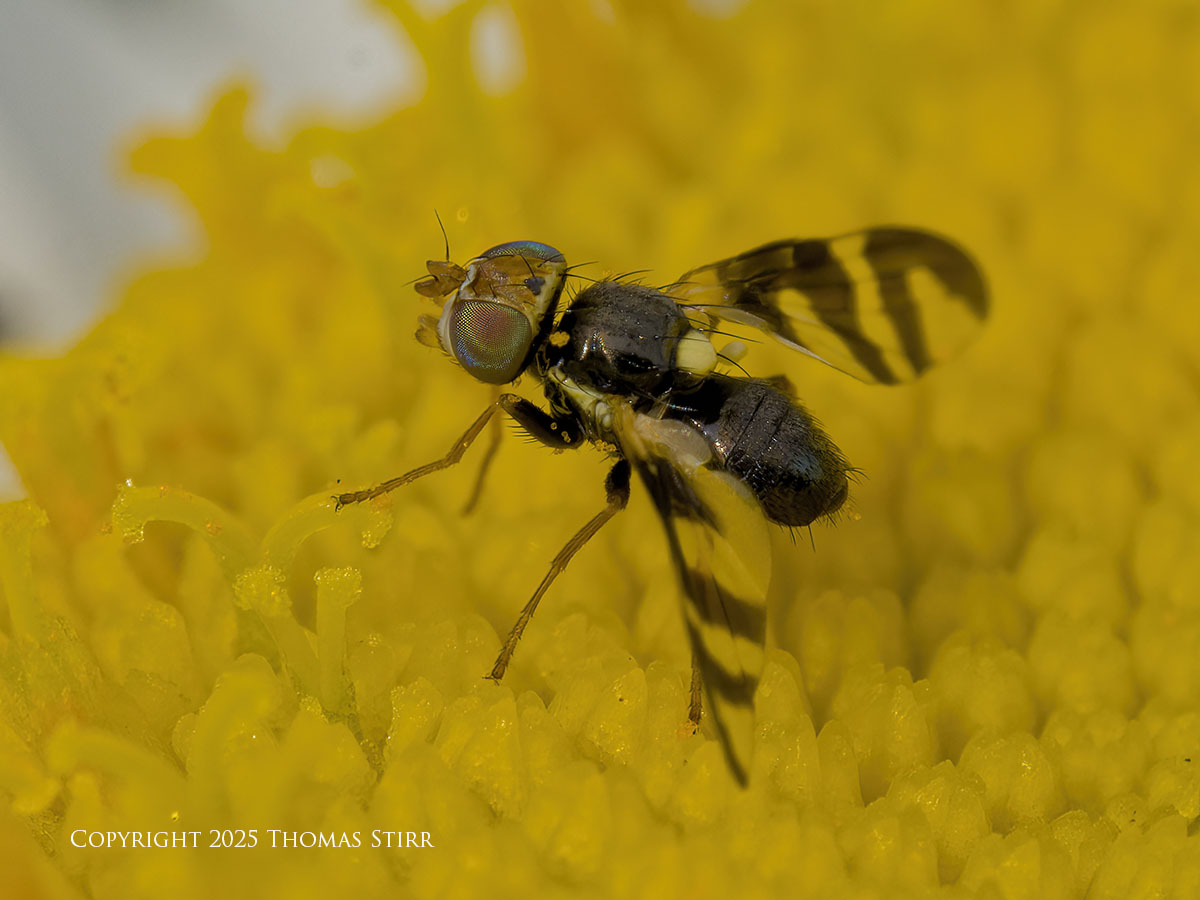
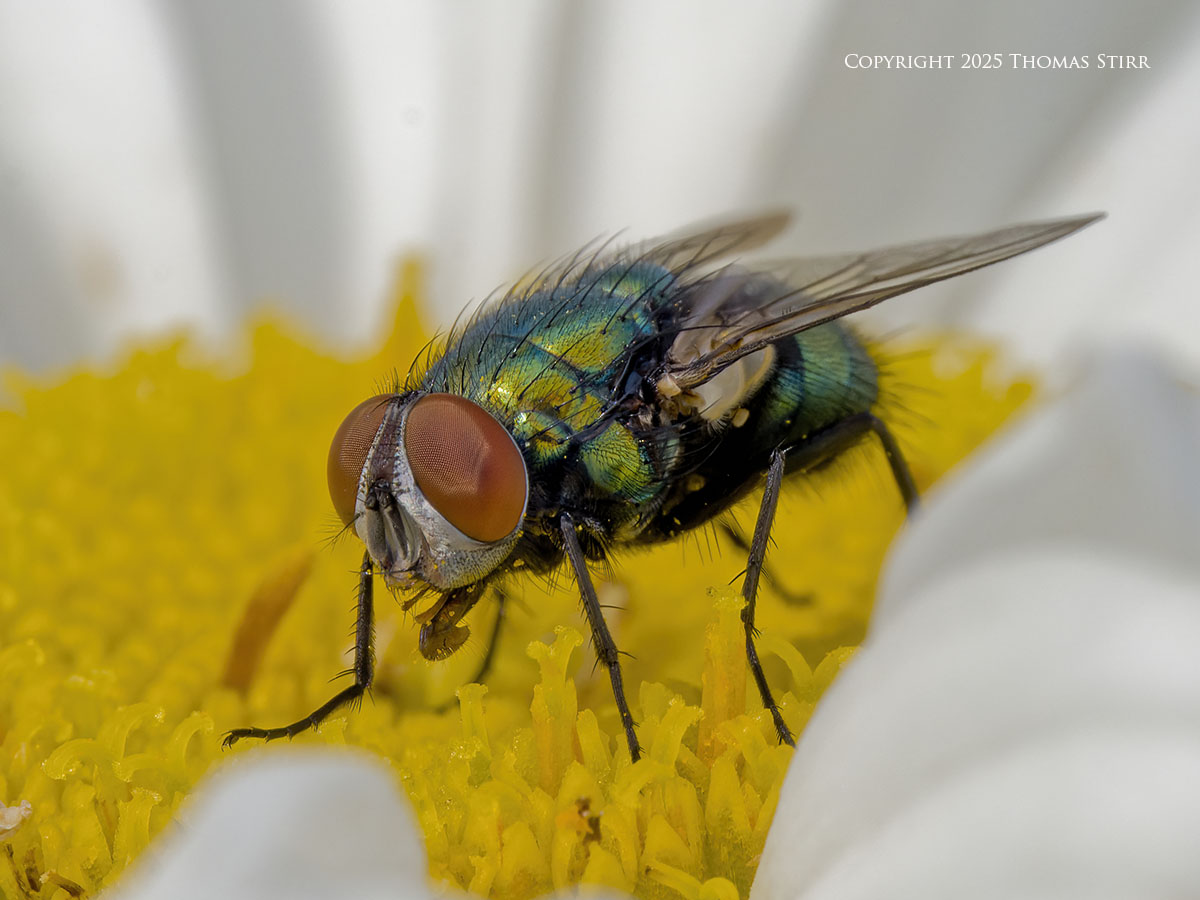
That same aperture of f/22 when used with a front quarter angle and from a closer distance to subject, tends to have some of our subject go out of focus. From an eye flow perspective this composition approach forces a viewer’s eye towards the head of the subject bee.
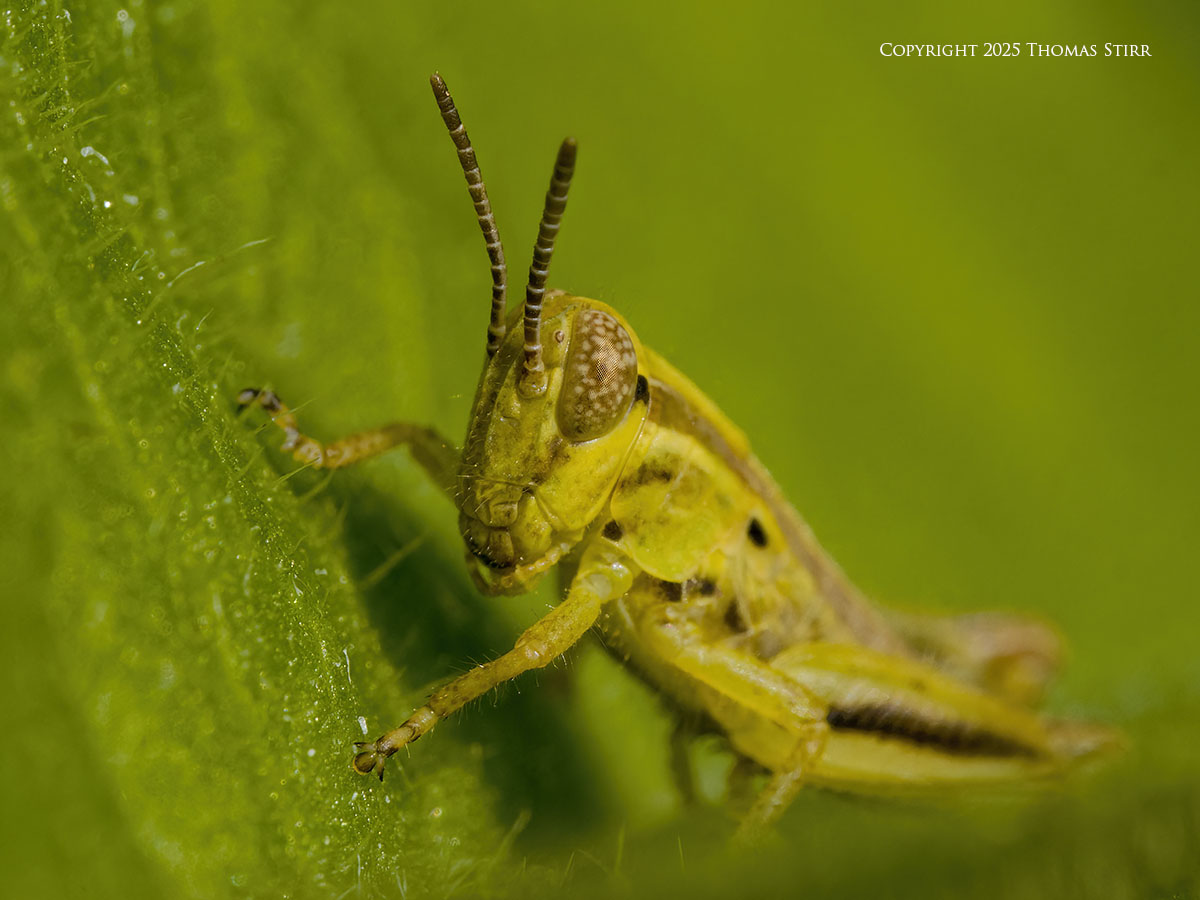
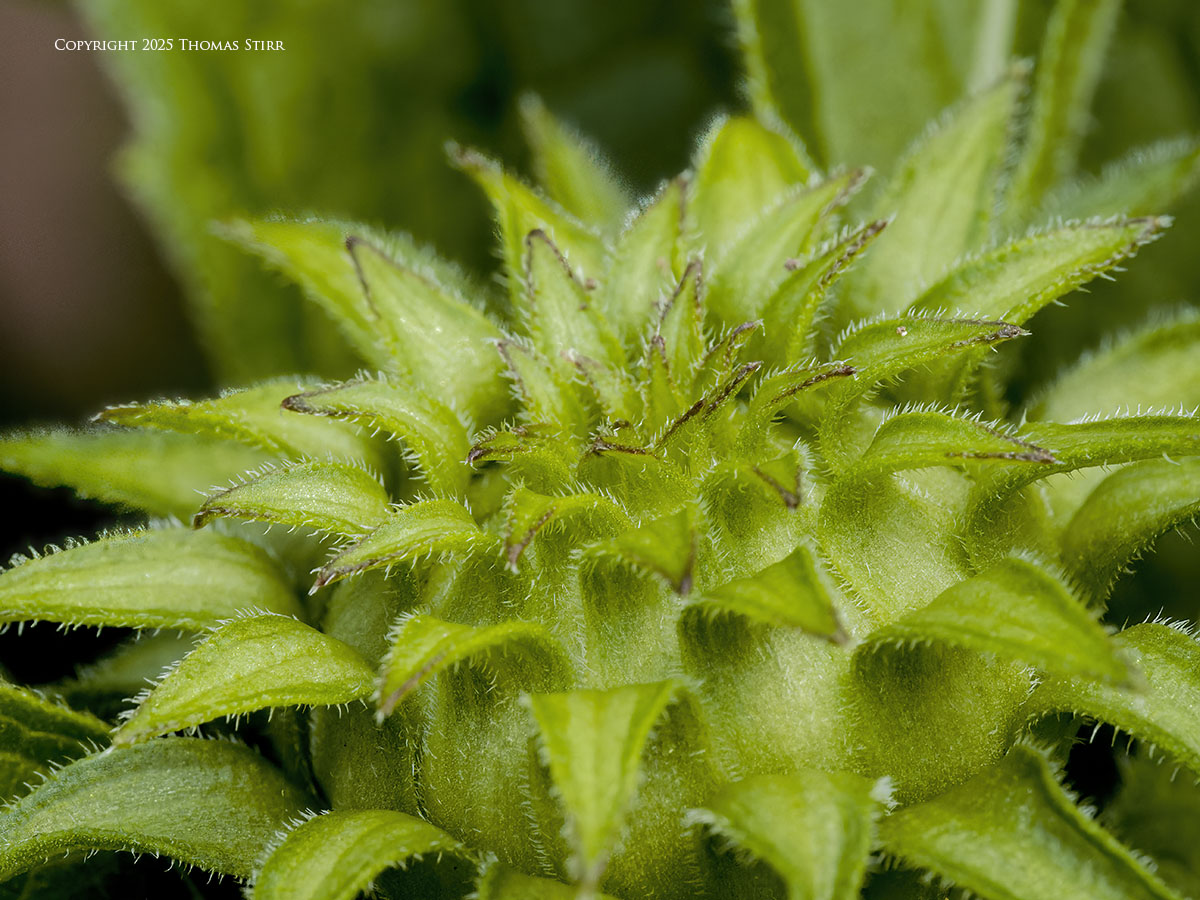
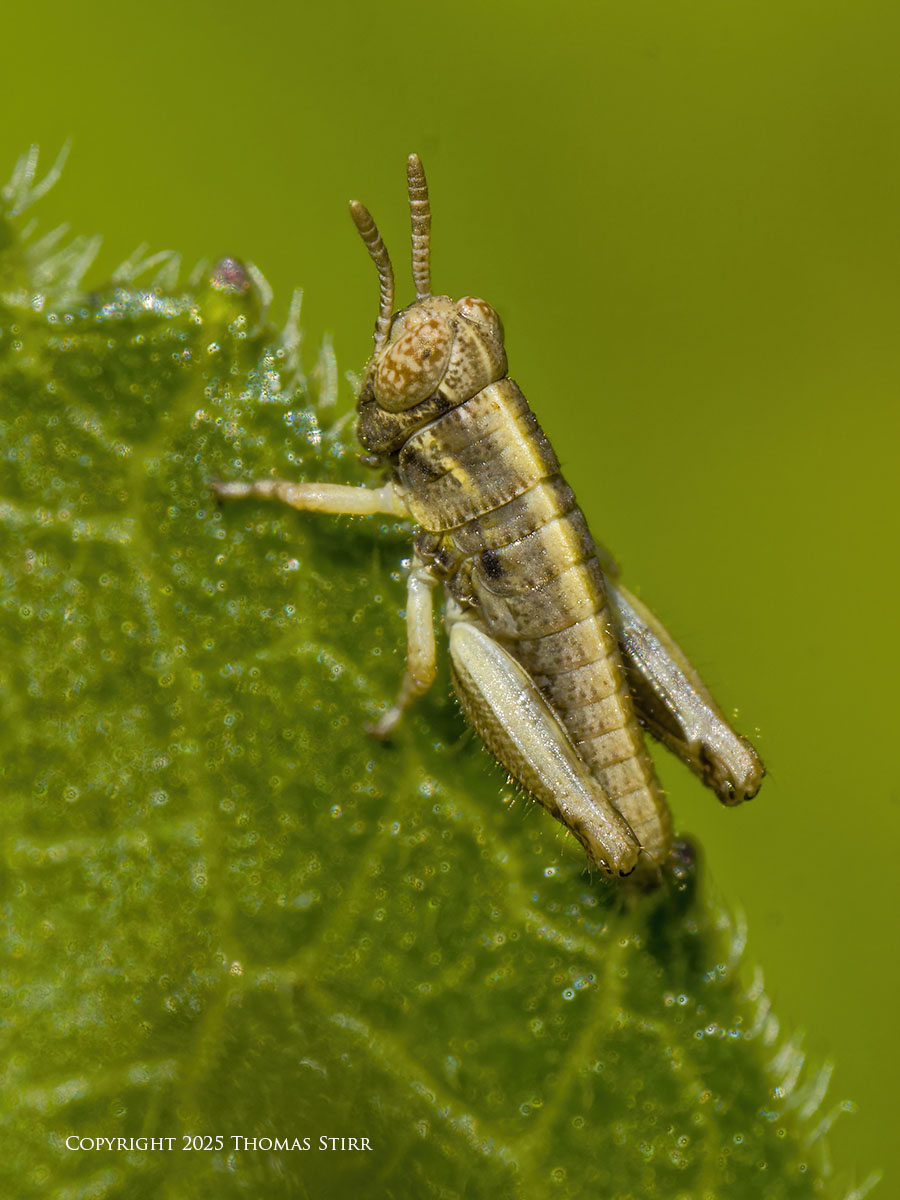
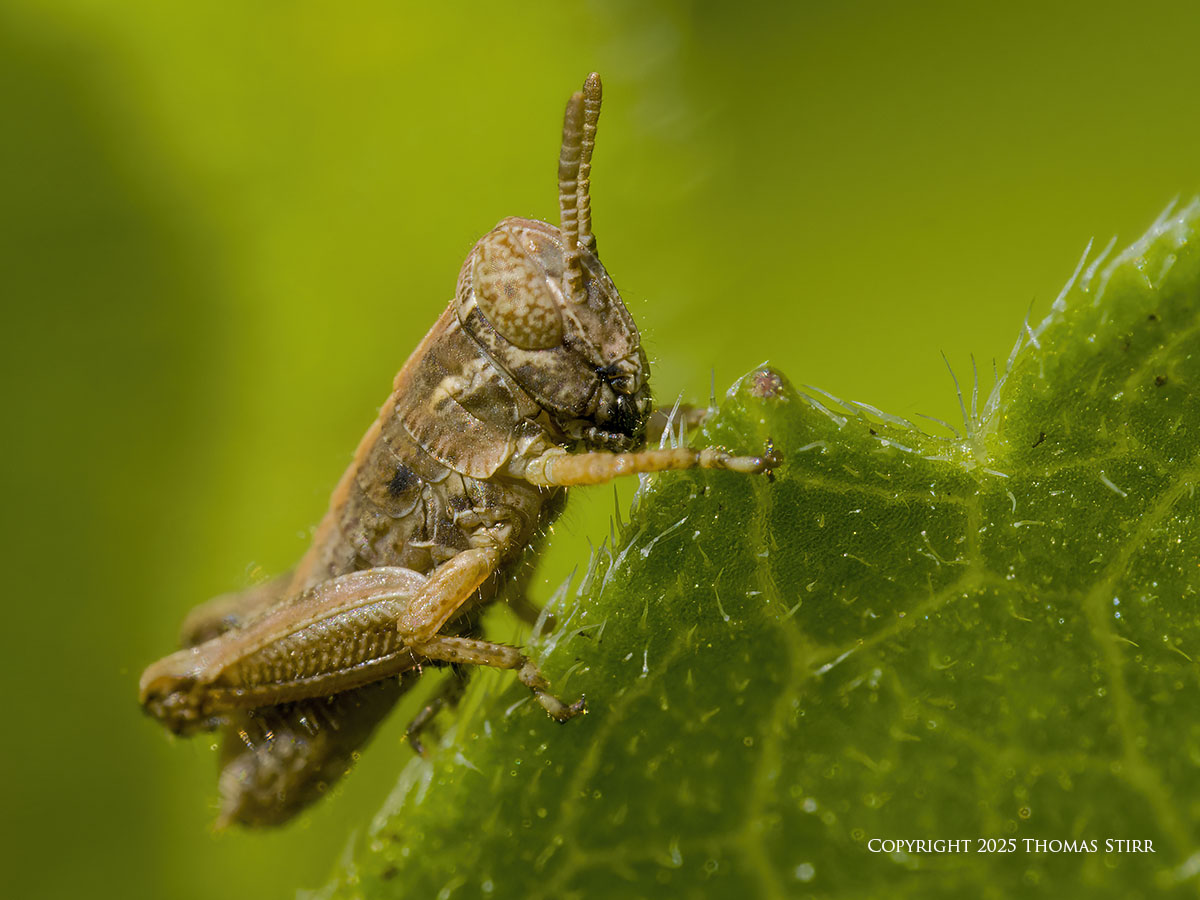
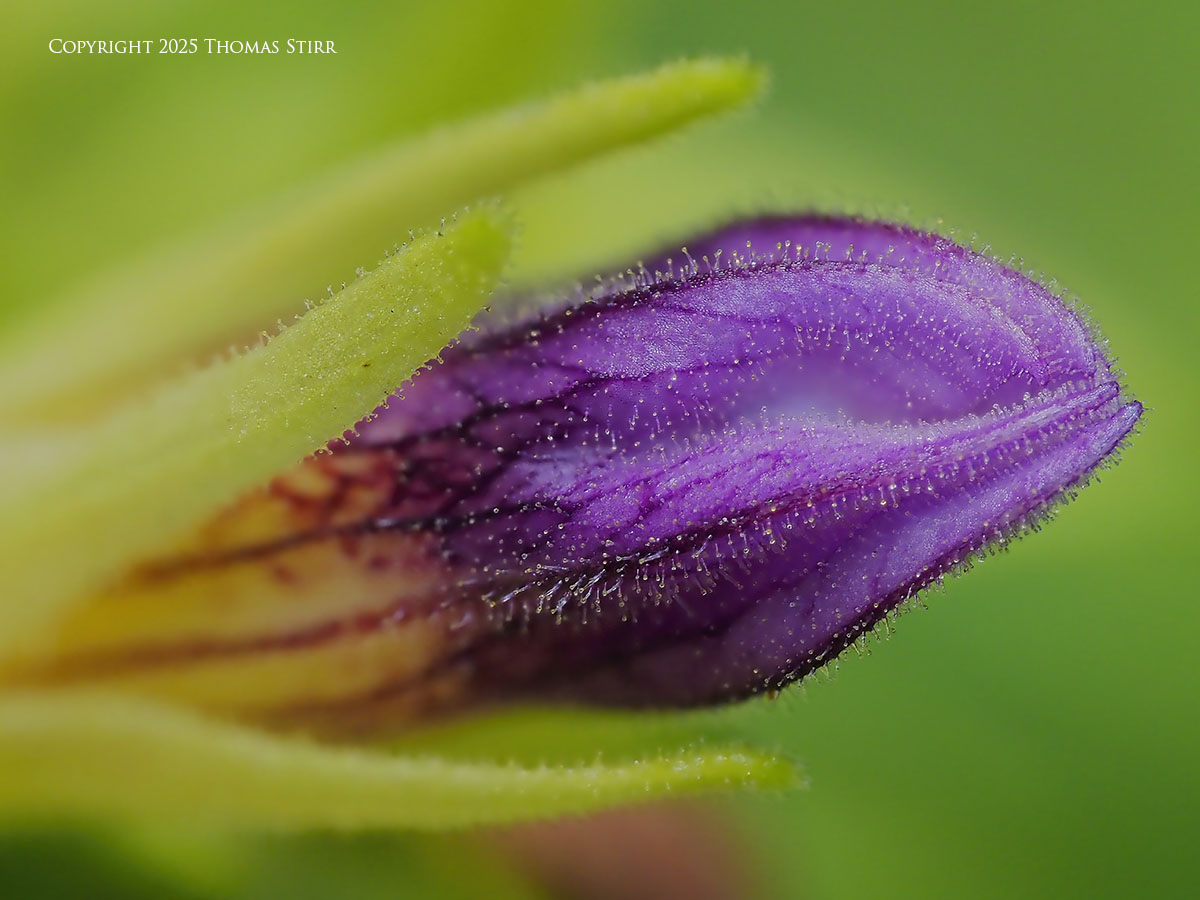
This creative approach was also used in the image above of a nymph. In this example choosing an appropriate focusing point… the forehead of the nymph for example… was critical to control depth-of-field.
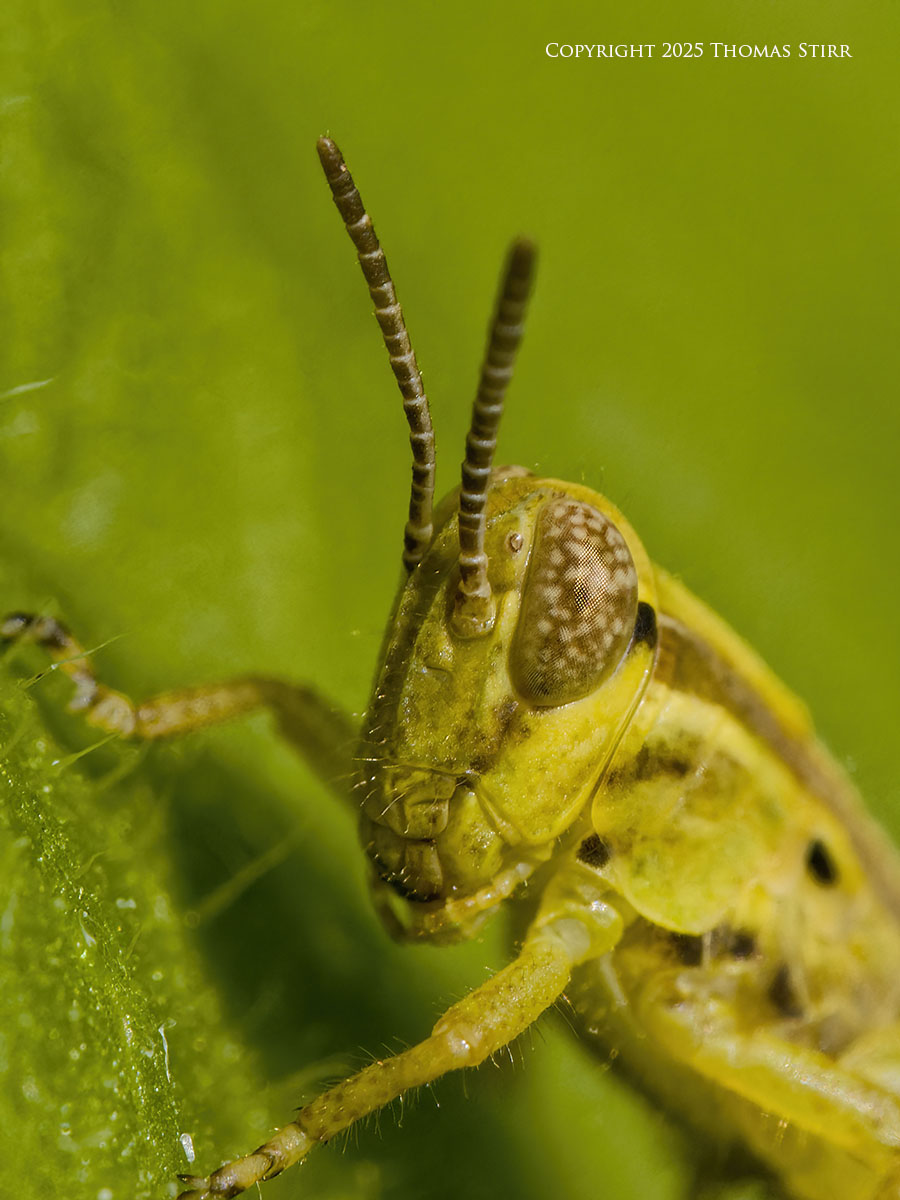
Notice how moving in slightly closer to the subject nymph… from 280 mm to 250 mm… has now put the left antennae of the nymph out-of-focus when compared to the previous image. A difference of 30 mm is only about 1.18 inches closer to the subject.
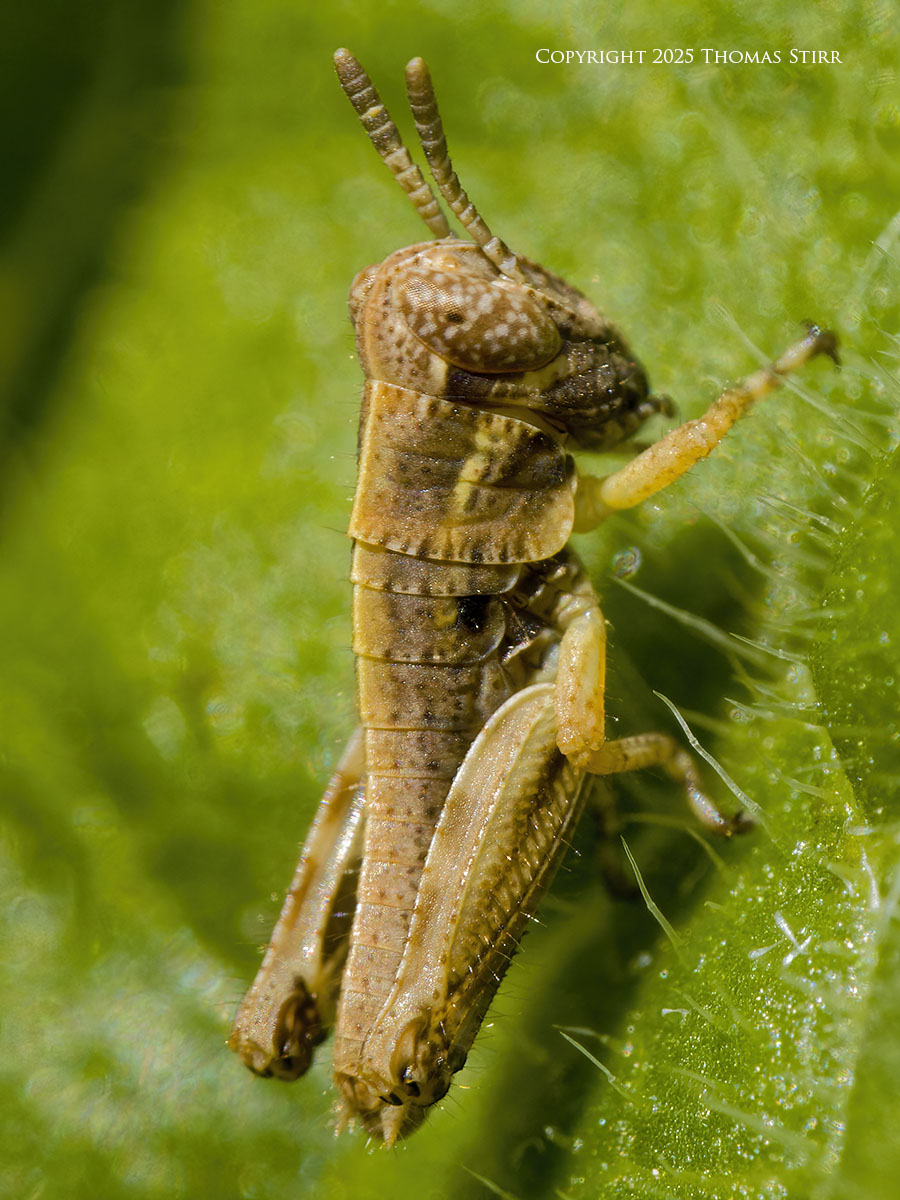
If we want most of a subject’s body in focus when doing macro photography, our shooting angle to the subject is critical. You can see in the photograph above that the subject nymph’s body was parallel to the sensor in my camera. This parallel alignment helped me get the entire length of the nymph’s body in focus.
A nymph is an immature grasshopper that has not yet fully developed. When it first hatches it is tiny… about the size of a kernel of wheat (~5 mm) and does not have any wings. Its reproductive organs are not fully developed.
It takes five moults before a nymph will become a mature grasshopper. When first hatched nymphs are extremely difficult to spot as they are tiny and often perch motionless on the edges or undersides of leaves. Getting in too close will cause them to leap a comparatively long distance… given their tiny body size… to a new leaf. Once they’ve leaped… they can be extremely hard to find again.
I used a single, small auto-focusing point for all of the images featured in this article. This allowed for accurate auto-focusing on my macro subjects. Given the shallow depth-of-field found in macro photography, focus accuracy is critical.
When doing handheld macro photography it is critical that we eliminate any sway from our own body. Even the slightest movement of our body towards… or away from the subject… can result in an out-of-focus image. This is the primary reason why I always take a short stool with me when shooting handheld macro photography. It helps me reduce the risk of body sway.
Our shutter release technique can also result in out-of-focus macro photographs. This can occur when we get an auditory confirmation ‘beep’ from our camera letting us know that auto-focus has been achieved…. but instead of following through and fully depressing our shutter release… we pause momentarily.
A slight pause of even a second or two is often all that is needed for some minor body sway to occur. This can put our images out-of-focus. For whatever reason, if we hesitate after getting the auditory auto-focus signal from our camera… we should always reacquire auto-focus. Then immediately capture our image with a smooth shutter release motion.
The risk of an out-of-focus photograph is even more pronounced if we are standing while shooting a handheld macro image. In these situations a shutter release pause can result in a woefully out-of-focus photograph.
Over the years I’ve witnessed many photographers blame their gear for an out-of-focus handheld macro image… rather than realizing that their handheld technique was the root cause of the problem.
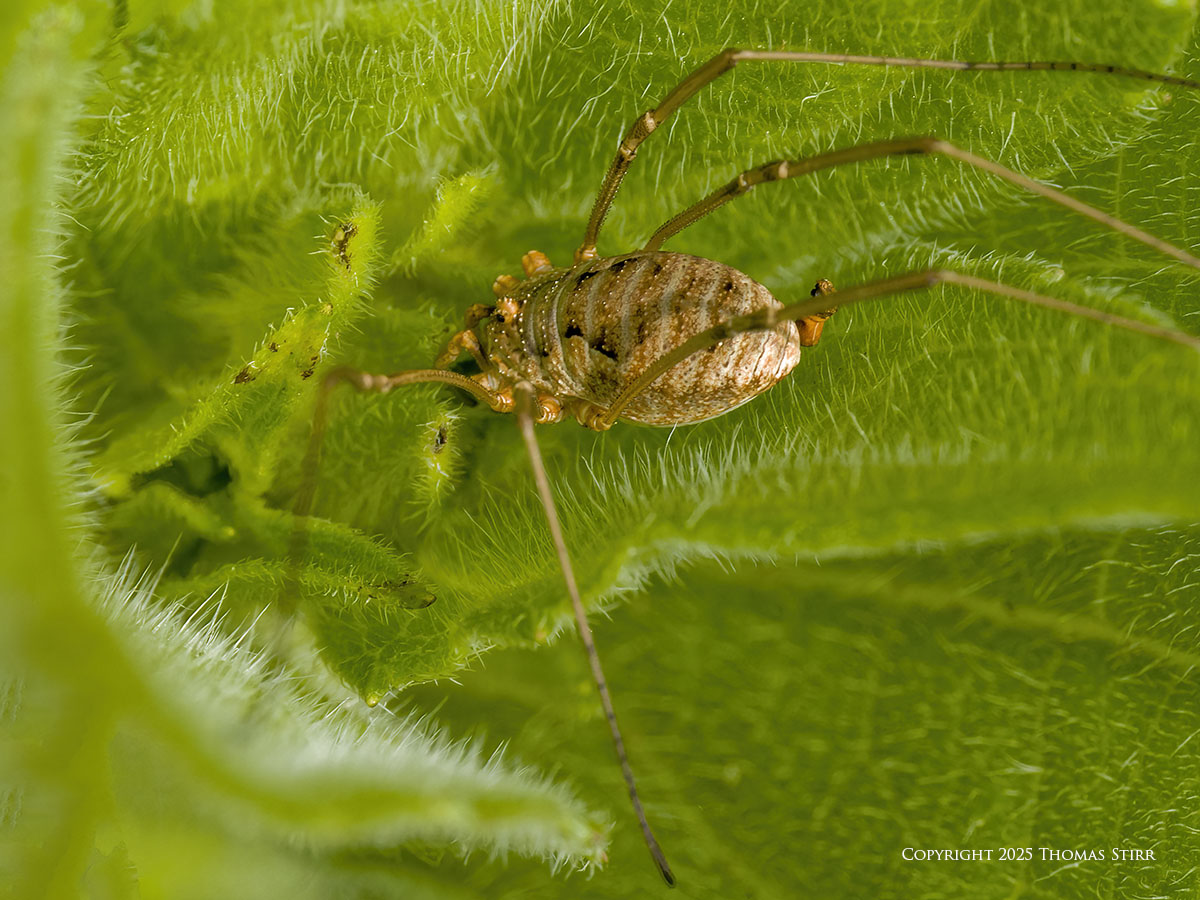
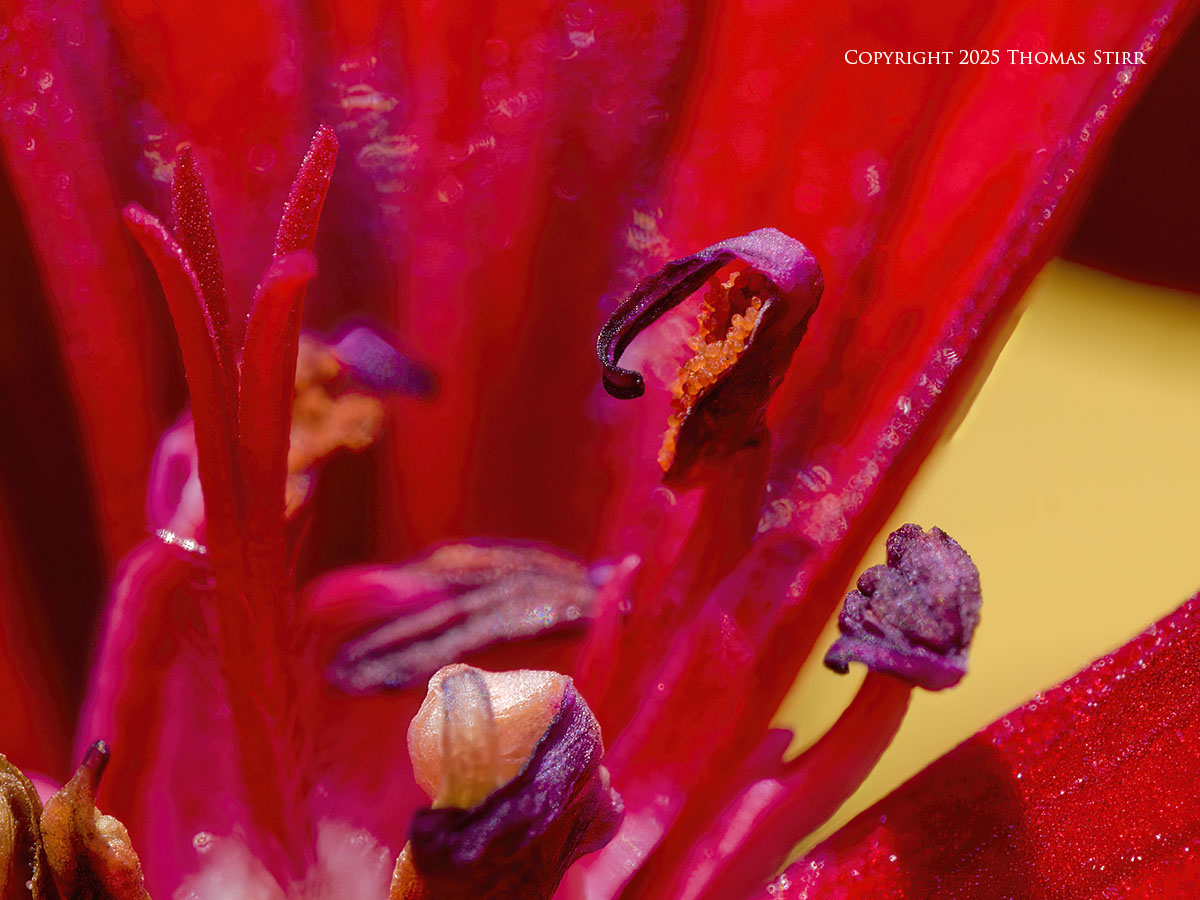
Unfortunately when doing macro photography of small critters, we often are not afforded very good shooting angles by our subjects. So, we end up photographing what Mother Nature provides. I suppose the rear end of a spider may be better than no image at all. 🙂
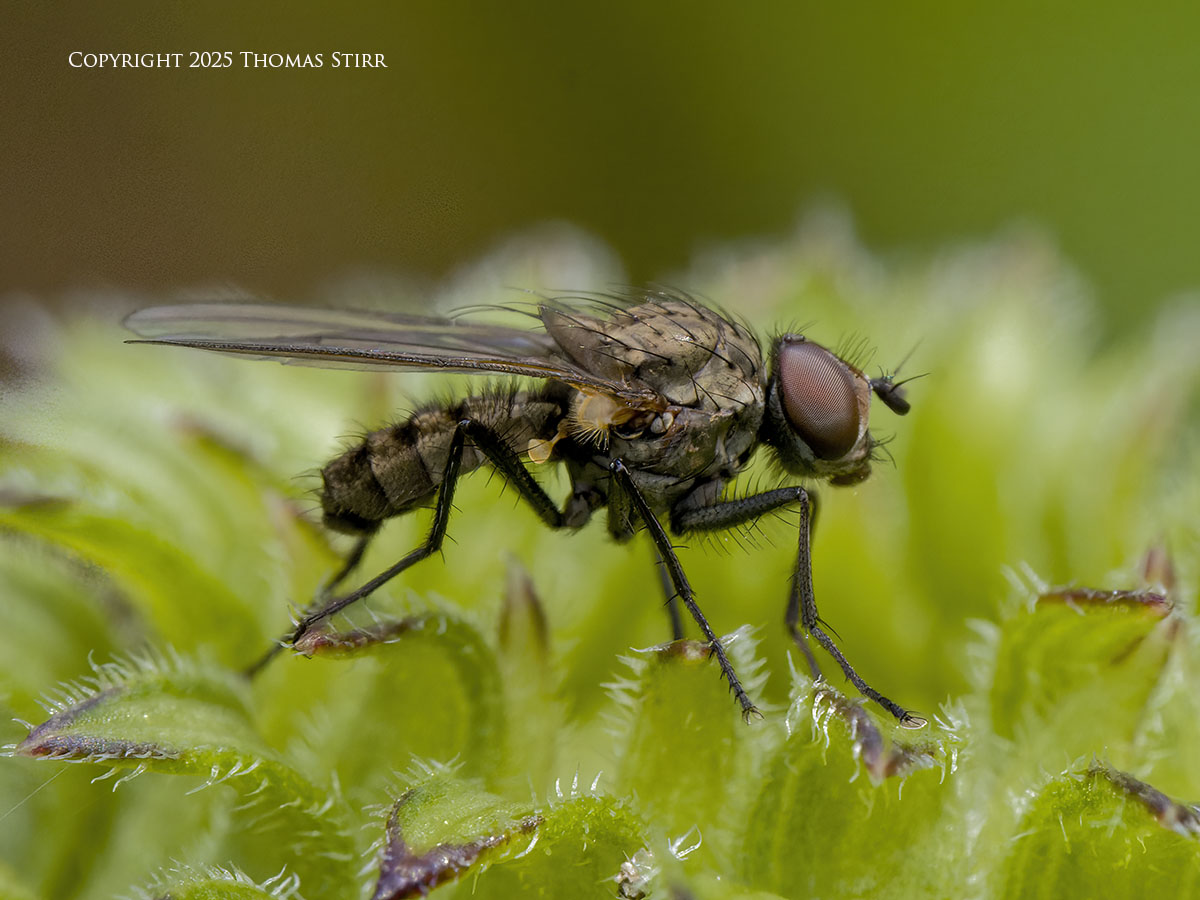
If we can adjust our physical position so we can compose our images with a smooth, monochromatic background… we can create more dramatic and visually pleasing images.
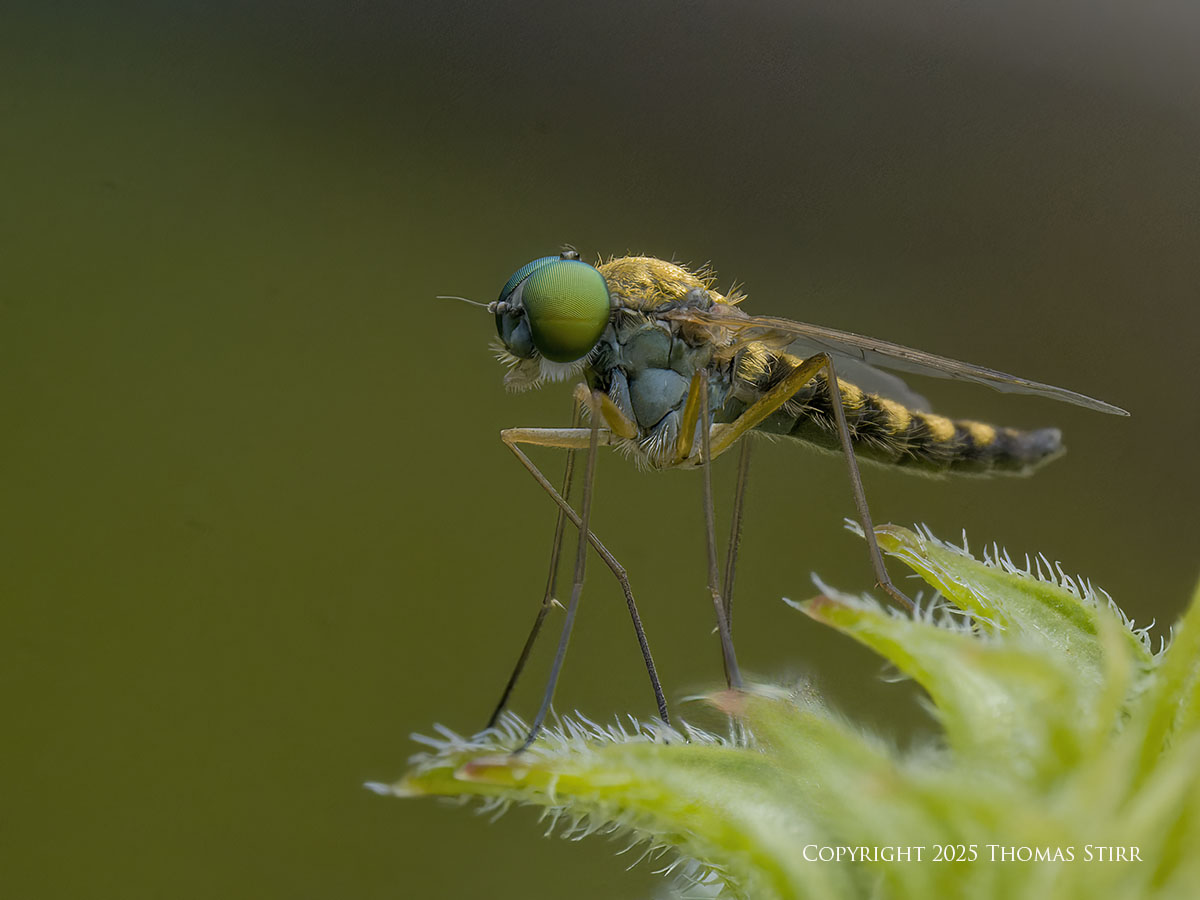
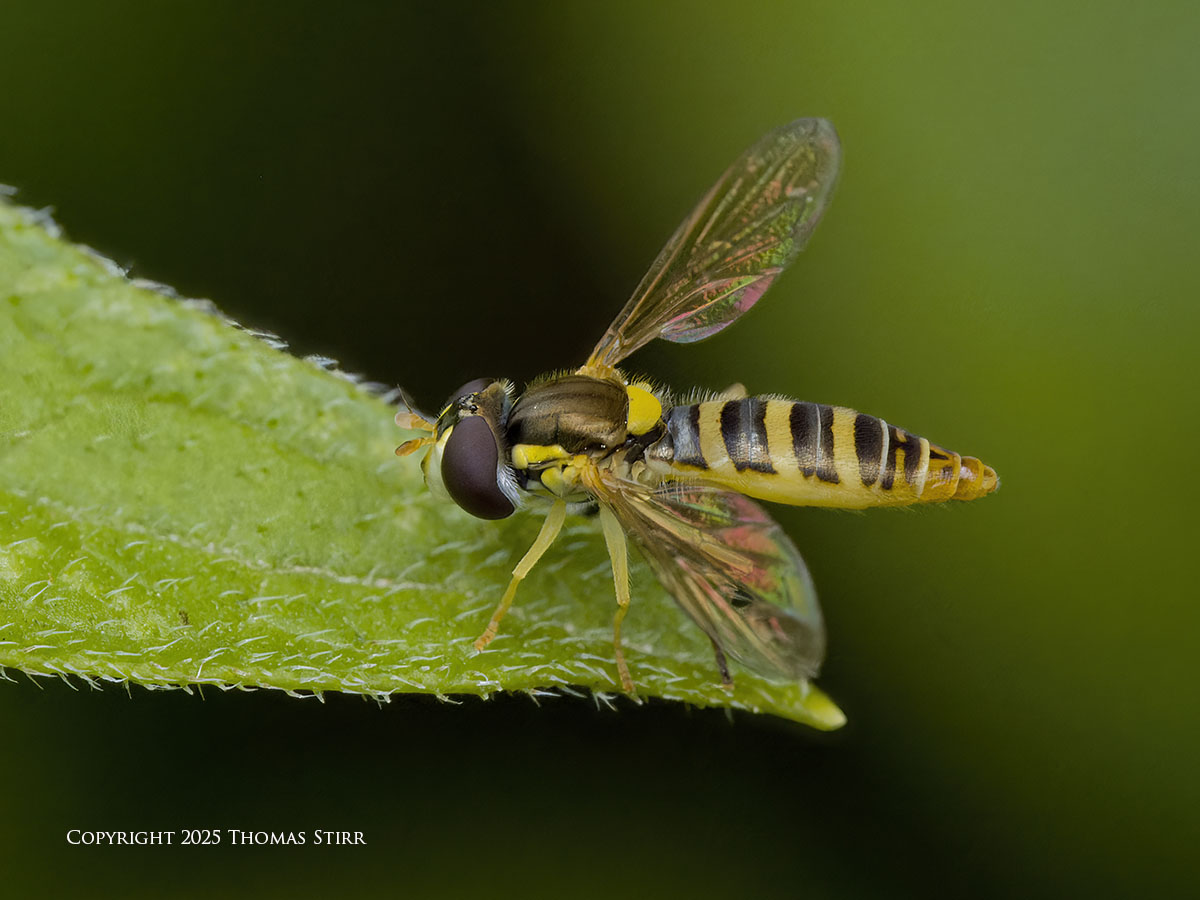
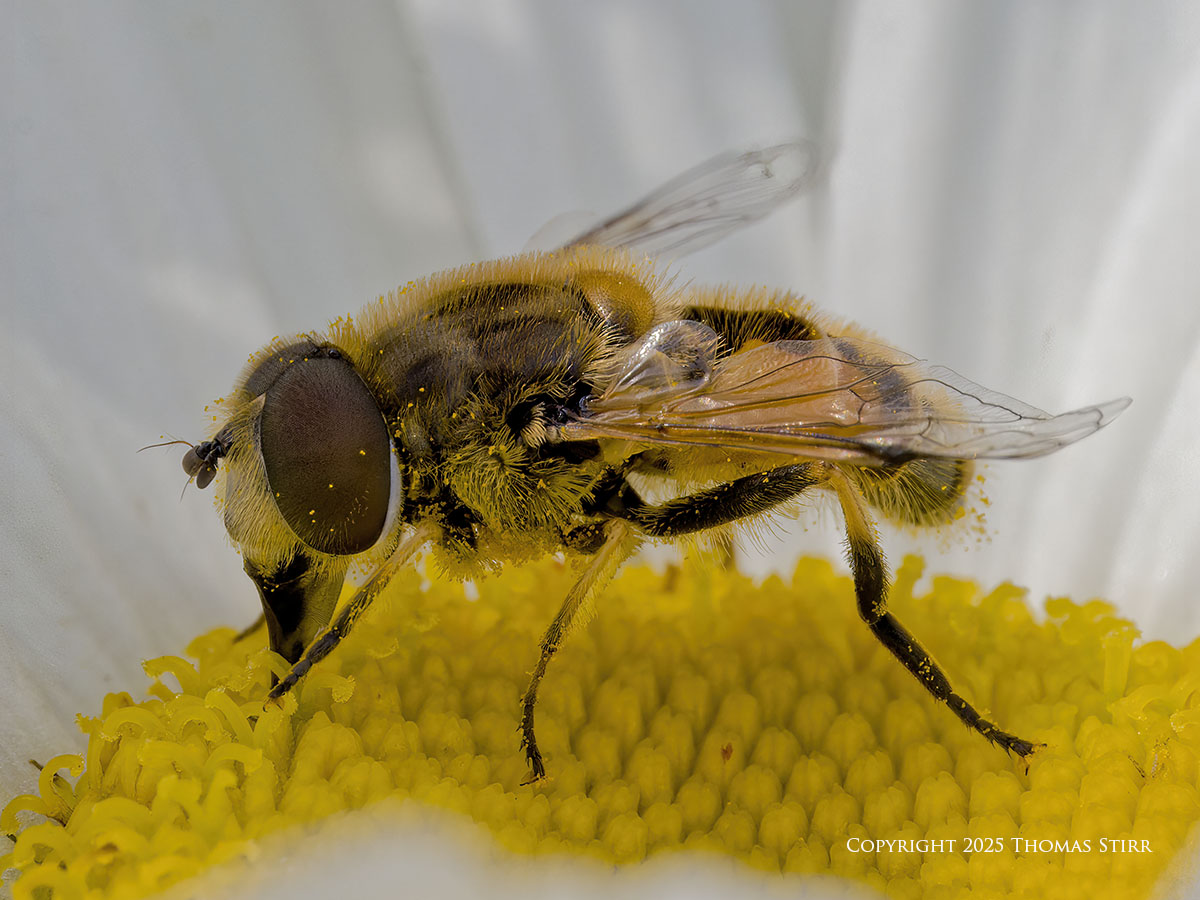
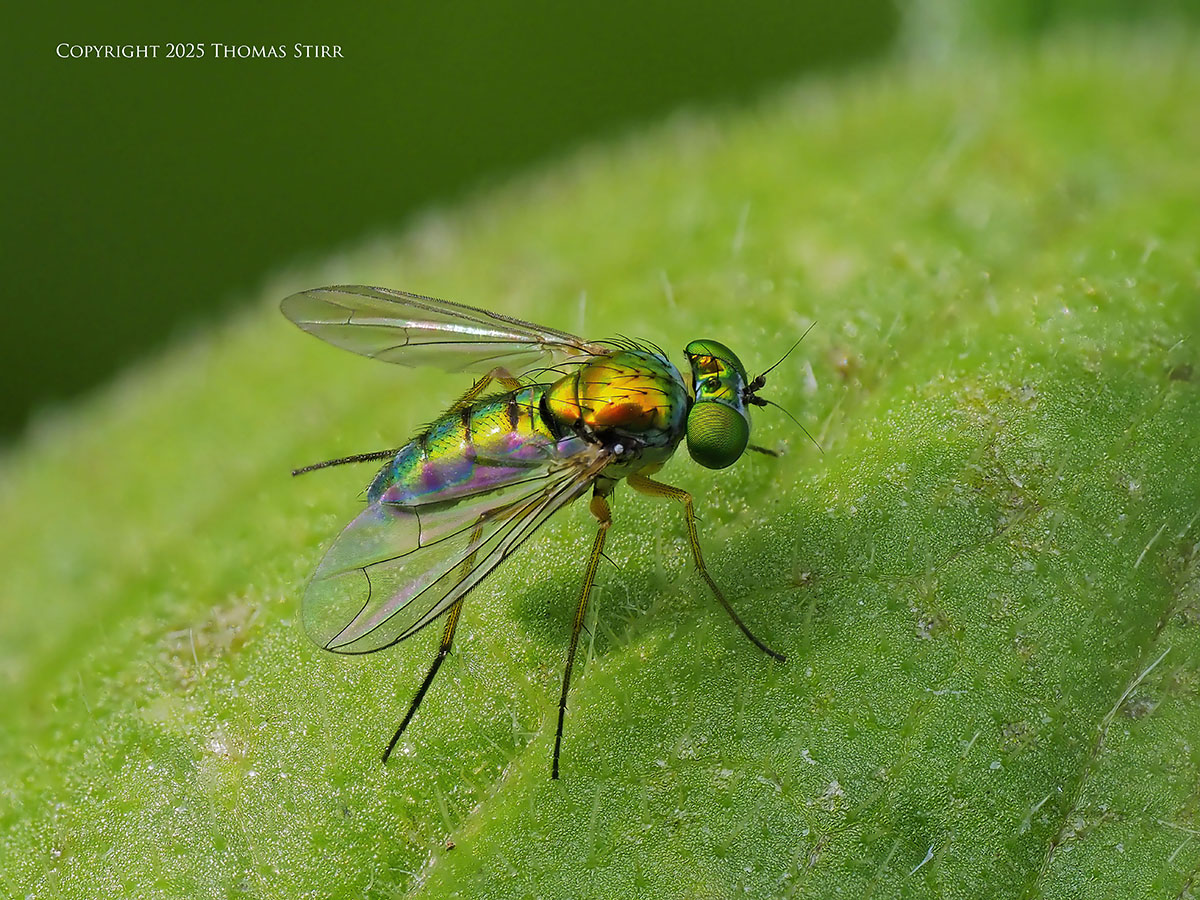
All of the photographs featured in this article were captured two days ago as I wandered around our yard at home. The image above was one of my favourite ones from that afternoon macro photography session. The tiny fly pictured above landed quite close to my sitting position. It remained motionless long enough for me to move my stool slightly to create a nice, smooth background for my composition. It soon darted off.
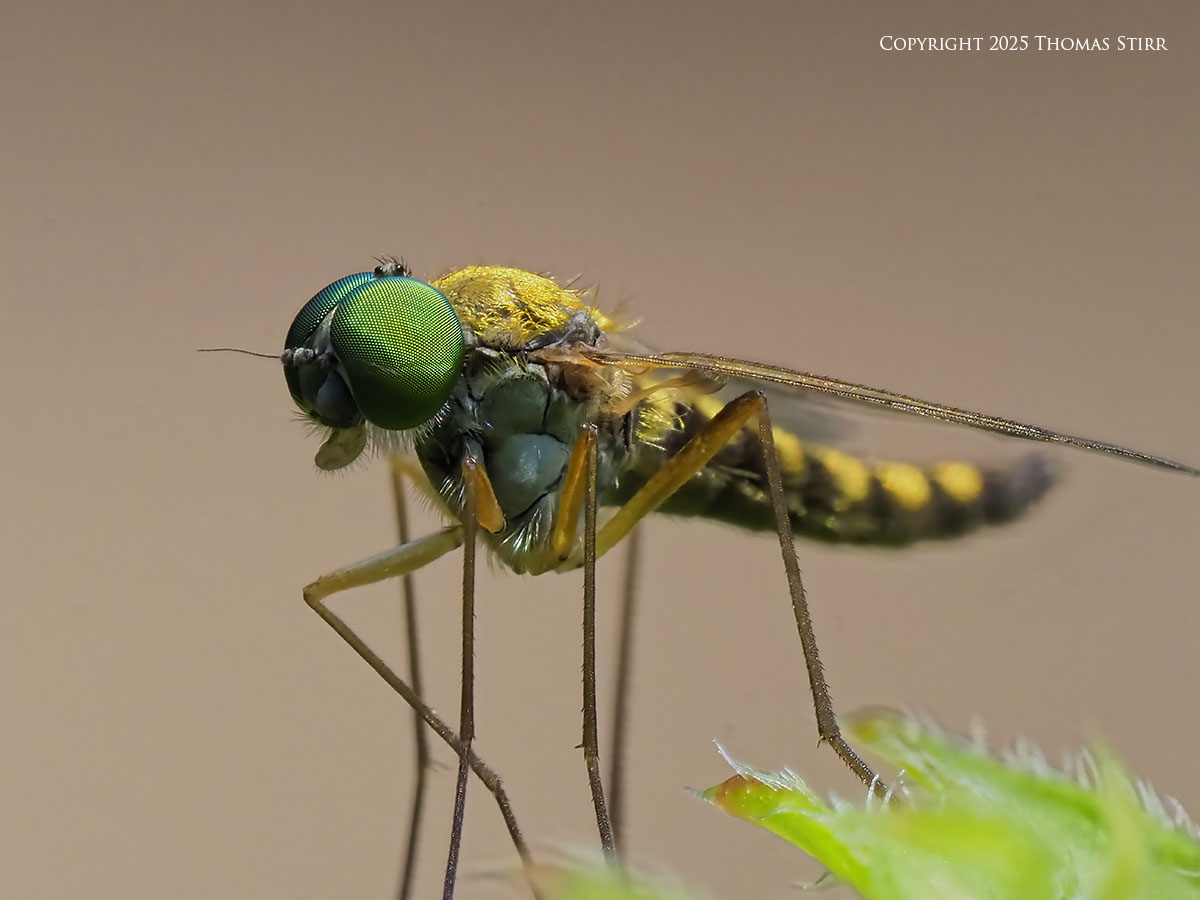
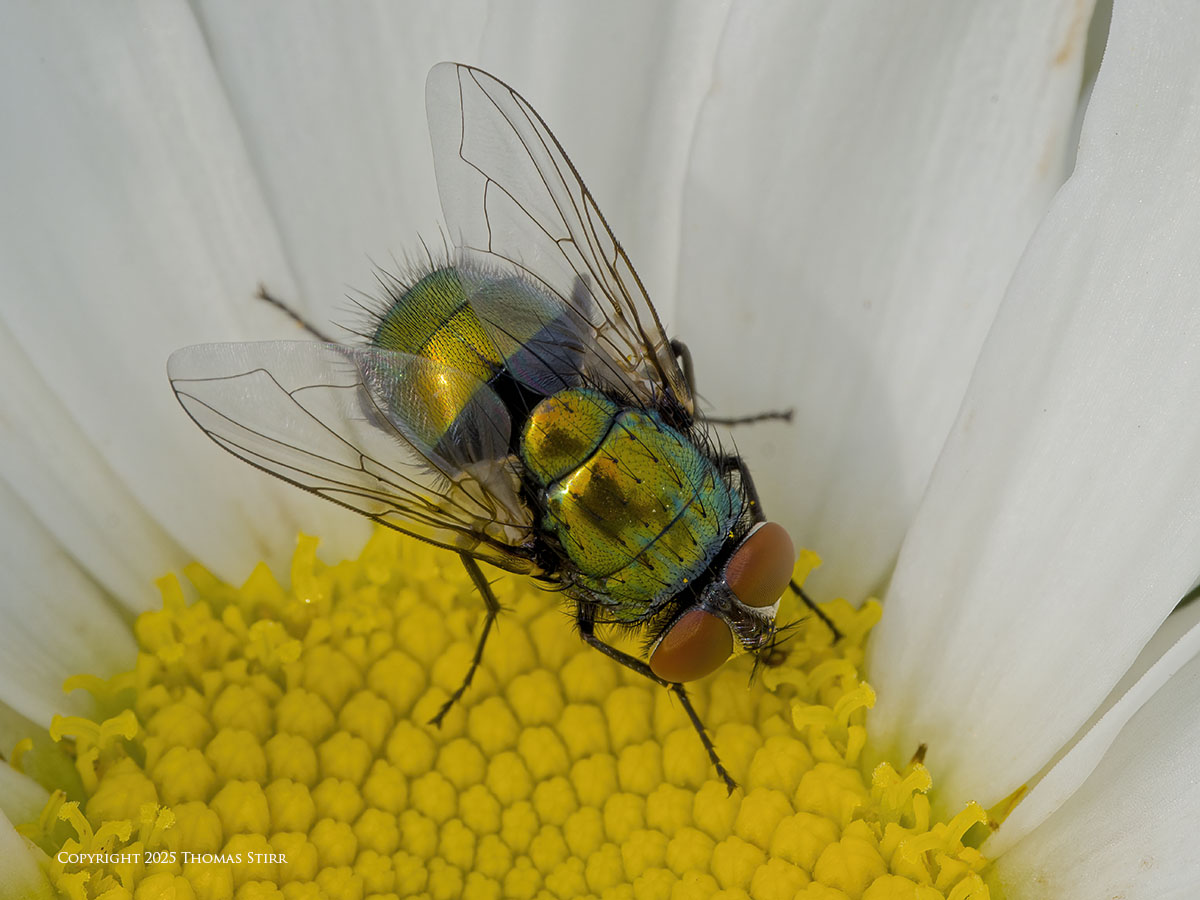
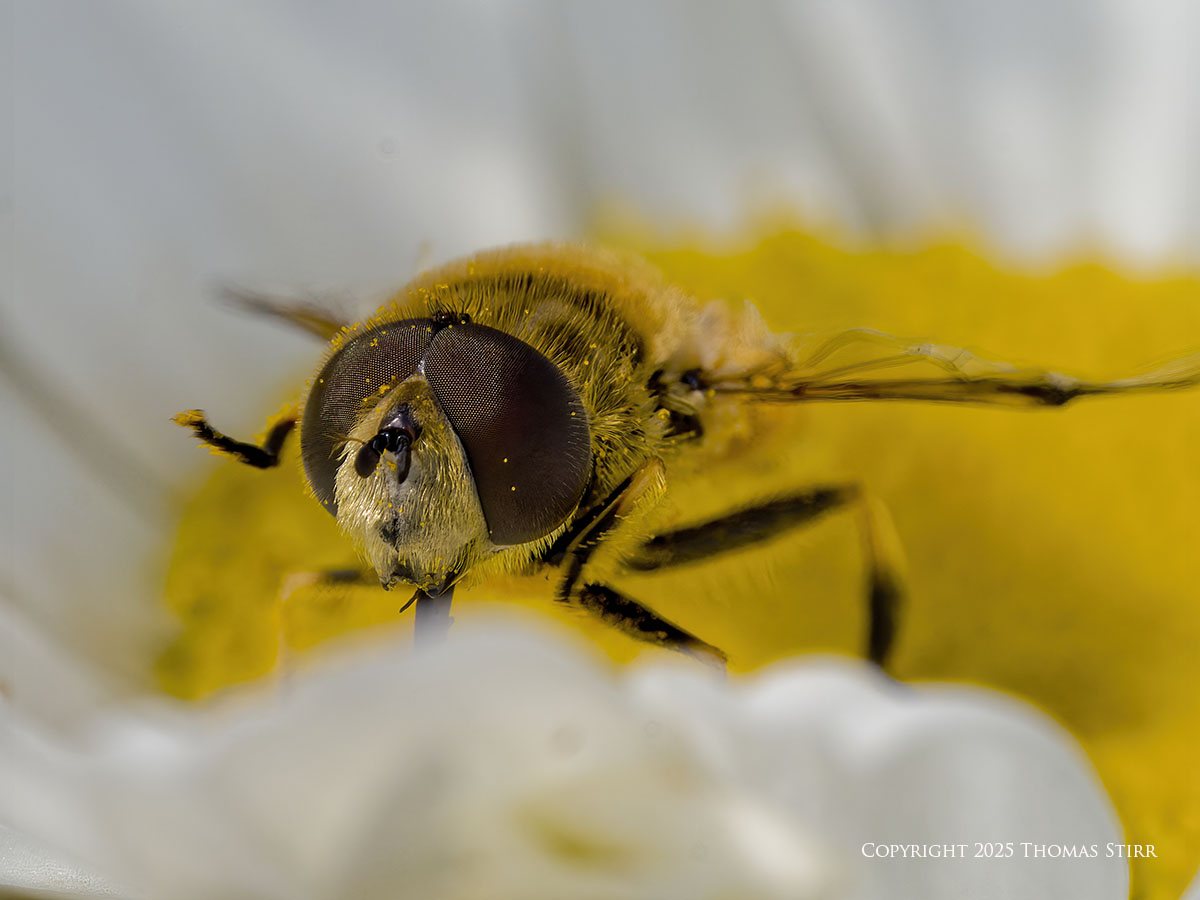
A couple of minutes later I watched the tiny fly return and land on a different part of the same plant. I quickly switched my camera setting to in-camera focus stacking… and leaned in closer to the tiny fly. This resulted in the full frame capture seen above.
If you happen to own the M.Zuiko 90 mm f/3.5 PRO IS macro lens, or a macro lens from another brand, and have not stopped it down fully to f/22… there’s no harm in giving it a try to see what images that aperture can produce for you.
And, if your macro lens accepts 2X teleconverters like the M.Zuiko MC-20… that also may be a worthwhile experiment.
Macro photography opens up a whole new world of image opportunities for us. It behooves us to leverage all of the photographic technology available to us, and push our existing boundaries… regardless of the camera gear we may happen to own.
Technical Note
Photographs were captured handheld using camera equipment noted in the EXIF data. All images were created from RAW files or out-of-camera jpegs. This is the 1,470 article published on this website since its original inception in 2015.
How you can keep this website advertising free
My intent is to keep this photography blog advertising free. If you enjoyed this article and/or my website and would like to support my work, you can purchase an eBook, or make a donation through PayPal (see Donate box below). Both are most appreciated.

You may enjoy bird photography, and if so our 188 page eBook Handheld Bird Photography may be of interest. It is available for download for an investment of $14.99 CDN. The best viewing experience of this eBook will be at 100% using Adobe Acrobat Reader.
Sometimes all we need as photographers is a bit of inspiration. We hope you can find some of that inside Finding Visual Expression II.

Finding Visual Expression II is available for download for an investment of $11.99 CDN. The best viewing experience of this eBook will be at 100% using Adobe Acrobat Reader.
You may be interested in all of the 30 concepts covered in both of these related eBooks. If so, you may want to also consider Finding Visual Expression.

Finding Visual Expression is available for download for an investment of $11.99 Cdn. The best viewing experience of this eBook will be at 100% using Adobe Acrobat Reader.
Our other eBooks include Images of Ireland, New Zealand Tip-to-Tip, Nikon 1: The Little Camera That Could, Desert & Mountain Memories, Images of Greece, Nova Scotia Photography Tour, and a business leadership parable… Balancing Eggs.
If you click on the Donate button below you will find that there are three donation options: $7.50, $10.00 and $20.00. All are in Canadian funds. Plus, you can choose a different amount if you want. You can also increase your donation amount to help offset our costs associated with accepting your donation through PayPal. An ongoing, monthly contribution to support our work can also be done through the PayPal Donate button below.
You can make your donation through your PayPal account, or by using a number of credit card options.
Word of mouth is the best form of endorsement. If you like our website please let your friends and associates know about our work. Linking to this site or to specific articles is allowed with proper acknowledgement. Reproducing articles, or any of the images contained in them, on another website or in any social media posting is a Copyright infringement.
Article and images are Copyright 2025 Thomas Stirr. All rights reserved. No use, duplication or adaptation of any kind is allowed without written consent. If you see this article reproduced anywhere else it is an unauthorized and illegal use. Posting comments on offending websites and calling out individuals who steal intellectual property is always appreciated!
Greetings,
I would like to know the working distance between the subject and the front lens that is obtained with the macro 90mm plus the M.ZUIKO 2X multiplier.
Is it correct to remove from the distance from the subject indicated by the Exif data the length of the lens + the length of the 2x multiplier?
Thank you
Hi Riccardo,
This is not my area of expertise. Here are a few articles I found that may be helpful.
https://photographylife.com/what-is-a-teleconverter
https://petapixel.com/how-to-use-teleconverters-macro-photography/
https://www.cambridgeincolour.com/tutorials/macro-extension-tubes-closeup.htm
Tom
Hi Tom nice work – the 90mm is a super sharp lens and using the 2x converter has given some very close dynamic shots .
I genuinely think that I need to maximise my use of the little marvel 60mm macro too.
I actually haven’t been on a macro shoot since I acquired the EM1-X note to oneself must get out more.
On a slightly off topic note I have bought a used Olympus 100-400, looking forward to using this for all types of nature work
Hi Mark,
I agree that the M.Zuiko 60 mm macro is a ‘little marvel’. We took our 60 mm macro to New Zealand with us since it is so small and light… but packs a great macro punch!
Tom
Wonderful image set, sir. Motivated to try out the same lens/converter setup and hope to hold steady enough. Always wondered, how do you get the subject distance information for your images? I’ve not found anything like that in the OM settings.
Thanks!
Hi Dan,
I’m glad you enjoyed the article!
After I process my images using DxO PhotoLab etc., I save my files in Windows Explorer. The distance to subject information is visible when I look at ‘Properties’.. then ‘Details’ in Windows Explorer.
Tom