
The 5 Why Analysis has long been used as a technique to identify the root cause of a problem, most commonly when dealing with quality issues. Rather than making assumptions and jumping to conclusions, the 5 Why Analysis digs deeper into potential causes, often with facts, data and logic.
This analytic approach was developed by the Japanese inventor and industrialist Sakichi Toyoda in the 1930s. The technique was later integrated into the Toyota Production System to help identify root causes during problem-solving. The basic approach is to ask a series of “why” questions (up to 5) to dig down deeper and deeper to reach the potential root cause.
So why bring up this approach on a photography blog?
NOTE: Click on images to enlarge. To view this article in a range of other languages click on the Canadian flag in the upper right hand corner.

As photographers we take pride in our work, and in many cases our self-esteem is linked to how successful we are when trying to capture a specific type of image. Let’s say that were intrigued with macro photography and wanted to expand our handheld photographic potential by purchasing a dedicated macro lens like the M.Zuiko 60 mm f/2.8.

No doubt we’d get out in the field with our new lens and capture a wide range of standard macro images. At some point we may begin to push ourselves and our new lens a bit more. For example, we may experiment with handheld in-camera focus stacking.

Let’s say that all of those early attempts are unsuccessful and we are unable to get the in-camera focus stacking to work. For some of us… our initial assessment could be that there is something wrong with our lens, our camera, or using that combination of gear with that specific technology. We may then abandon any further attempts to capture those types of images with Handheld In-Camera Focus Stacking… and blame our camera gear.

All one has to do is follow discussion threads on various photography blogs to discover how prevalent “blame the gear” excuses are in the photographic community.

To be clear, ‘blame the gear” is sometimes justified to some degree. There are specific lenses that do have discernable limitations. For example, the M.Zuiko 75-300 mm f/4.8-6.7 II lens has been documented to struggle with auto-focusing when used in low light situations.

This is especially true when there is a lack of contrast between the the subject and the background. If a photographer was going to photograph birds or wildlife under predominantly dark conditions, with flat lighting, the M.Zuiko 75-300 zoom may not be the best choice.
That doesn’t mean that we abandon all personal responsibility if we own that lens. It is still up to us to figure out ways to work around the limitations of the camera gear we happen to own, to the best of our ability.

Let’s suppose that the photographer’s work was almost entirely done under challenging low light situations. If that was the case then choosing a larger sensor system could be a better equipment option for their needs.

Using the 5 Why Analysis can help us get to the root cause of a performance deficiency… even at an individual photographer level. Let’s get back to our handheld in-camera focusing stacking example.

The first step is to clearly identify and state the performance problem… i.e. the inability of a specific photographer to successfully execute in-camera focus stacking handheld.
In this particular case it is very simple to quantify if the root problem is gear related, or user-related. All the photographer would have to do is mount his camera and lens on a tripod and do some test shots using in-camera focus stacking. If the resulting images are successful, then it is a user-related issue.

The first 5 Why question a photographer could ask themselves is, “Why am I unable to get in-camera focus stacking to work handheld?” Their initial, honest reply to themselves may be, “I don’t know.”
The next logical 5 Why question may be “Why don’t I know?” At this point there could be a personal admission by the photographer that they have been too lazy to research the issue. It is much easier and less potentially challenging to our egos to simply blame our camera gear… than accept personal accountability.

After doing the requisite research the photographer may learn that the basic factors that can contribute to unsuccessful in-camera focus stacking include:
- camera movement
- subject movement
- movement in framing elements like water or foliage
- rapidly changing lighting
- insufficient depth-of-field overlap (i.e. choice of aperture, number of images in the stack, and focus differential settings).

Each of these issues could have related 5 Why Analysis questions:
- Why do I have camera movement? Why is my handholding skill not sufficient?
- Why am I not cognisant of subject movement? Why am I distracted when capturing an image?
- Why am I not noticing movement with framing elements? Why am I not using techniques to increase my peripherical vision?
- Why haven’t I been experimenting and documenting my in-camera focus stacking settings to learn what works for me?

So… we don’t always have to ask five successive questions in our 5 Why Analysis. The potential root causes can sometimes surface quickly. Once specific potential root causes have been identified we can test each one out to see which one(s) were affecting our personal performance.
When it comes to developing a specific course of action for self-improvement using the 5 How Analysis is a helpful tool. Each successive ‘How’ question reveals more detailed components of our corrective plan.

Having worked with a number of photographers over the years, I can attest to the fact that very few problems with photographic quality end up being gear-related. The vast majority are user-related and caused by a lack of familiarity and skill with specific camera gear. A lack of awareness, and understanding of, in-field conditions and adapting to them. A lack of shot discipline. Or, a lack of practice to build the necessary physical skills.

Each of us can operate with the best of intentions and still miss important information on how to properly use our camera gear. For example, I struggled in the past when trying to use the 1:1 setting on the side of my M.Zuiko 60 mm f/2.8 macro lens.
Below is a sample image captured without the use of the 1:1 short cut dial. I kept moving my camera in as tight as I could and still have the auto-focus work. I was able to get the subject blossom 210 mm from my camera. This took a while to do. I may have been able to get in closer… if I was willing to spend even more time trying to get my 60 mm f/2.8 macro to auto-focus.
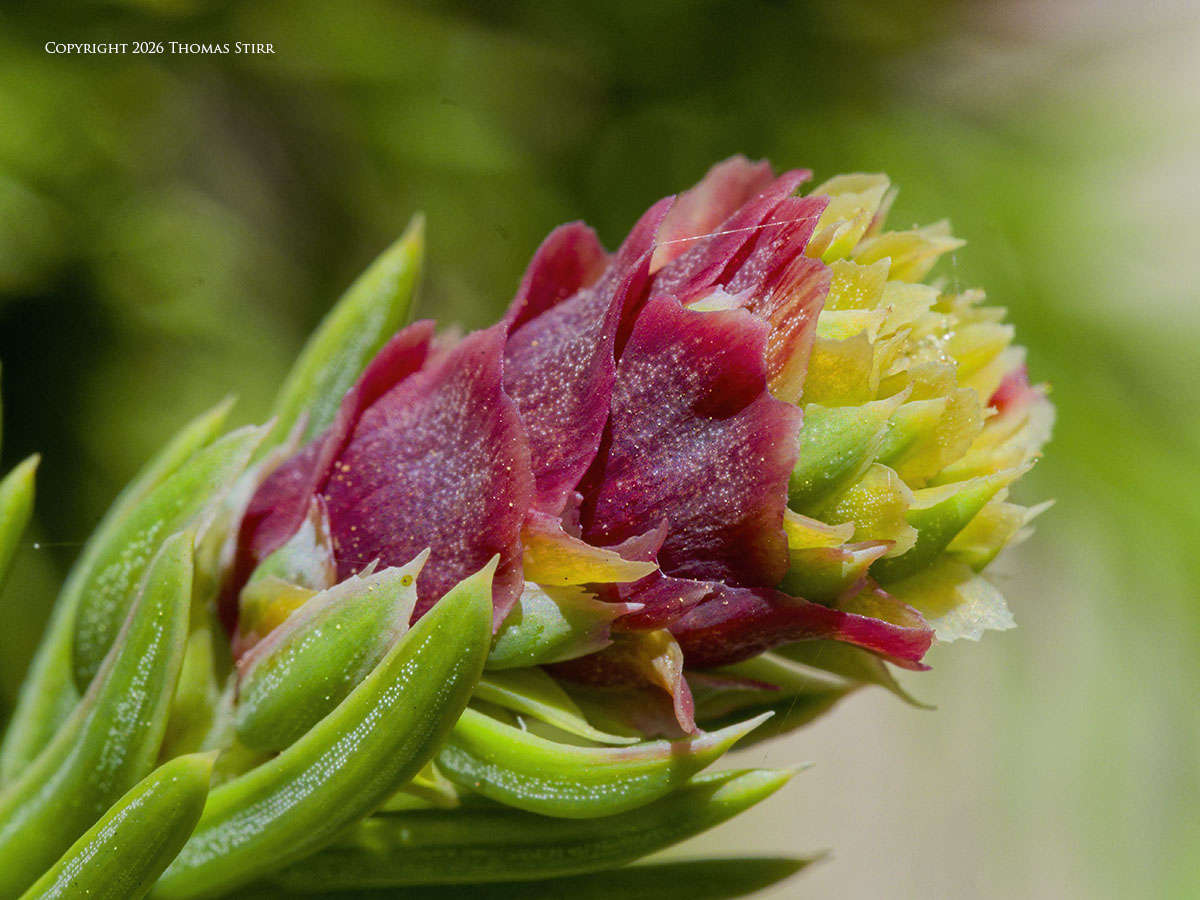
For quite a while I didn’t realize that the use of the 1:1 short cut dial was a 2-stage process (I initially didn’t realize it was a short cut dial 🙂 ). The first stage is to set the dial to 1:1 by moving the adjustment knob on the barrel of the lens counter clockwise, then release it.
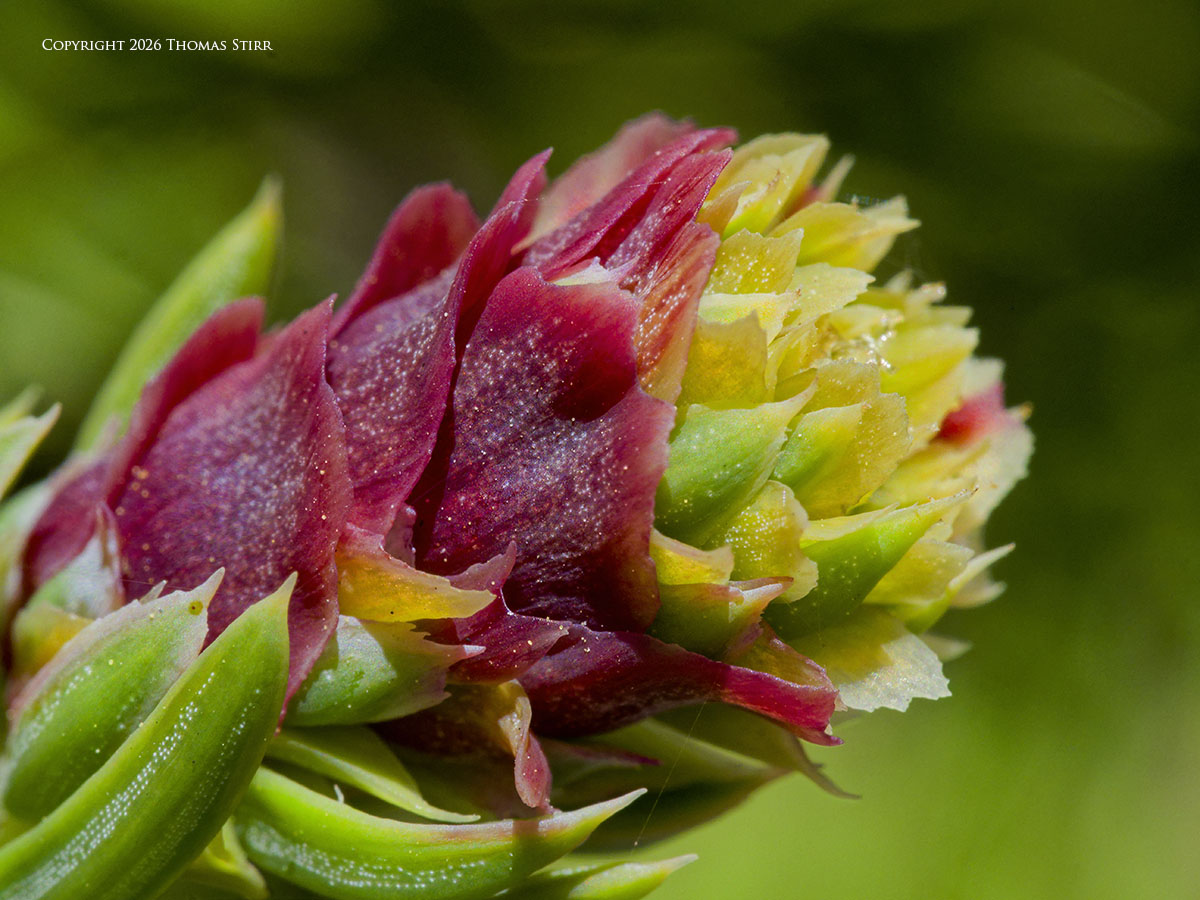
Step 2 is to move my camera in tighter and tighter until the blossom comes into focus based only on the distance to the subject. Once this has been achieved, I could then fully depress my shutter release to capture my image. Using the 1:1 short cut dial allowed me to quickly get my camera to 185 mm from the subject blossom… about 1 inch closer. You can see the difference in magnification that 25 mm makes to a macro image. The key point is that this is much easier to do when assisted by the 1:1 short cut dial.
As regular readers know, I’ve never professed to be a technical expert when it comes to specific cameras and lenses… I just have fun and experiment. Folks who would like a more thorough explanation on how to use the 1:1 short cut dial on the M.Zuiko 60 mm f/2.8 macro lens can view this YouTube video by Robin Wong. You may need to rewind the video to get to the start.
Technical Note
Photographs were captured handheld using camera gear as noted in the EXIF data. All images were created from out-of-camera jpegs or RAW files using my standard process in post. Handheld In-Camera Focus Stacking (HHFS) was used for most of the images in this article. A stack of either 10 or 12 images, with a focus differential of 4 or 5 were used for the HHFS images. This is the 1532 article published on this website since its original inception in 2015.
How you can keep this website advertising free
My intent is to keep this photography blog advertising free. If you enjoyed this article and/or my website and would like to support my work, you can purchase an eBook, or make a donation through PayPal (see Donate box below). Both are most appreciated.

You may be interested in macro and close-up photography with some emphasis on blossoms, bugs and butterflies. If that’s the case our 210 page eBook Blossoms, Bugs & Butterflies may be of interest. It is available for download for an investment of $14.99 CDN. The best view experience will be at 100% using Adobe Acrobat Reader.

You may enjoy bird photography, and if so our 188 page eBook Handheld Bird Photography may be of interest. It is available for download for an investment of $14.99 CDN. The best viewing experience of this eBook will be at 100% using Adobe Acrobat Reader.
Sometimes all we need as photographers is a bit of inspiration. We hope you can find some of that inside Finding Visual Expression II.

Finding Visual Expression II is available for download for an investment of $11.99 CDN. The best viewing experience of this eBook will be at 100% using Adobe Acrobat Reader.
You may be interested in all of the 30 concepts covered in both of these related eBooks. If so, you may want to also consider Finding Visual Expression.

Finding Visual Expression is available for download for an investment of $11.99 Cdn. The best viewing experience of this eBook will be at 100% using Adobe Acrobat Reader.
Our other eBooks include Images of Ireland, New Zealand Tip-to-Tip, Nikon 1: The Little Camera That Could, Desert & Mountain Memories, Images of Greece, Nova Scotia Photography Tour, and a business leadership parable… Balancing Eggs.
If you click on the Donate button below you will find that there are three donation options: $7.50, $10.00 and $20.00. All are in Canadian funds. Plus, you can choose a different amount if you want. You can also increase your donation amount to help offset our costs associated with accepting your donation through PayPal. An ongoing, monthly contribution to support our work can also be done through the PayPal Donate button below.
You can make your donation through your PayPal account, or by using a number of credit card options.
Word of mouth is the best form of endorsement. If you like our website please let your friends and associates know about our work. Linking to this site or to specific articles is allowed with proper acknowledgement. Reproducing articles, or any of the images contained in them, on another website or in any social media posting is a Copyright infringement.
Article and images are Copyright 2026 Thomas Stirr. All rights reserved. No use, duplication or adaptation of any kind is allowed without written consent. If you see this article reproduced anywhere else it is an unauthorized and illegal use. Posting comments on offending websites and calling out individuals who steal intellectual property is always appreciated!